1. Activate B2B Wholesale
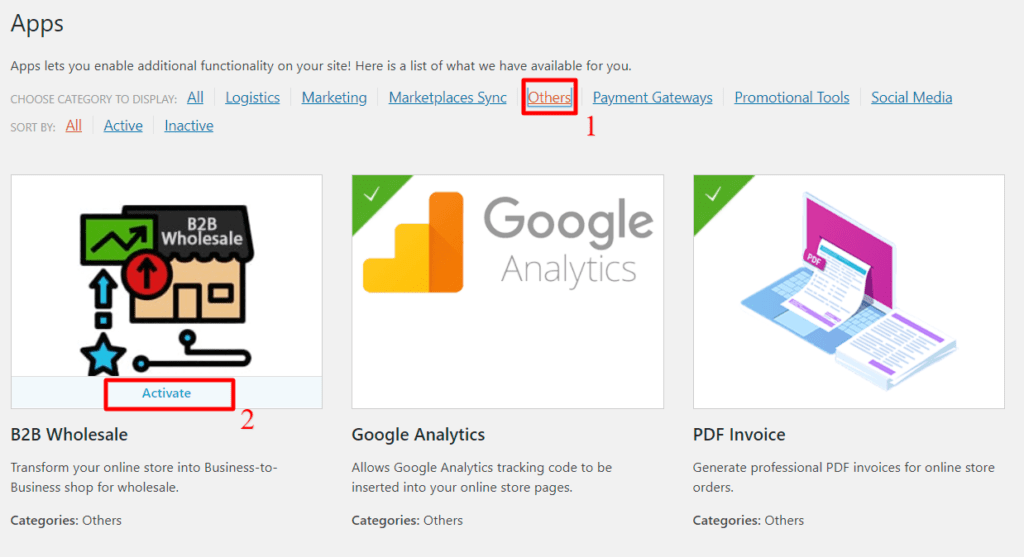
1.1. To activate your B2B Wholesale app, on your dashboard menu, go to Apps > Others > Activate B2B Wholesale.
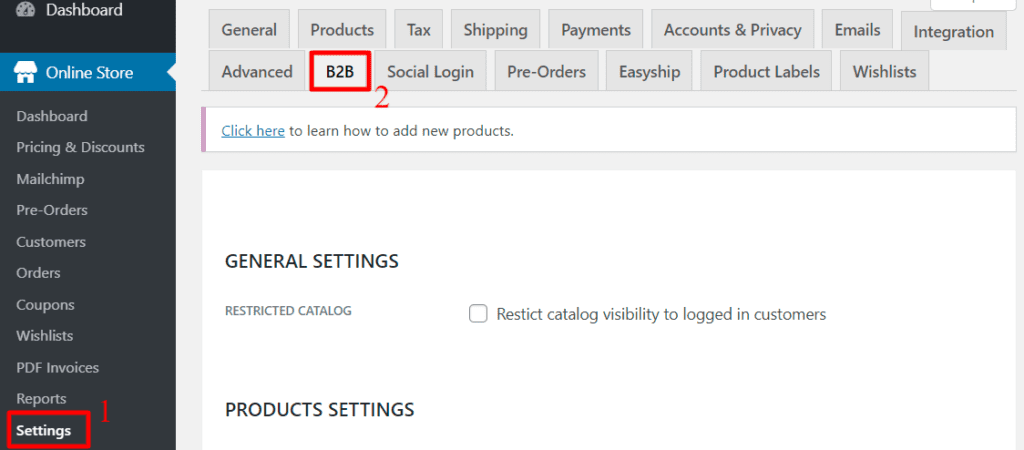
1.2. Once the B2B Wholesale App is activated, on dashboard go to Online Store > Settings > B2b.
2. B2B Wholesale General Settings
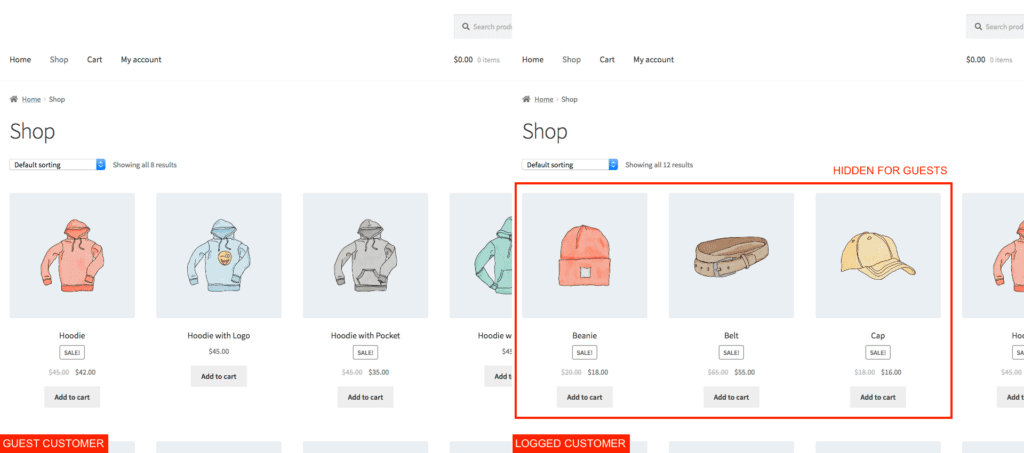
2.1. Restricted catalog
It limits the visibility of catalog only to customers who are logged in, redirecting guest users to the login page when they try to reach to your shop page.
It also takes care of removing online store pages for guest customers from menus, widgets, lists.
Here hidden pages list:
- Product pages
- Product category pages
- Product tag pages
- Shop
- Cart
- Checkout
- Pay page
- Thanks page
- Edit address page
- View order page
- Terms page
3. Product Settings
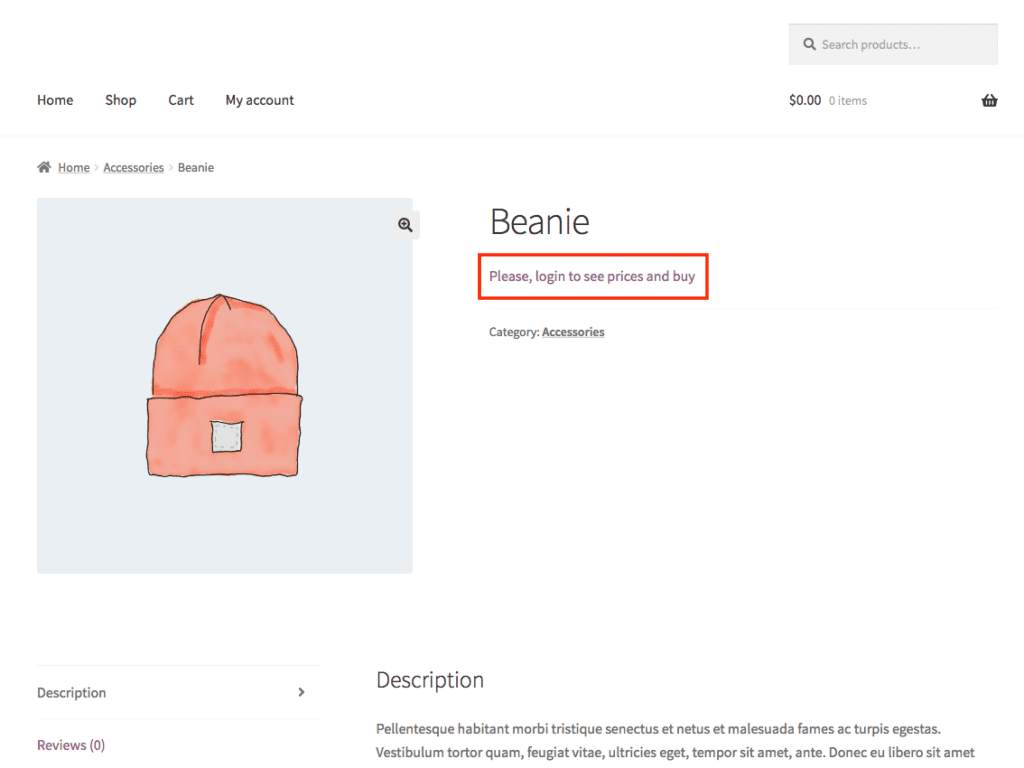
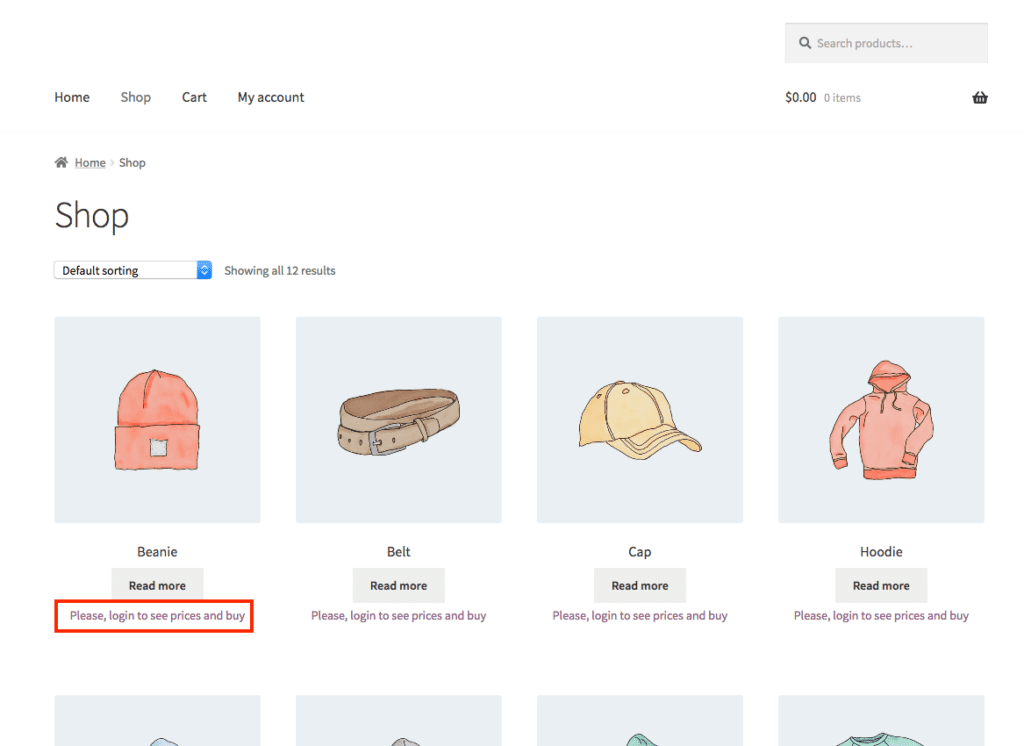
3.1. Hide Prices
Removes the possibility of viewing the prices of the products for non-logged in customers, replacing the price with the message “Please, login to see prices and buy” linked to the login page.
It also takes care of making the products not purchasable for customers who are not logged in, so no purchase can be made by guest customers.
3.2. Prices rules
Price rules allow you to offer your customers different prices depending on the group they belong to. For more flexibility, you can apply several options:
- Show prices assigned to single product: in each product, you can define a dedicated price (regular and sale) for each customer group. When a customer logs in, they will see the price dedicated to the group they belong to.
- Show default prices discounted by customer group percentage: you can define a discount percentage for each group that will be applied to all products. When a customer logs in, they will see the default shop price discounted by the percentage assigned to the group they belong to.
- Show prices assigned to single product discounted by customer group percentage: a combination of the previous options, the discount percentage will be applied no longer on the default price of shop, but on the dedicated price.
Note: if the dedicated price is not present for a product, the default shop price will be considered.
Examples
Here are some simulated scenarios, to understand how the price rules are applied in the different combinations.
- Groups:
- Partners, with 15% discount
- Suppliers, without percentage discount
- Resellers, with 10% discount
- Customers:
- Customer1, assigned to Partners group
- Customer2, assigned to Suppliers group
- Customer3, assigned to Resellers group
- Customer4, no group
- Products:
- Product1
- Default price $100
- Partners dedicated price 90
- Suppliers dedicated price 80
- Resellers dedicated price 70
- Product2
- Default price $200
- No Partners dedicated price
- Suppliers dedicated price 180
- Resellers dedicated price 170
- Product3
- Default price $300
- No Partners dedicated price
- No Suppliers dedicated price
- Resellers dedicated price 270
- Product1
| Option1 | Option2 | Option3 | ||
| Customer1 (Partners) | Product1 | $90 (Partners dedicated price – 10%) | $85 (Default price – 15%) | $75 (Partners dedicated price – 15%) |
| Product2 | 200 (no Partners dedicated price => default price) | 170 (Default price – 15%) | 170 (no Partners dedicated price => default price – 15%) | |
| Product3 | ||||
| Customer2 (Suppliers) | Product1 | |||
| Product2 | ||||
| Product3 | ||||
| Customer3 (Resellers) | Product1 | |||
| Product2 | ||||
| Product3 | ||||
| Customer4 (no group) | Product1 | |||
| Product2 | ||||
| Product3 |
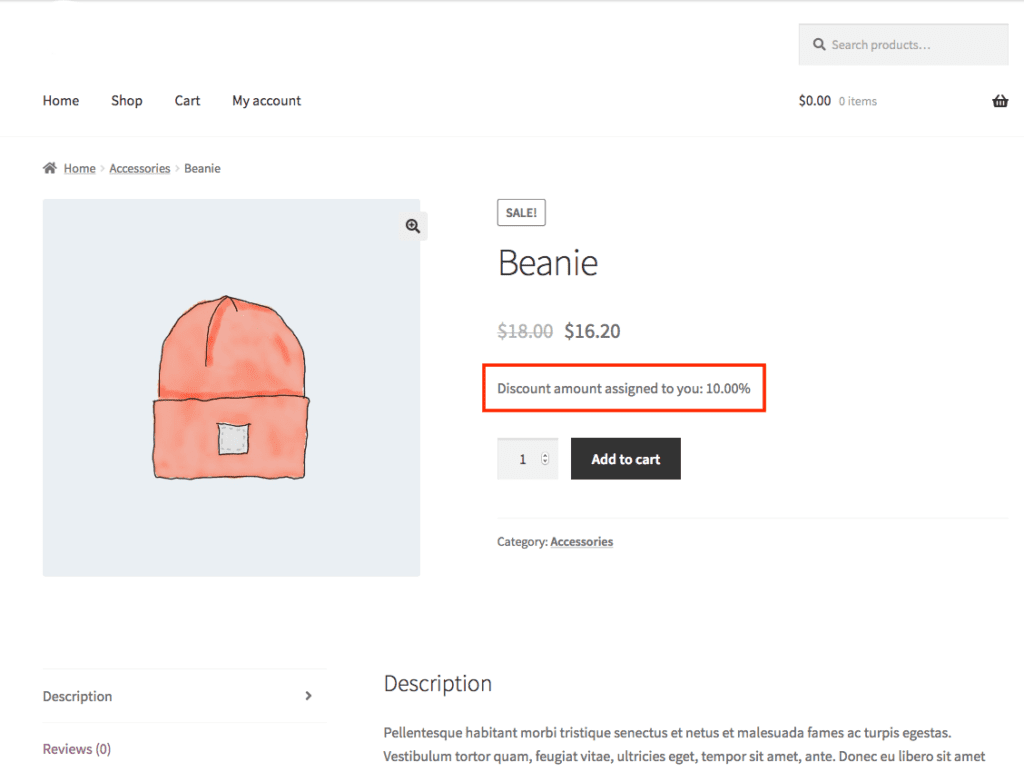
3.3. Show Discount
Allow customers to see their group assigned percentage discount. There are two different options, independent of each other:
- Customers can view discount amount assigned to them in their own account area: display group percentage discount in customer my-account area
- Customers can view discount amount assigned to them in single product page: display group percentage discount in each product page
Note: it requires “Price rules” option in B2B settings page is set on “Show default prices discounted by customer group percentage” or “Show prices assigned to single product discounted by customer group percentage”.

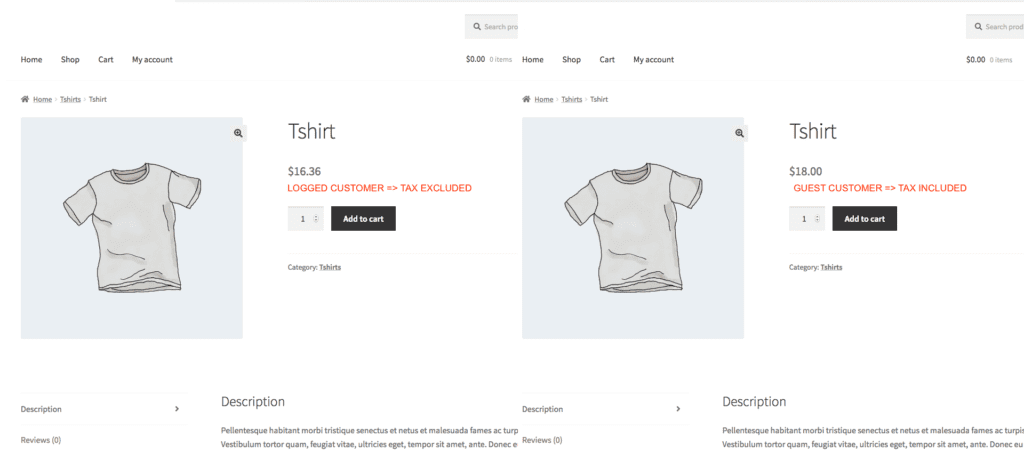
3.4. Product prices with and without taxes
Displays the prices including taxes for B2C customers (Guest) and taxes excluded for B2B customers (assigned to other groups).
- Customers can view discount amount assigned to them in their own account area: display group percentage discount in customer my-account area
- Customers can view discount amount assigned to them in single product page: display group percentage discount in each product page
Note: it requires “Enable taxes” option in Online Store settings page (general tab) is enable. It requires “Tax rates” option in Online Store settings page (Tax tab) is setup. When enabled, override options “Display prices in the shop” and “Display prices during cart and checkout” behaviour in “Tax” tab under Online Store settings.
3.5. Product Categories Visibility
Enable product categories management. You can decide to view the product categories according to the customer group. If a category is hidden, the products belonging to the category will also be hidden.
Hidden product categories and their products are also removed from menus, widgets and lists.
3.6. Redirect on Page
When customers reach not visible product category or product, they will be redirected on 404 pages or on a WordPress page of your choice.
4. Cart & Checkout Settings
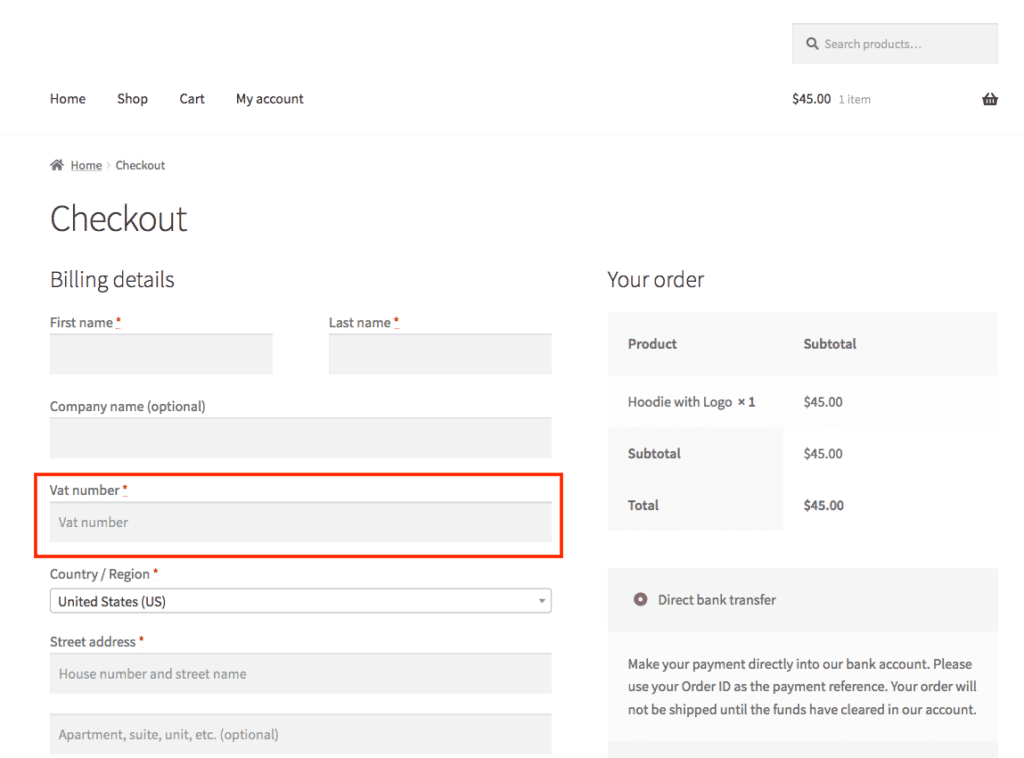
4.1. VAT Number
Multiple options to enable VAT management:
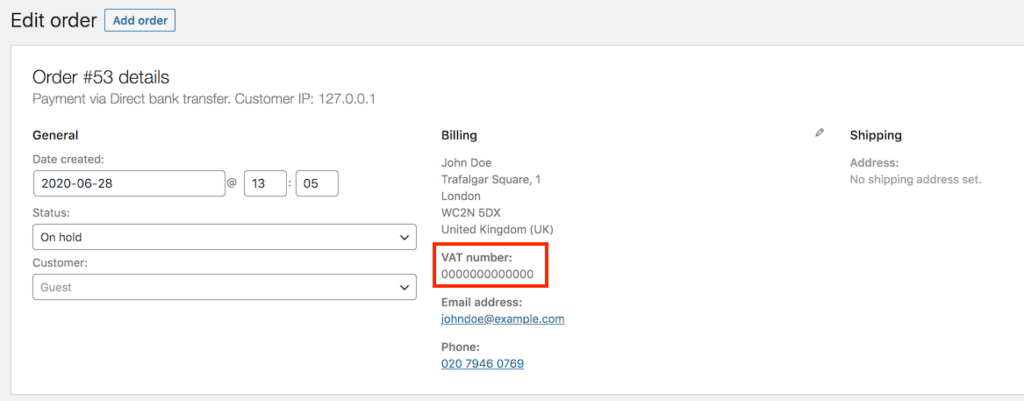
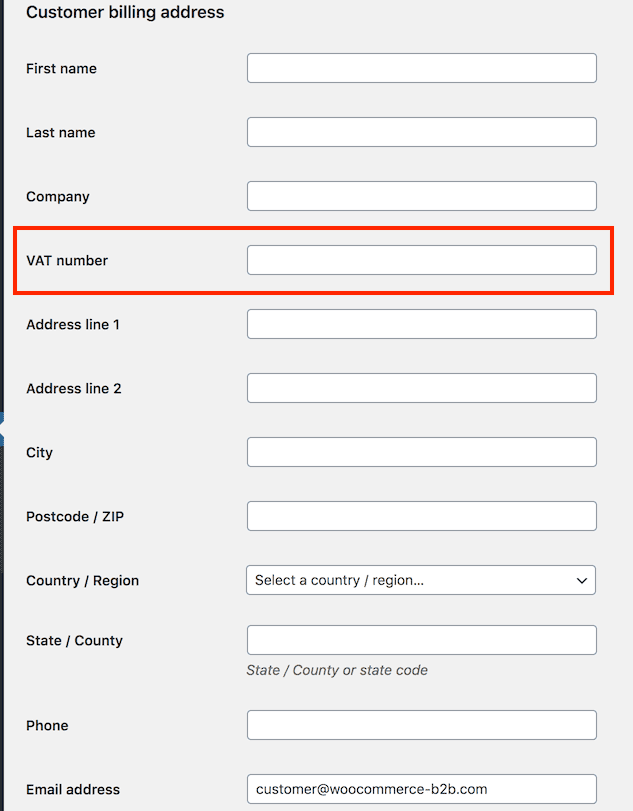
- Add VAT number field to billing address: VAT number field is added to billing address (in checkout form and in customer profile page), order emails, order details and registration form (if “REGISTRATION FORM” option enabled), both in the frontend and in the backend.
- Make VAT number field required: decide if the VAT number field must be mandatory or optional.
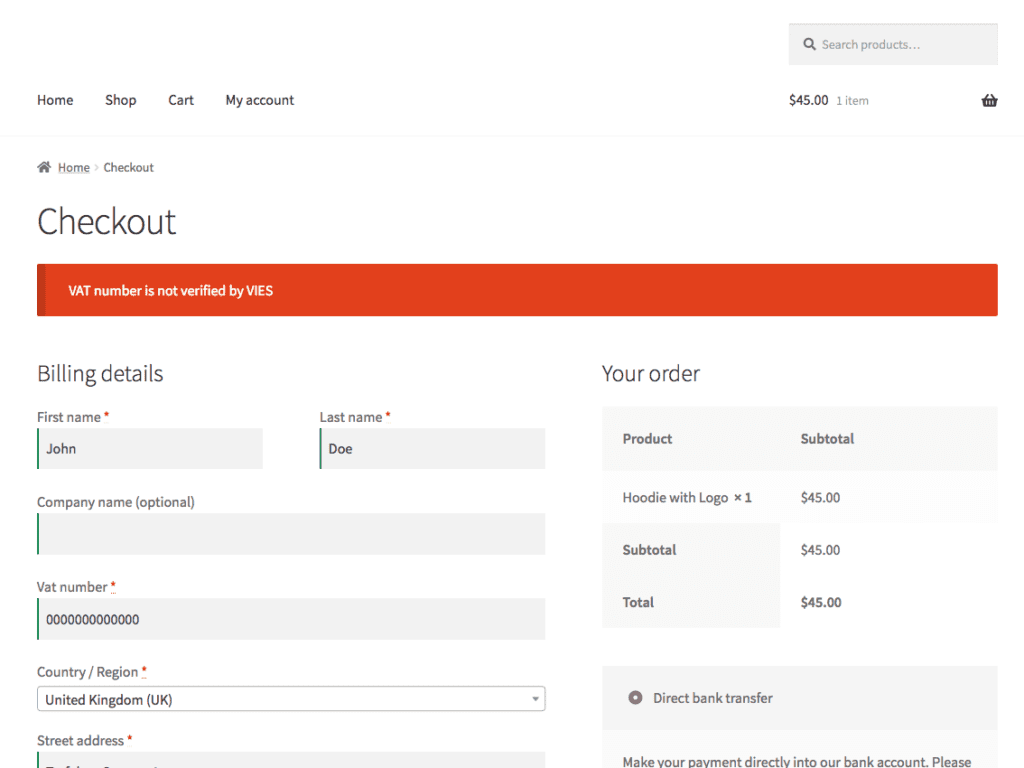
- Enable VAT number VIES validation for EU customers: enable VAT number VIES validation for EU customers. VIES validation works with third part WebService.
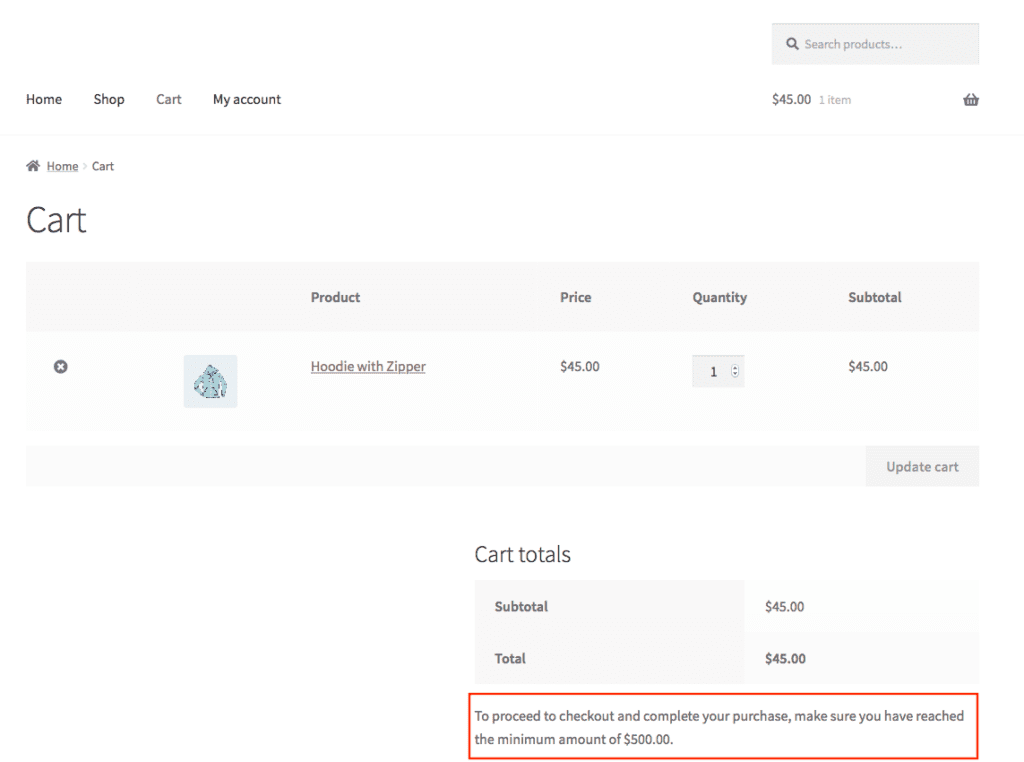
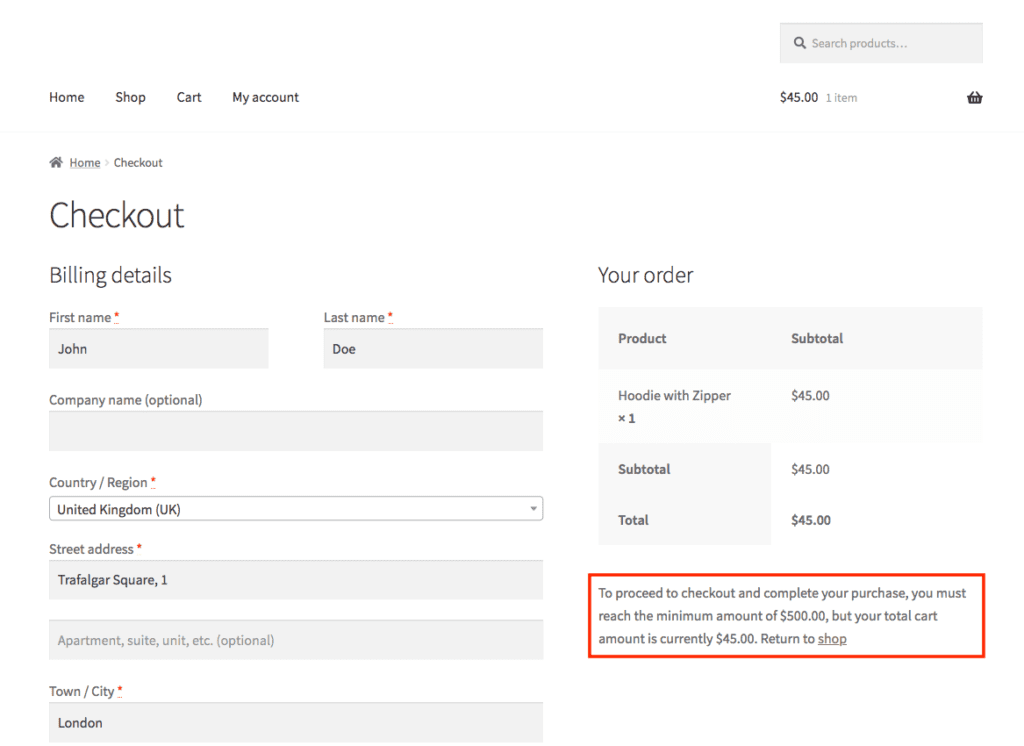
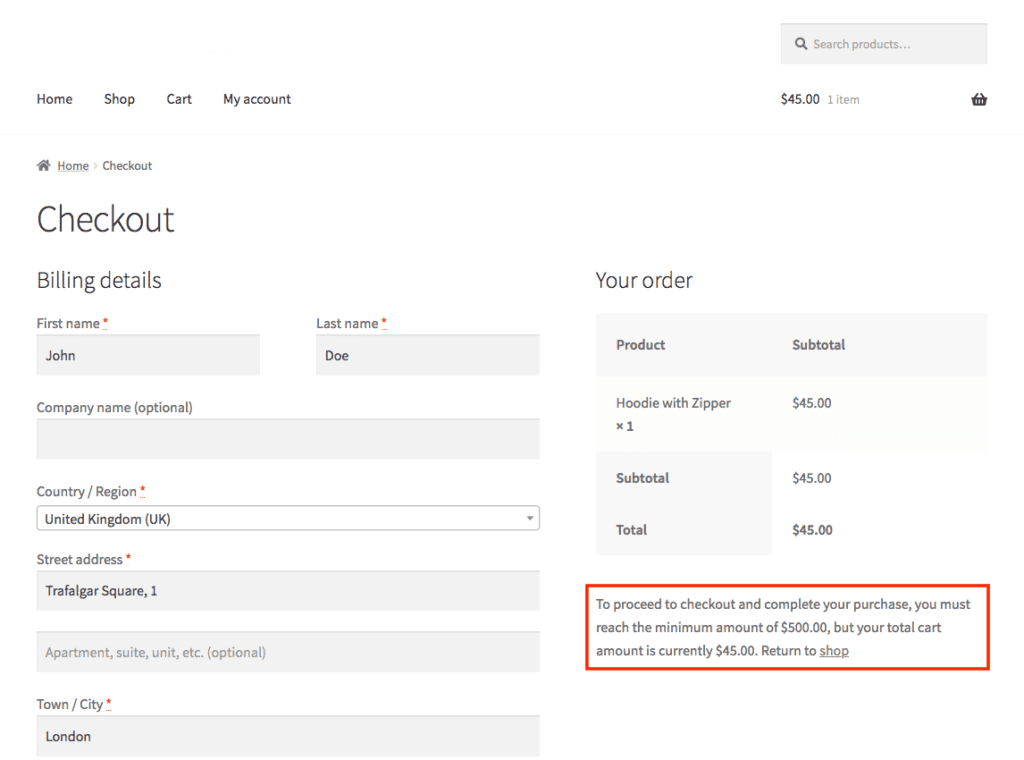
4.2. Min Purchase Amount
Allow to set a minimum purchase amount by group. If the minimum amount is not reached, a warning message is displayed in checkout page.
There are two different options, independent of each other:
- Enable minimum purchase amount by group: enable minimum purchase amount by group management
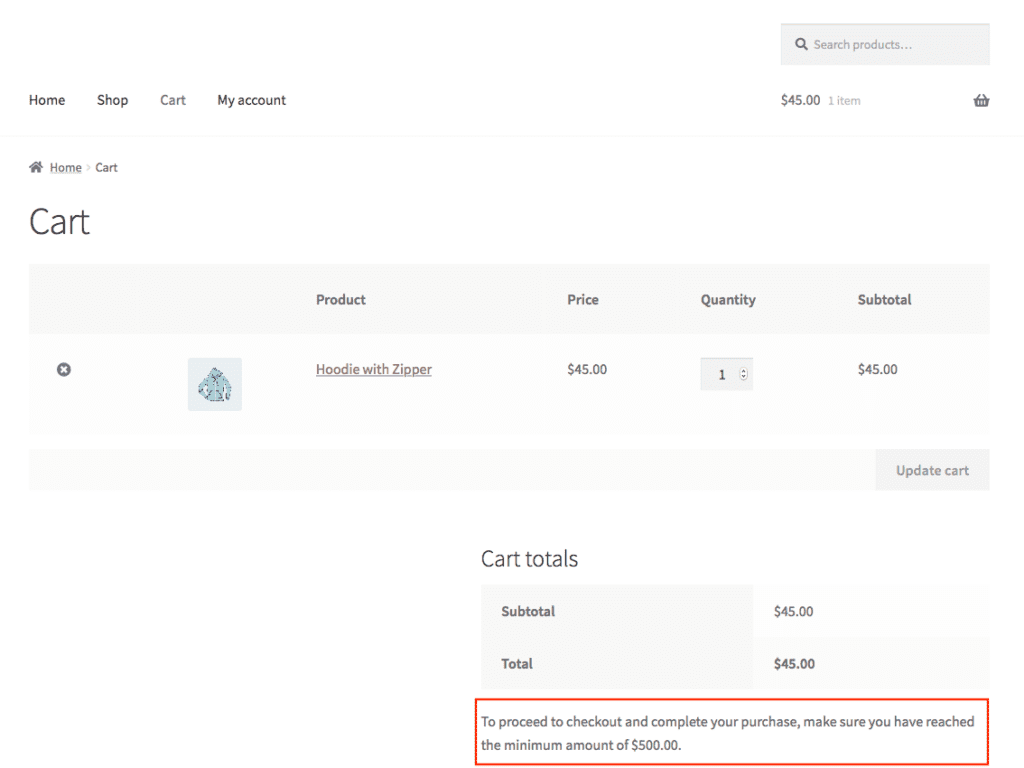
- Display a message in the shopping cart page to alert that minimum amount isn’t reached yet: if the minimum amount is not reached, a warning message is displayed in the cart.
- Remove “Proceed to checkout” button in shopping cart if customer doesn’t reach the minimum amount: if the minimum amount is not reached, customer cannot proceed to checkout page.
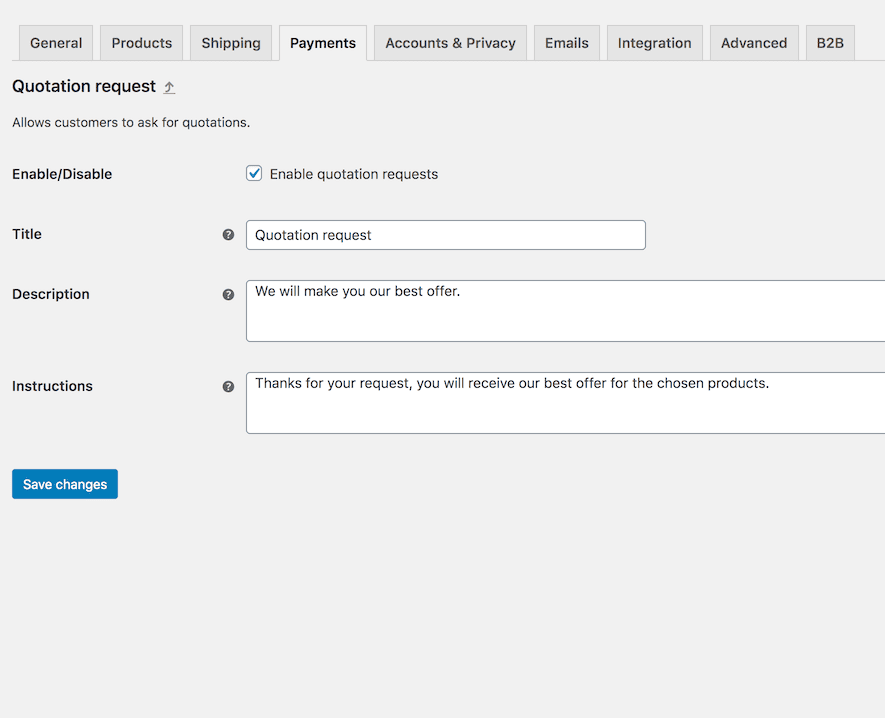
4.3. Enable Quotations
When enabled, “Quotation request” appears as new payment method.
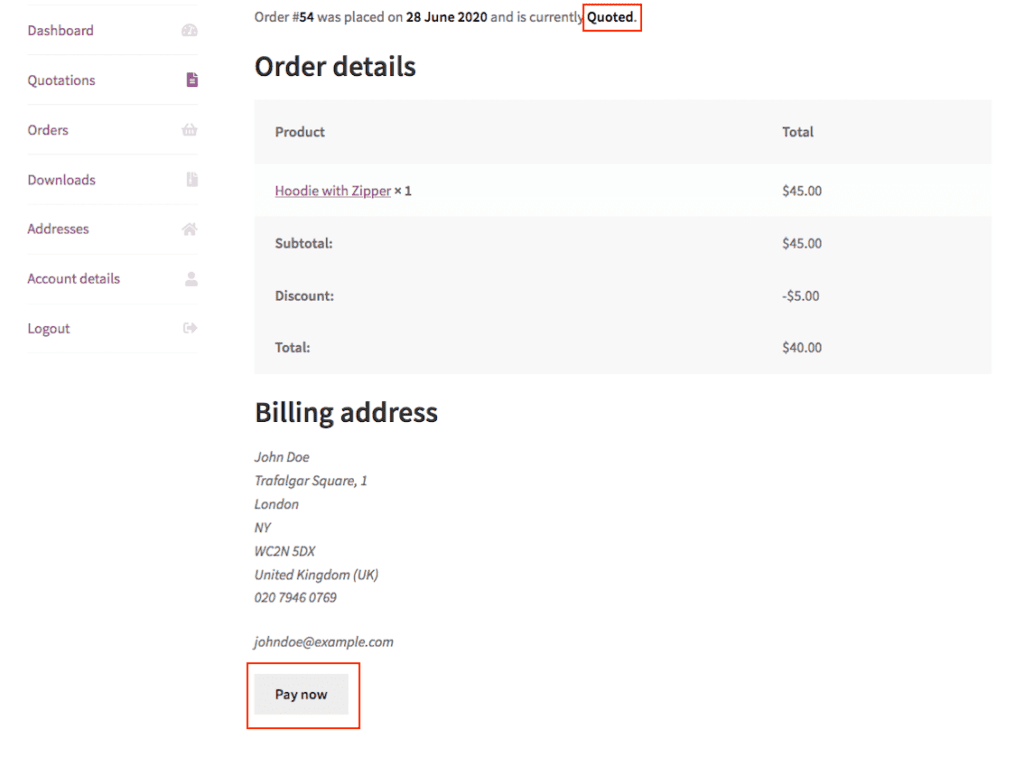
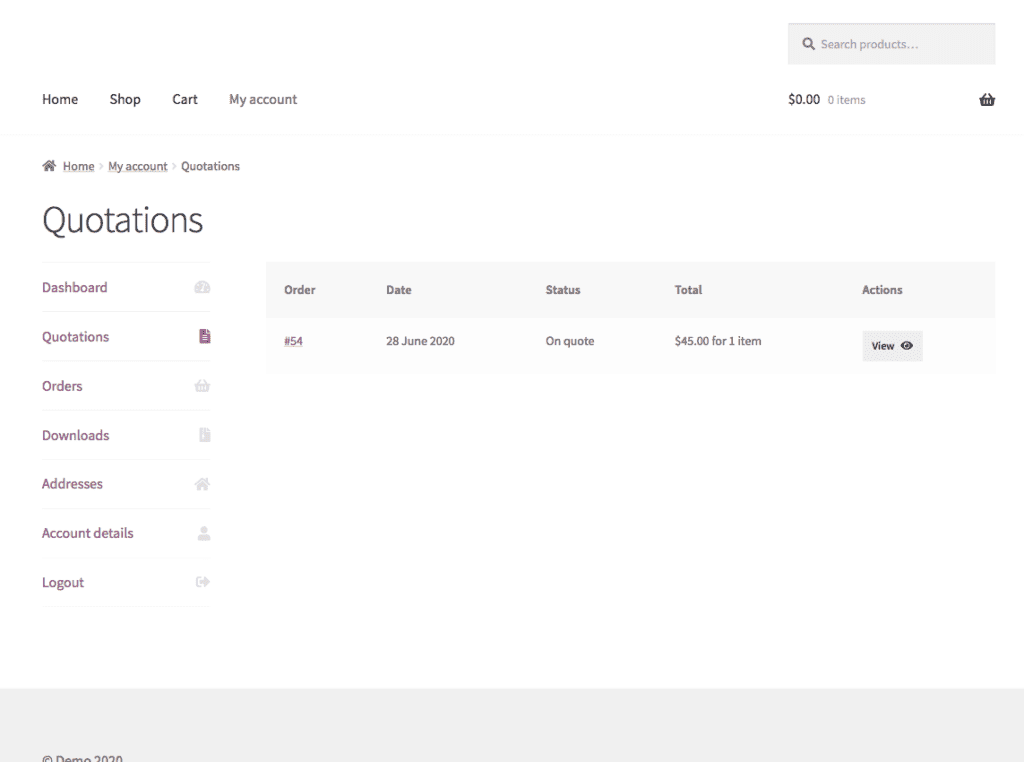
In the customer’s my-account area, a special “Quotations” section is displayed, listing all of his requests for quotation.
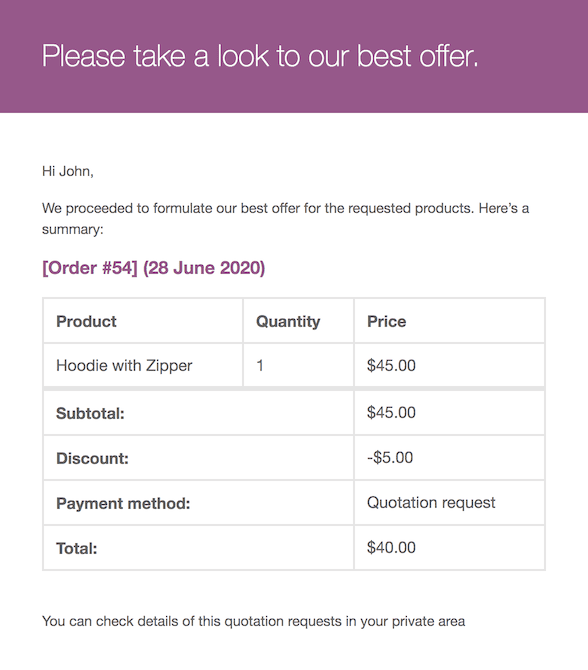
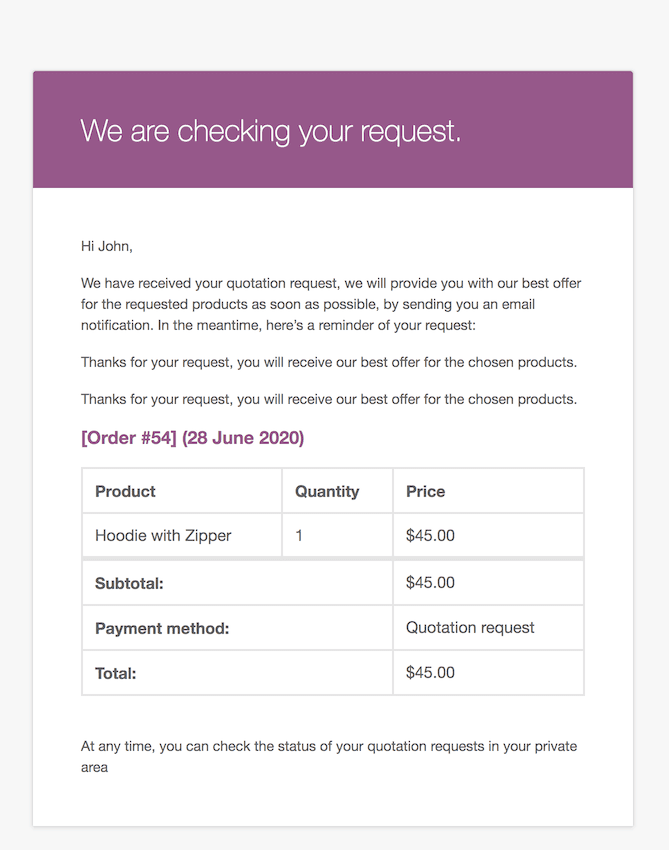
If the customer chooses “Quotation request”, he receives an email summarizing his request and the order is saved with the status “On quote”.
The admin of the site can manage the request, modifying the quotation just like any other order and finally conclude by putting the status “Quoted”. In this way, the customer receives an email notification that the quote is ready and can decide to make the payment by clicking the “Pay” button directly from his my-account area. In this way, the quotation becomes an order and can be managed as such.
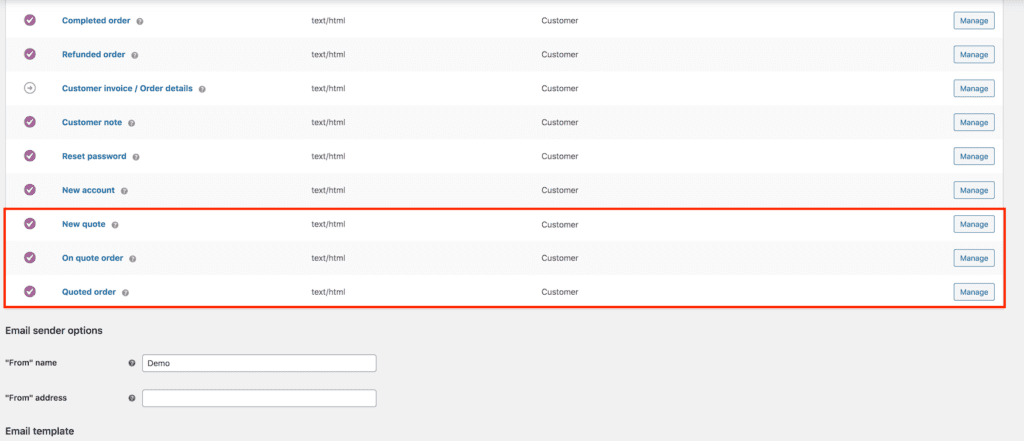
Note: on new quotation request, products stock is not reduced. Stock reduction is done on “Quoted” status. Note: quotations email can be customized in online store settings page (Emails tab).Note: quotations payment method text can be customized in online store settings page (Payments tab).

4.4. Quotation Endpoint
Allow to change my-account page quotations list endpoint slug.
5. Customers Settings
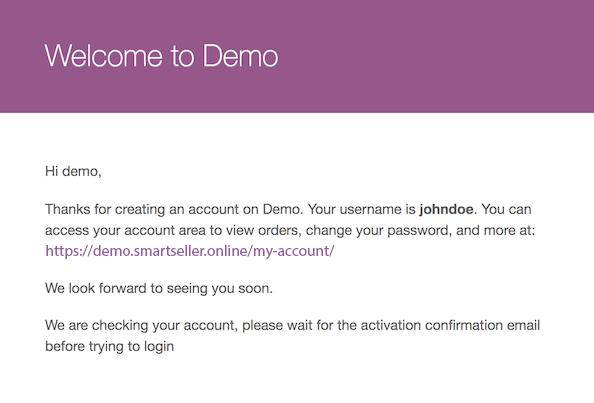
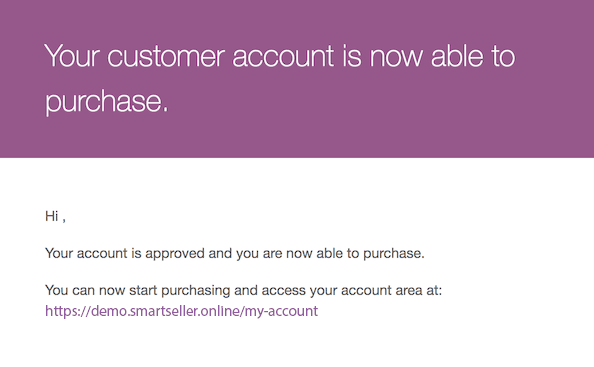
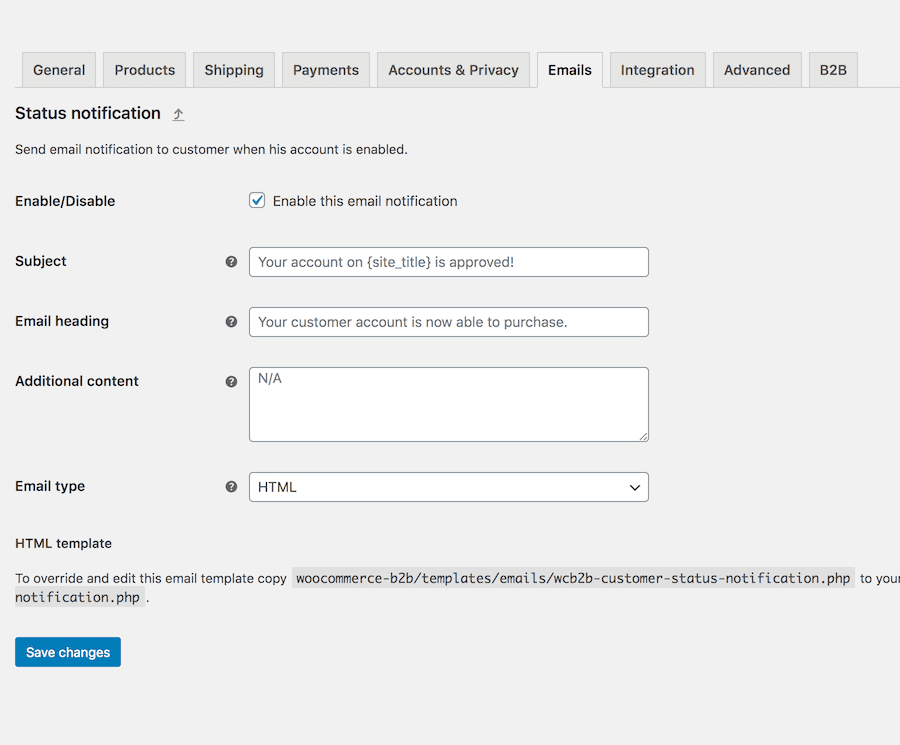
5.1. Moderate Registration
When enabled, customers can login only after admin approvation. On approvation, customer receive an email notification which warns that your account is active.
Note: active account email can be customized in online store settings page (Emails tab).

5.2. Registration Form
Extend online store default registration form with online store default billing fields.
Note: it requires “Allow customers to create an account on the ‘My account’ page” option in online store settings page (Accounts & Privacy tab) is enabled.

5.3. Registration Notice
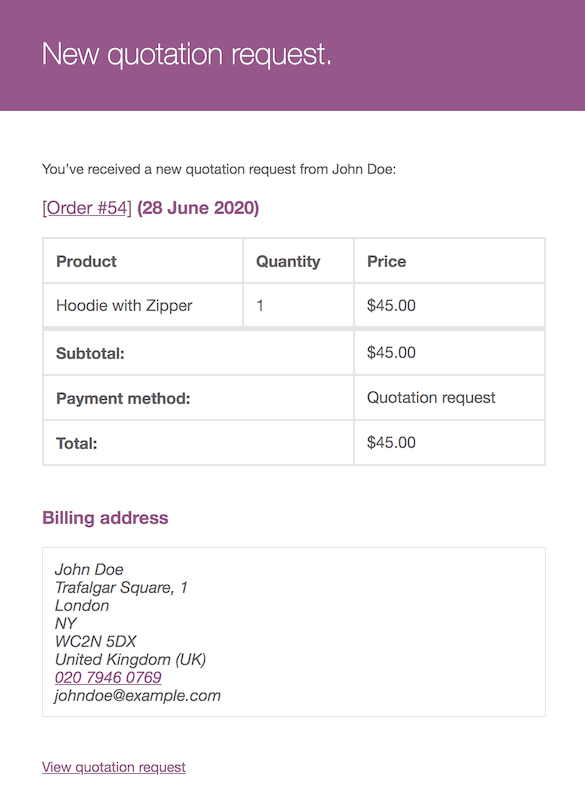
Send email to admin on every new customer account registration. Very useful if moderate registration option is enabled.
5.4. Default Group
Automatically assign customer to a default group on registration.
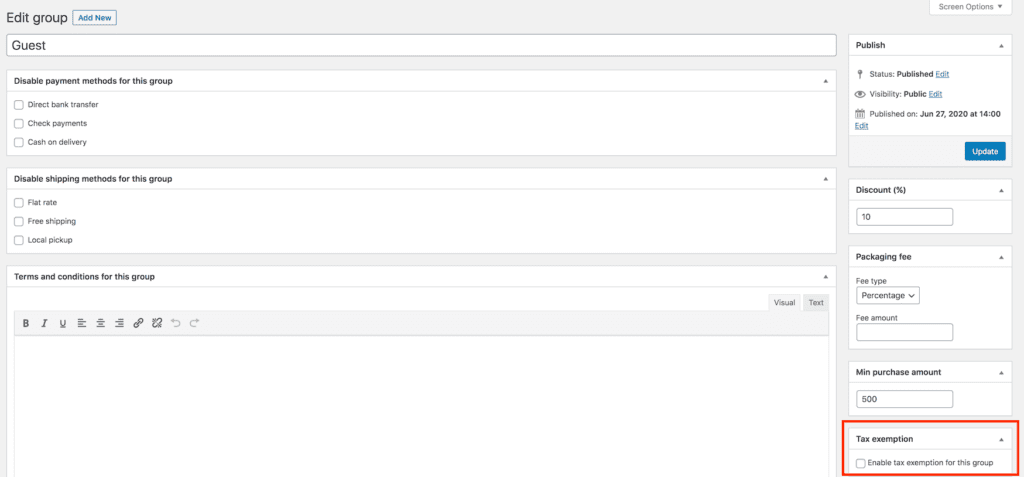
6. Group Page Settings
6.1. Disable Payment Methods for Group
Select all payment methods you want to disable for customers assigned to group.
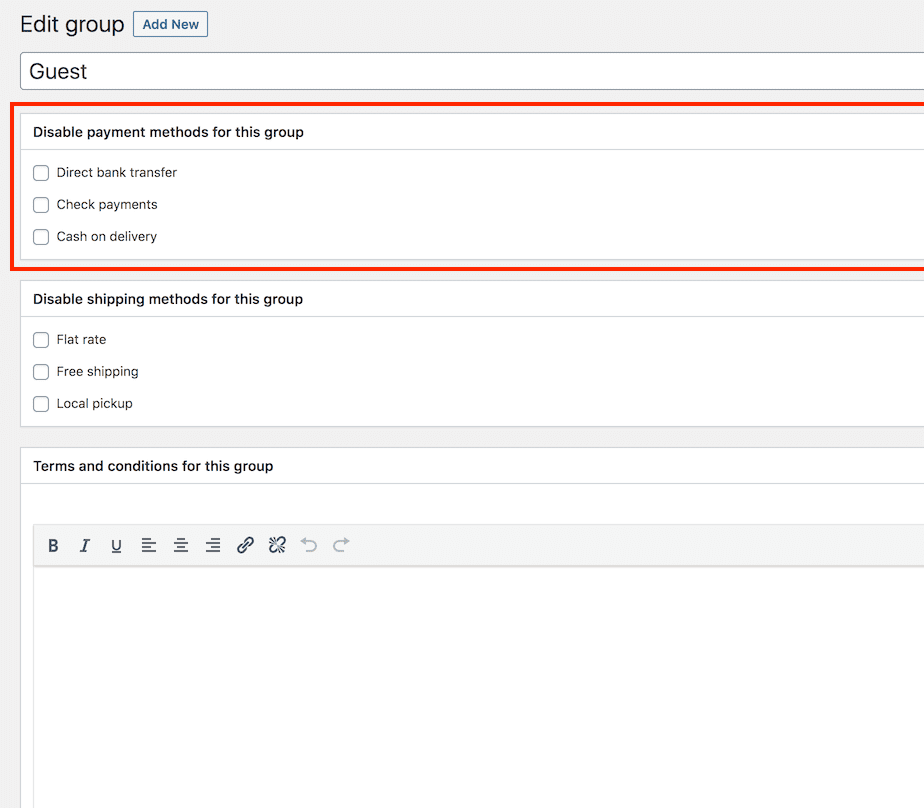
6.2. Disable Shipping Methods for Group
Select all shipping methods you want to disable for customers assigned to group.

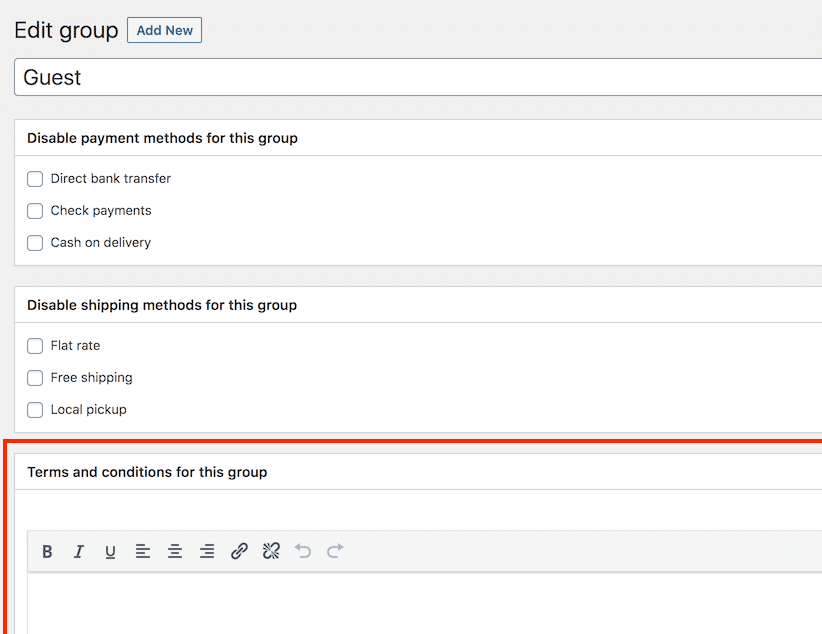
6.3. Terms and Conditions for Group
Enter a dedicated Terms&Condition disclaimer to display to customers assigned to group.
6.4. Percentage Discount
As described in “Price rules” option, each group can have a global percentage discount to apply to all product. You can enter desired percentage discount.
Note: it requires “Price rules” option in online store B2B settings page is set on “Show default prices discounted by customer group percentage” or “Show prices assigned to single product discounted by customer group percentage”.
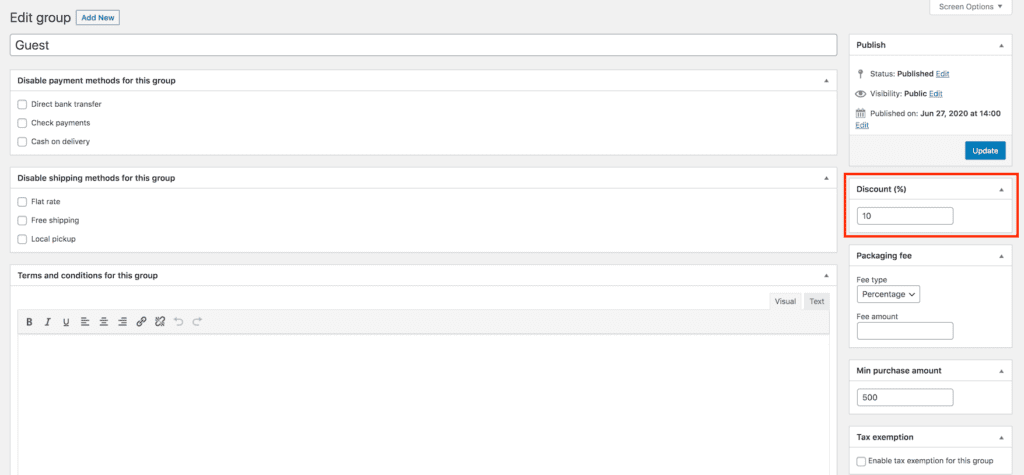
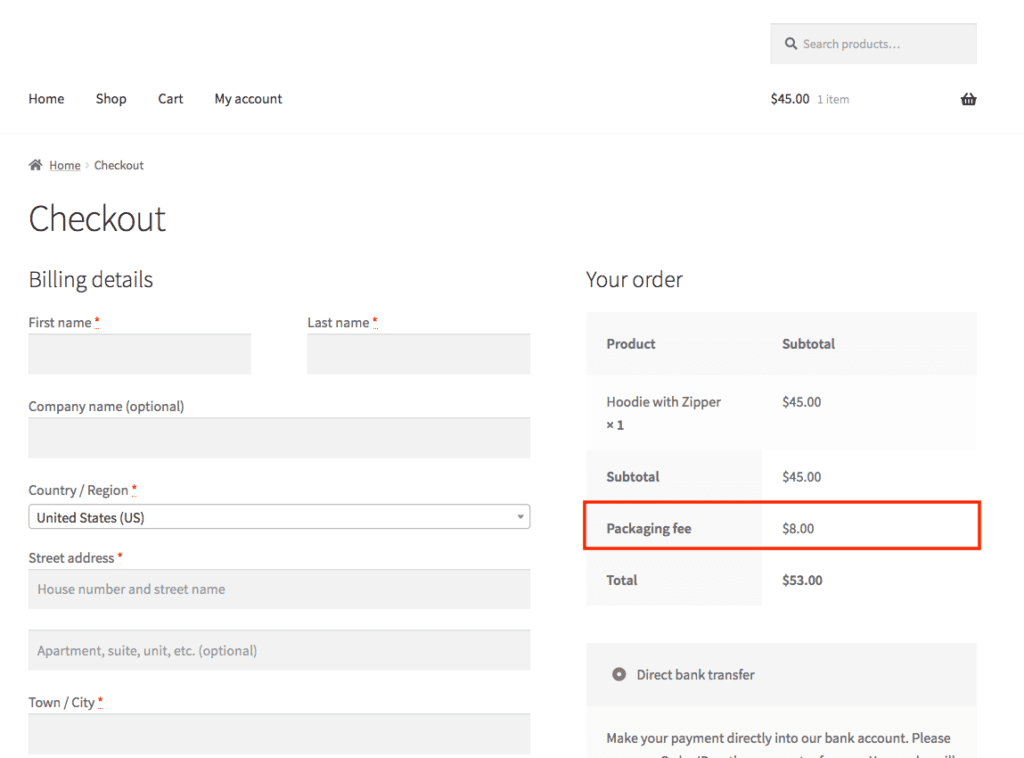
6.5. Packing Fee
Packaging fee is added to customer cart, as additional fee to process order.
It can be set as fixed amount or percentage on cart amount.

6.6. Min Purchase Amount
The minimum amount of the cart to be able to complete the order. If the customer does not reach the minimum cart amount, he cannot complete his purchase.
Note: it requires “Min purchase amount” option in online store B2B settings page is enabled.
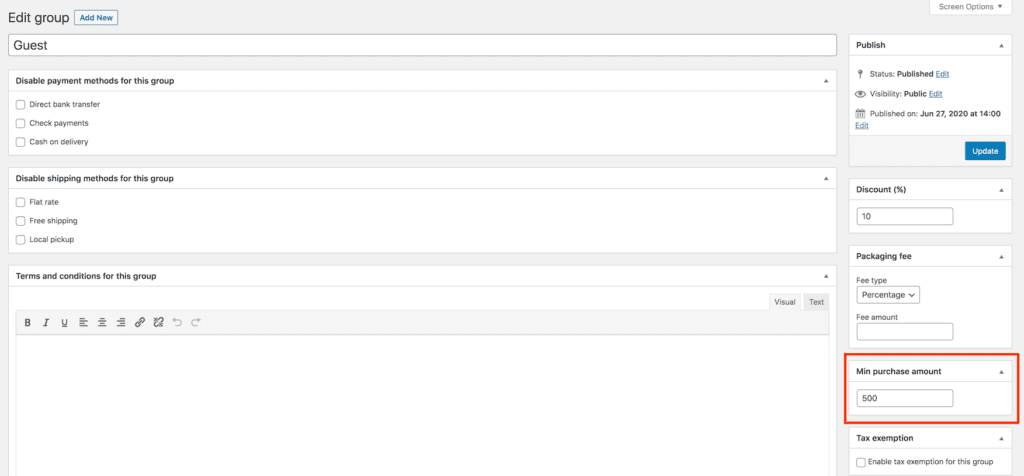
6.7. Tax Exemption
Allow customers assigned to group to purchase without taxes (zero tax class).
Note: it requires “Enable taxes” option in online store settings page (general tab) is enable. It requires “Tax rates” option in online store settings page (Tax tab) is setup.
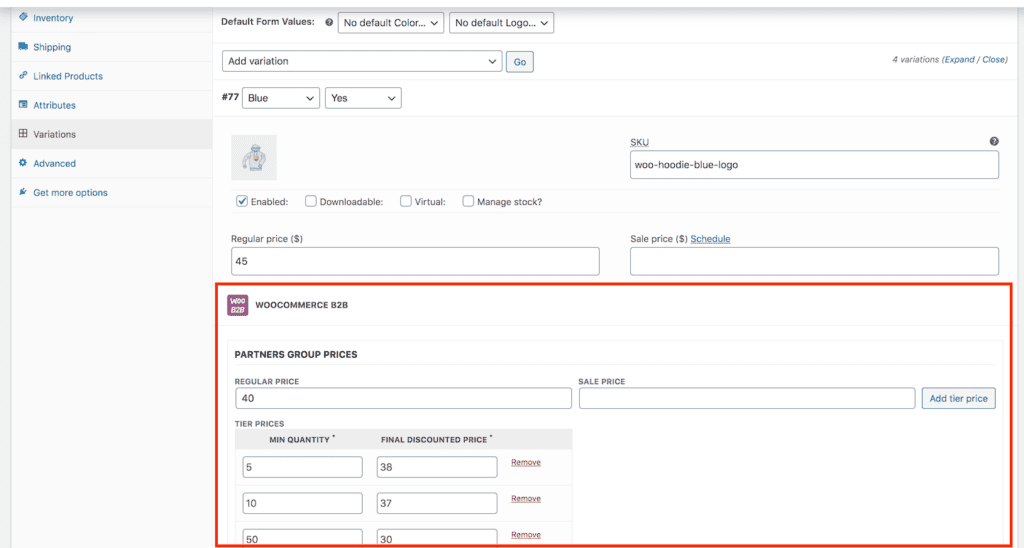
7. Product Page Settings
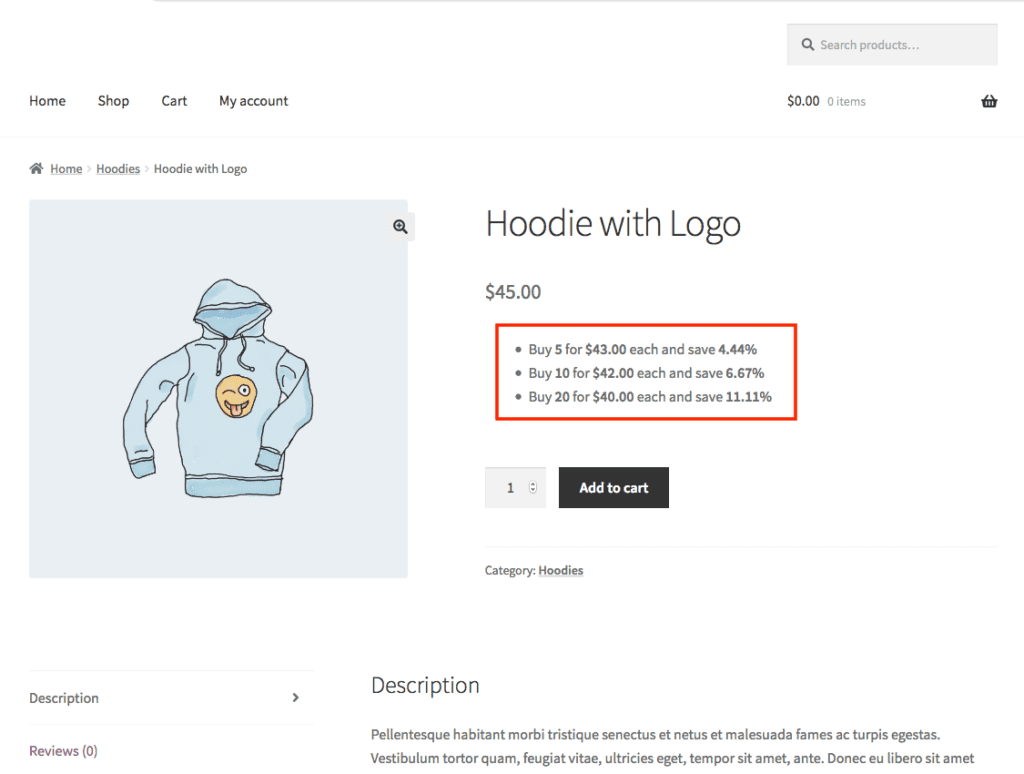
7.1. Product Dedicated and Tier Prices
Set for each product custom price lists according to customer group.
For each group created, there is an additional section: {GROUP_NAME} GROUP PRICES
In this section, it’s possible to enter:
- Regular price: dedicated regular price for group
- Sale price: dedicated sale price for group
In addition, in this section it is possible to enter the discounted prices for each group (tier group prices): by clicking on the “Add tier price” button, a new row is inserted, in which it is sufficient to enter:
- Min quantity minimum quantity to which the discounted price applies
- Final discounted price the discounted price applied for the max quantity
Examples
Here are some simulated scenarios, to understand how the tier group prices are applied in the different combinations.
- Product configuration
- Min quantity: 5 – Final discounted price: 100
- Min quantity: 10 – Final discounted price: 90
- Min quantity: 15 – Final discounted price: 80
- Min quantity: 20 – Final discounted price: 70
- If customer add to cart quantity 5, he pay 100 for each
- If customer add to cart quantity 6, he pay 10 for each
- If customer add to cart quantity 12, he pay 90 for each
- If customer add to cart quantity 20, he pay 70 for each
- If customer add to cart quantity 99, he pay 70 for each

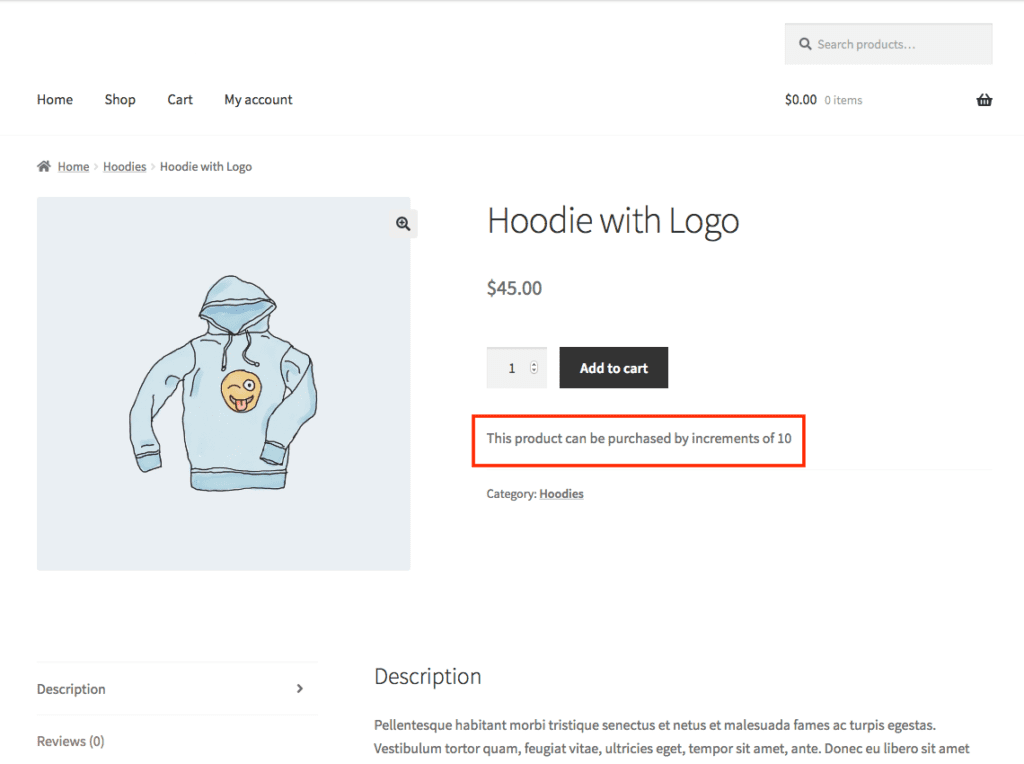
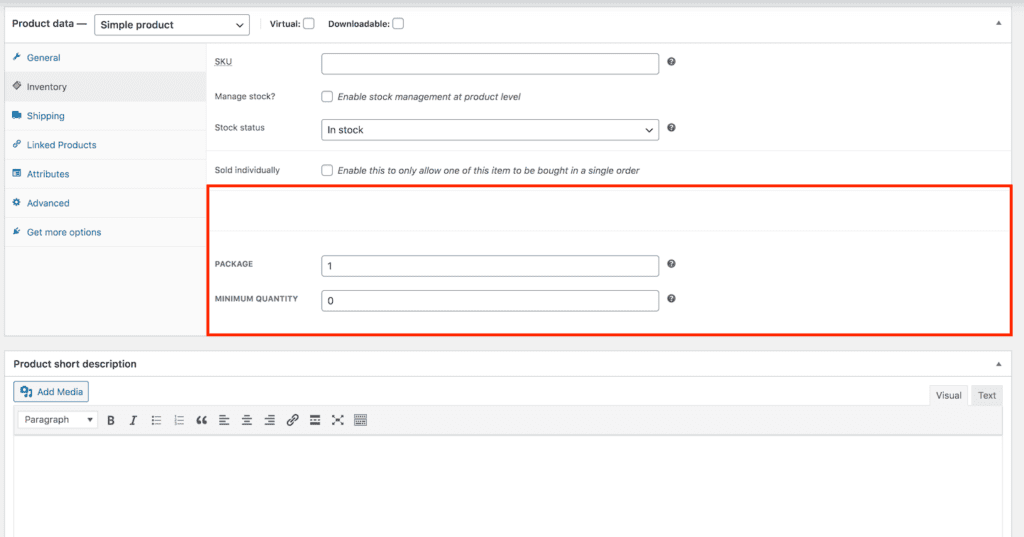
7.2. Packing Quantity
Force customers to purchase product by pack increment. Insert how much products are in every pack.
This setting is applied on each product quantity selector in shop (product pages, category pages, cart)
In product page, a message appears to inform you that the product can only be purchased in predefined stocks.

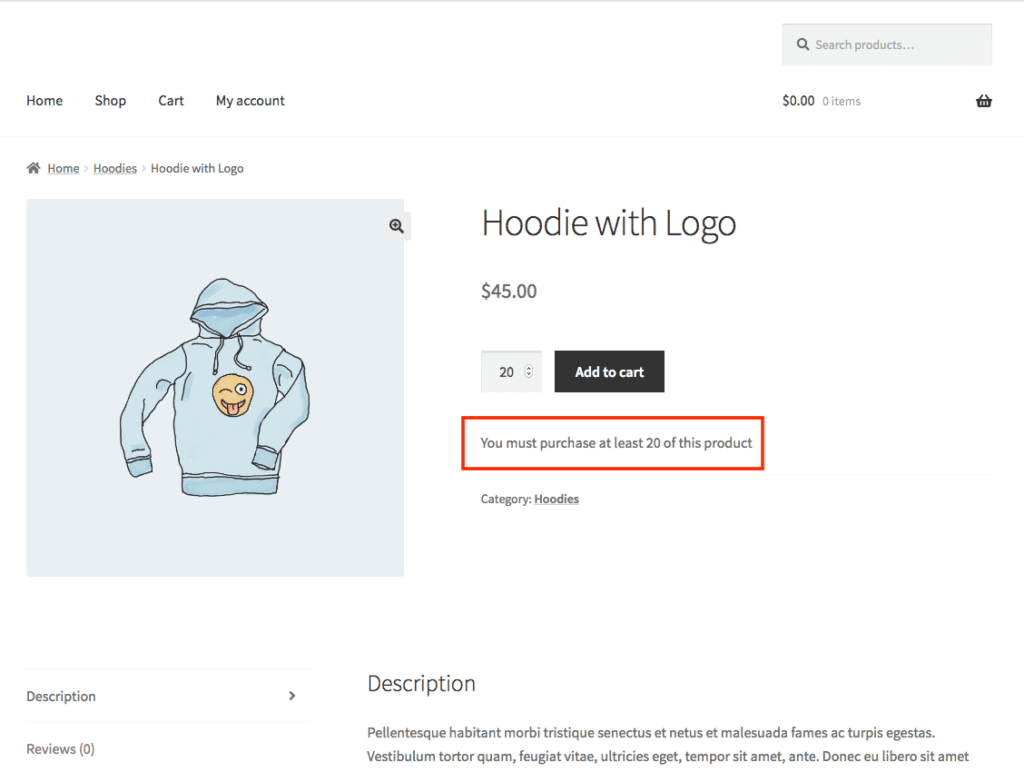
7.3. Minimum Quantity
Force customers to purchase minimum quantity of a product.
This setting is applied on each product quantity selector in shop (product pages, category pages, cart)
In product page, a message appears to inform you that the product can only be purchased in minimum quantity.
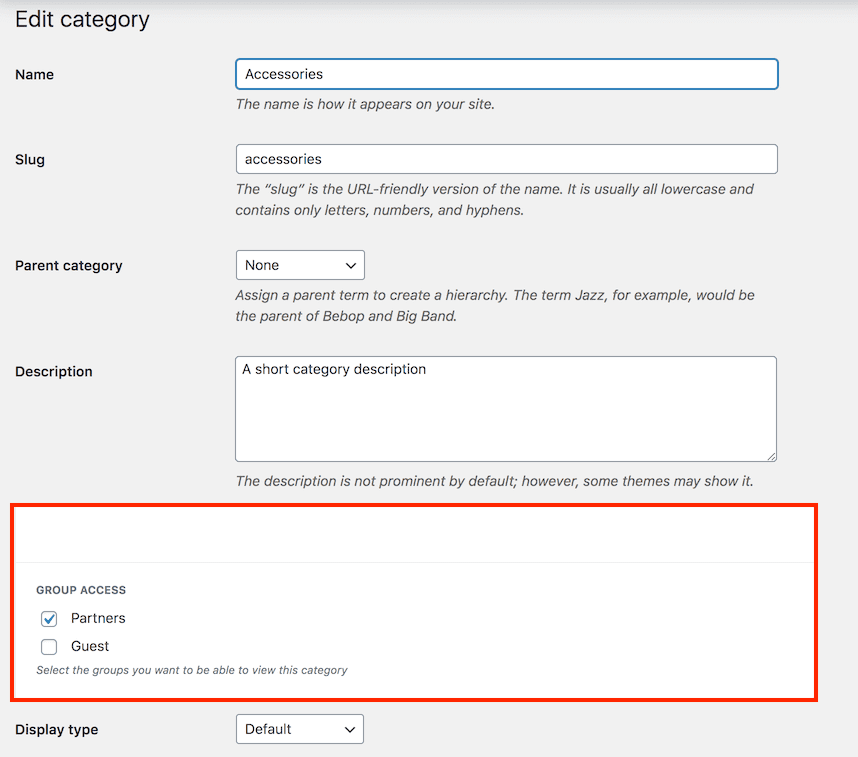
8. Product Category Page Settings
8.1. Group Access
Manage product category visibility by group.
9. Customer Page Settings
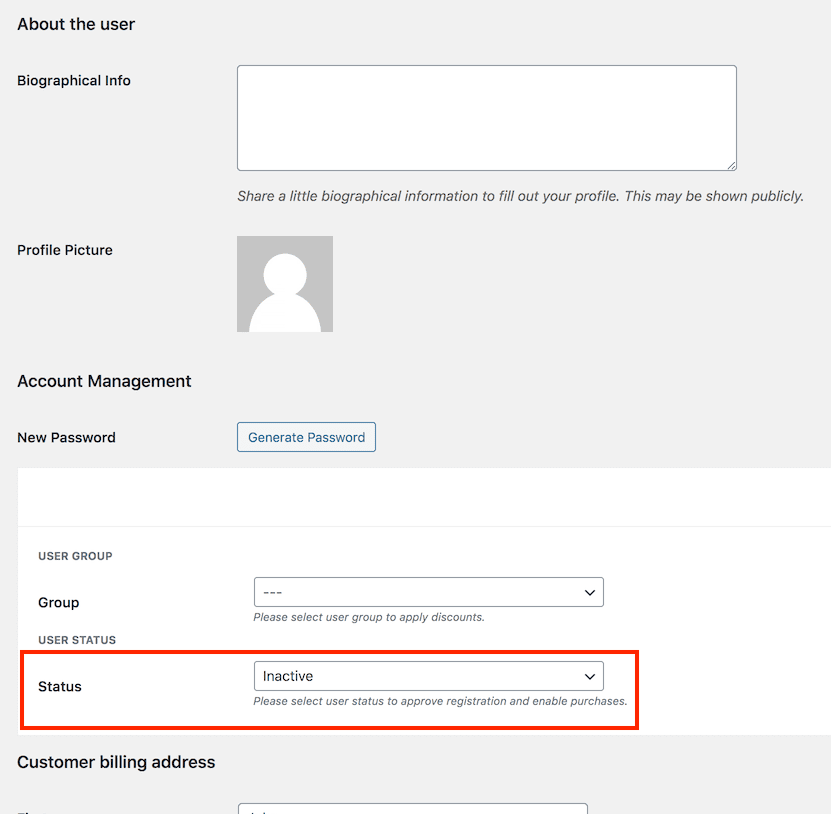
9.1 User Group
Assign a group to customer.

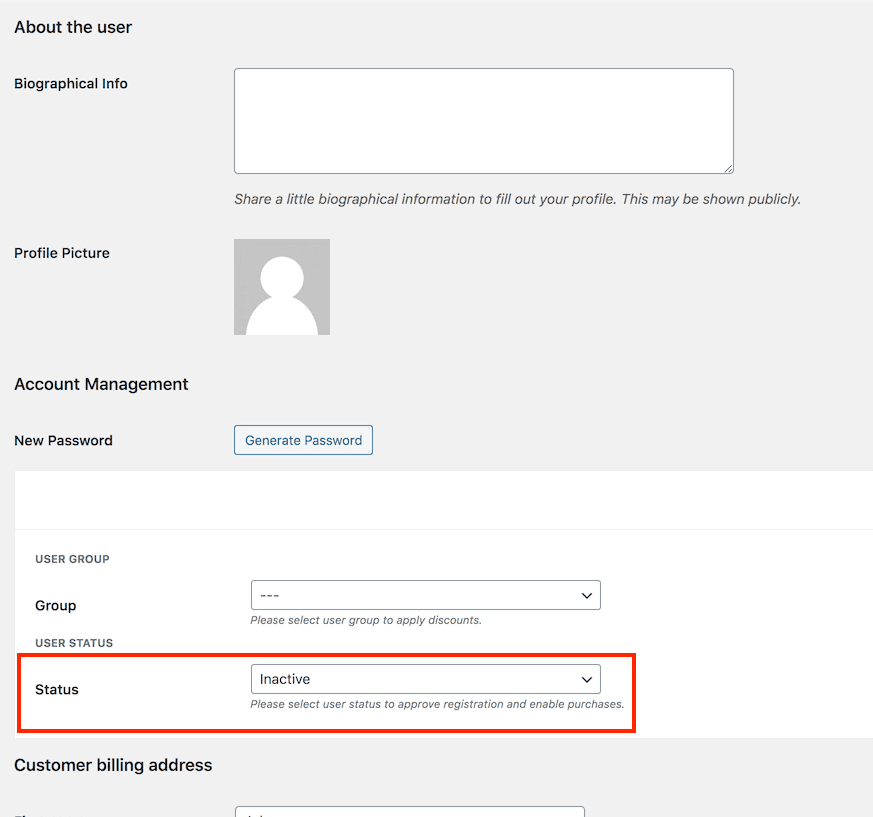
9.2. User Status
Enable/Disable user profile. If status is “Inactive”, customer cannot login and purchase.