1. Product Image
The Product Image, or more precisely the featured image, serves as the main image for your product. Each product has a featured image. You should include a clear featured image and ensure that there is no text on the image.
Adding a Product Image
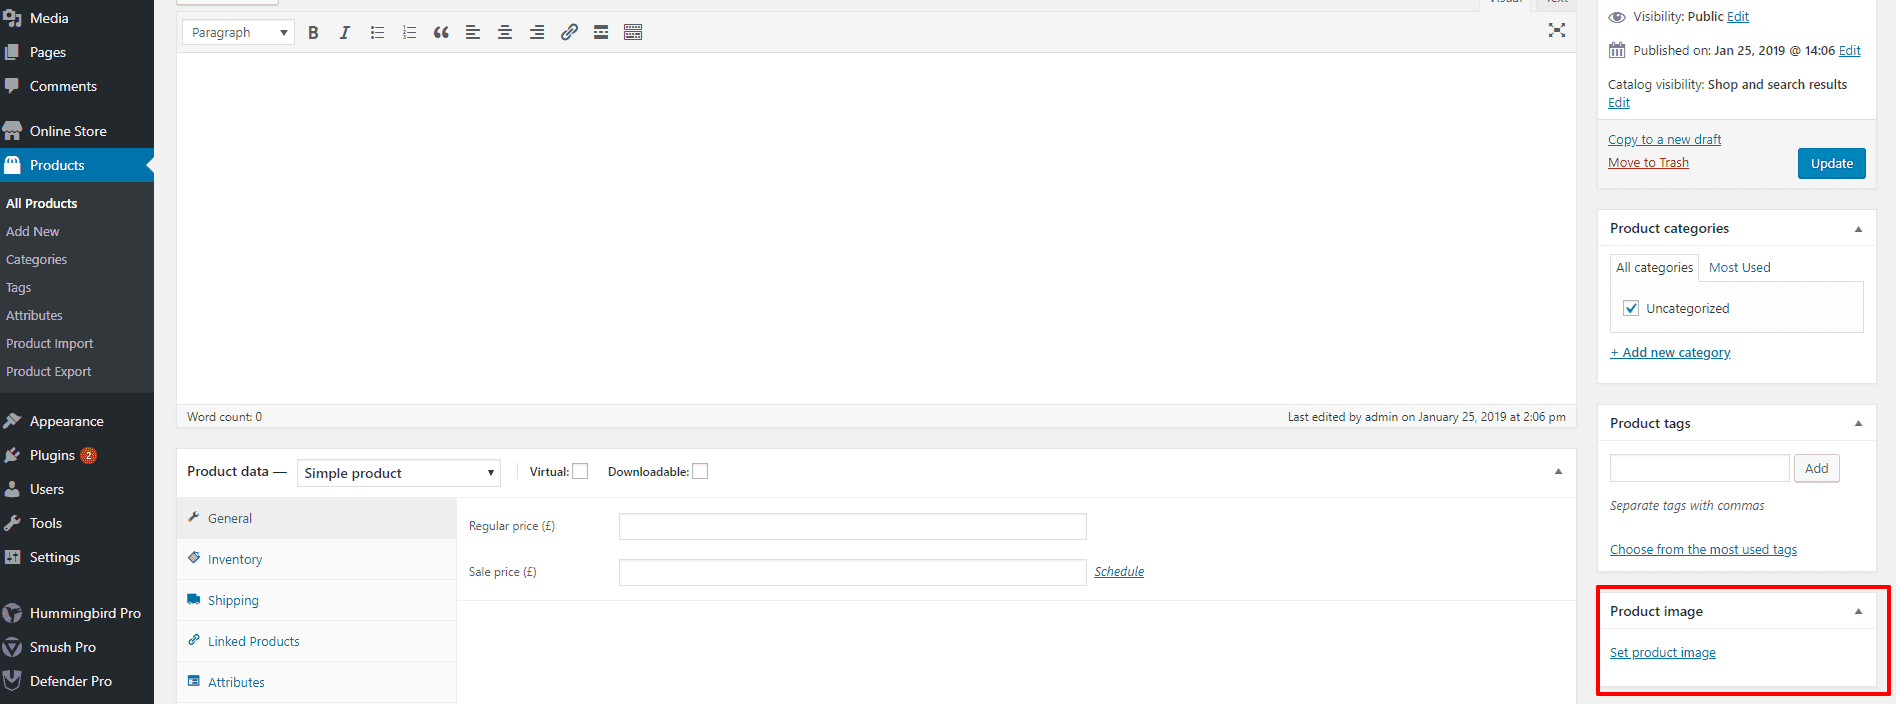
If you look towards the lower right side of the product editing page you will find a meta box for Product Image. You can set an image here by clicking Set product image.
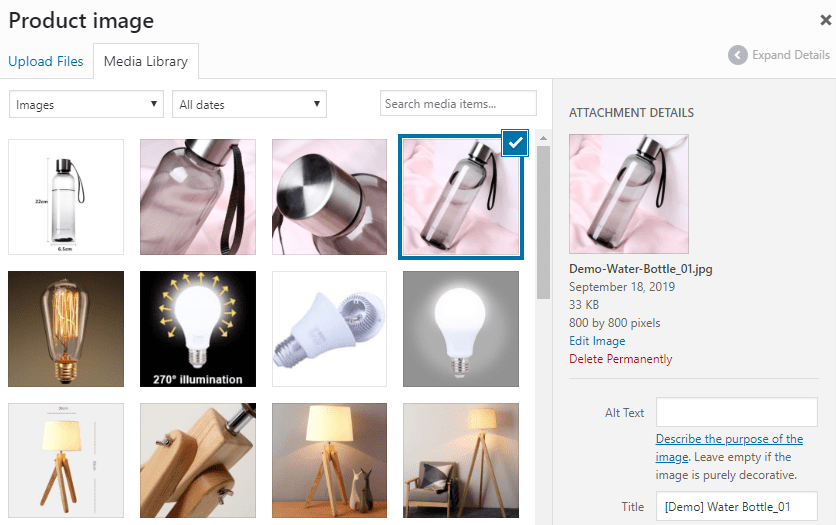
Once you click it, you will be directed to an image uploader like the one shown in the above figure. From here you can either upload a new image file from your computer or you can click Media Library to select an already uploaded image as your product image.

Click the Set product image button once you are done with your selection. After this, click Save Draft (if the product is not published) or Update (if the product is published), and the product image appears on the front-end.
2. Product Galleries
Normally sites can have a single featured image, but an e-commerce site must have multiple images on a product to get better sales. Now the best practice here is to add at least three and at the most five images. Customers always need more than you provide them with. But that doesn’t mean you can add tens of images in gallery images. Gallery images are for a quicker view. If you want to add more images, you need to use the editor for the description of product.
Adding a Product Gallery
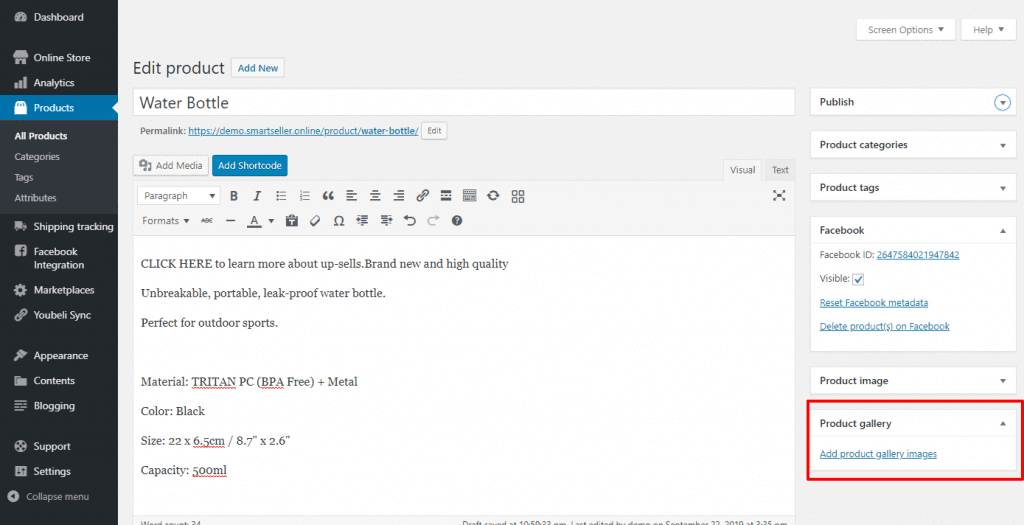
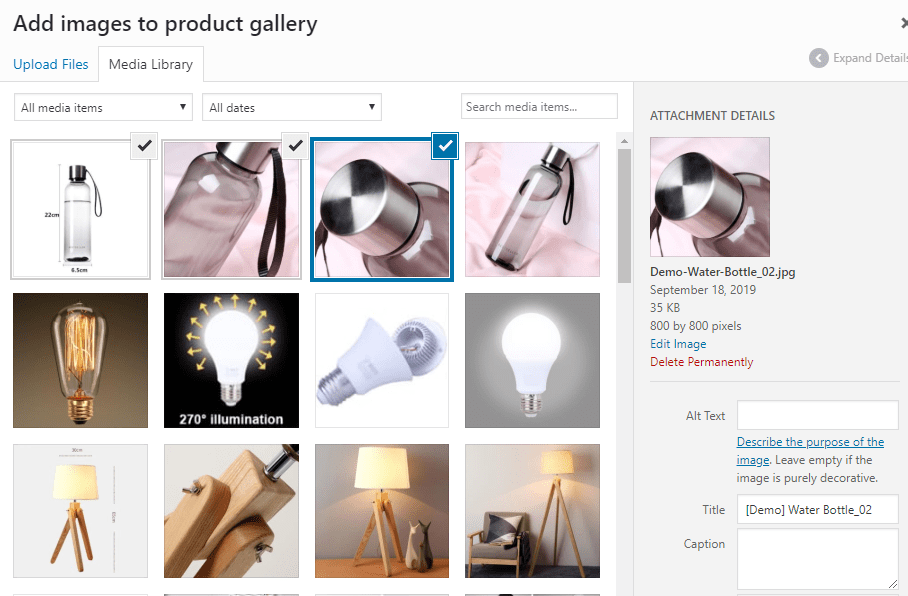
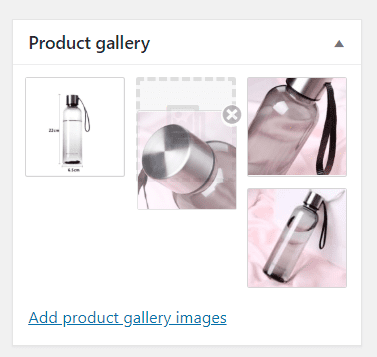
To add a Product Gallery, look towards the lower right side of the page, near to the meta box for Product Image, and you will find the meta box for Product Gallery. Here, click Add product gallery images.
Then you will again be directed to an image uploader from where you can upload and choose images which will appear in the gallery. Once your images are uploaded, click Add to gallery.
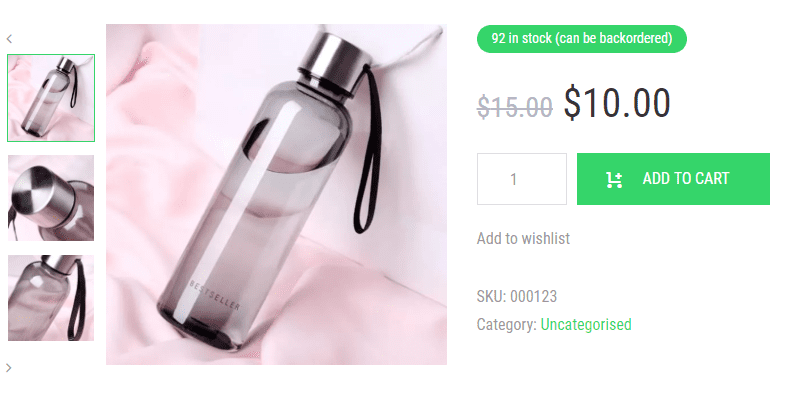
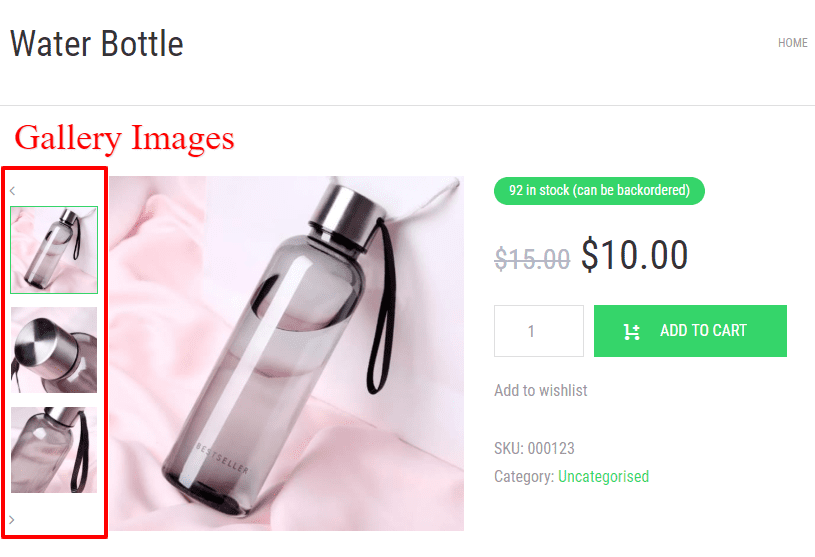
When you publish the product, these gallery images will appear at the front-end. The above figure shows the product image being displayed as the main image, and its related gallery images are displayed right below it. Customers may click any of these images and scroll through the entire gallery.
Reordering or Removing Images from Product Gallery
If you want to change the order of images in the gallery then you may drag and drop the images in the preferred order.
To delete or remove an image from the gallery, hover your mouse over the image you want to remove, and click the cross mark which appears in red.
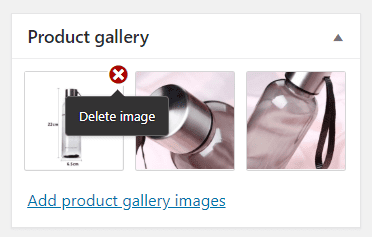
To confirm these changes again, click Save Draft or Update.