1. Setup and Configuration
After activating waitlist, go to Online Store > Settings > Products > Waitlist.
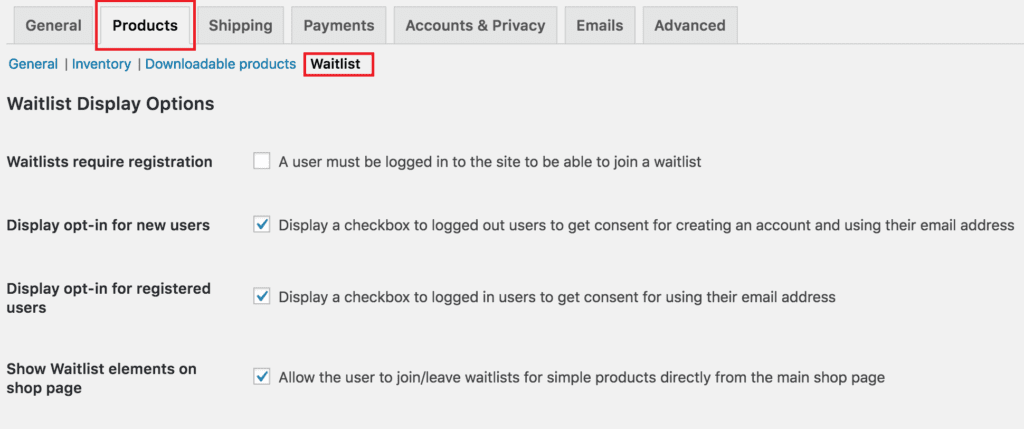
Waitlist Display Options
Display options enable you to control what your customer see in your shop.
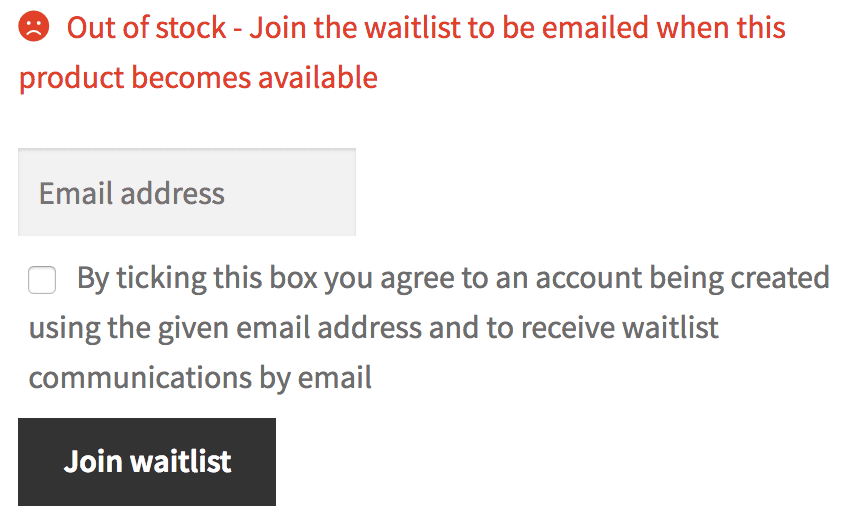
By default all customers can use the waitlist functionality. When a customer joins a waiting list, an account is automatically created without further input. The welcome email is automatically created and sent.
Opt-in Options
Options have been added to display an opt-in checkbox and a notice to customers who signing up to a waiting list. With these options enabled new customers will need to consent to an account being created and receiving further communications before being allowed to join the waiting list. This can be enabled for both new customers and existing users customers.
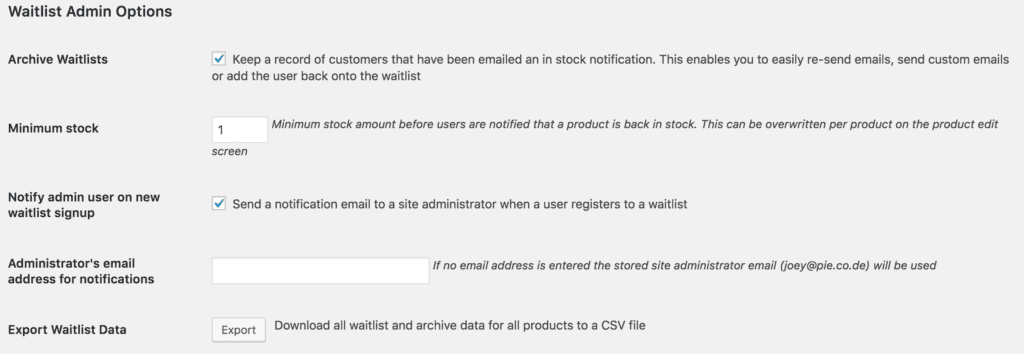
Waitlist Admin Options
Admin options allow the shop manager to specify options to make the plugin work for them.
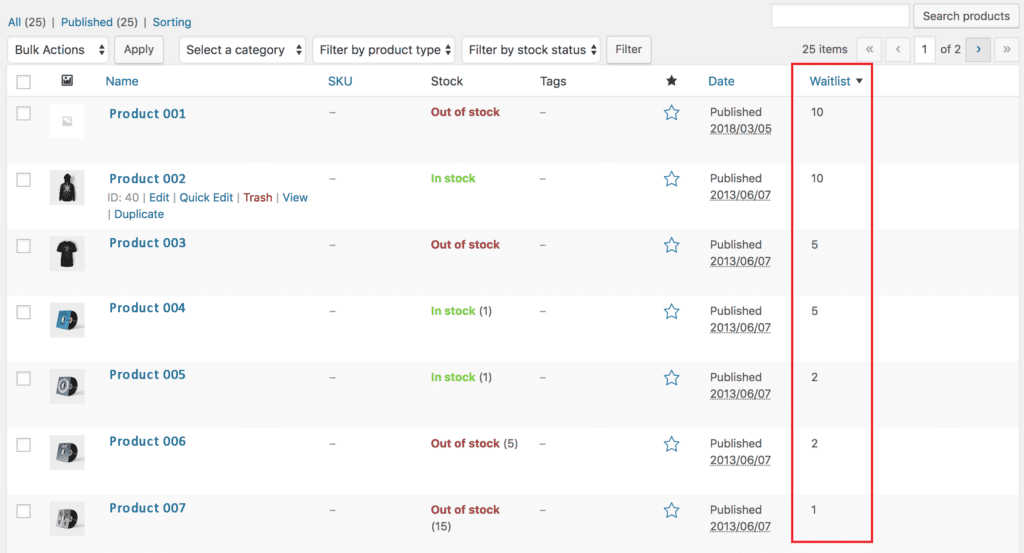
Products Listing Screen
After activating Waitlist, it adds a new column to the products listing, displaying the number of customers on the waiting list for a product. This column is sort-able to enable Shop Managers to quickly find the most ‘sought after’ products in the catalog.
Edit Product Screen
Waitlist adds a new product tab to the Edit Product screen by going to Products > Edit Product > Scroll down to Product Data > Waitlists.
This new tab displays any customers that are currently on the waiting list for the product, any customers that were sent an in-stock notification email and subsequently removed from the waiting list (if archiving is enabled) and available options for this product. There are 3 tabs under this:
- Waitlist
- Archive
- Options
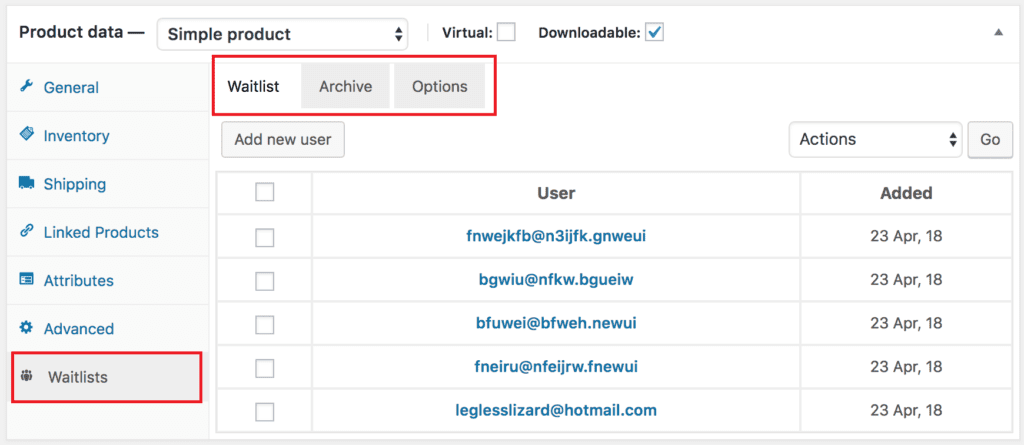
Waitlist
On the waitlist tab, shop manager can add single or multiple email addresses (separated by a comma), remove customers from the waiting list, manually send out in-stock notification emails or send custom emails.

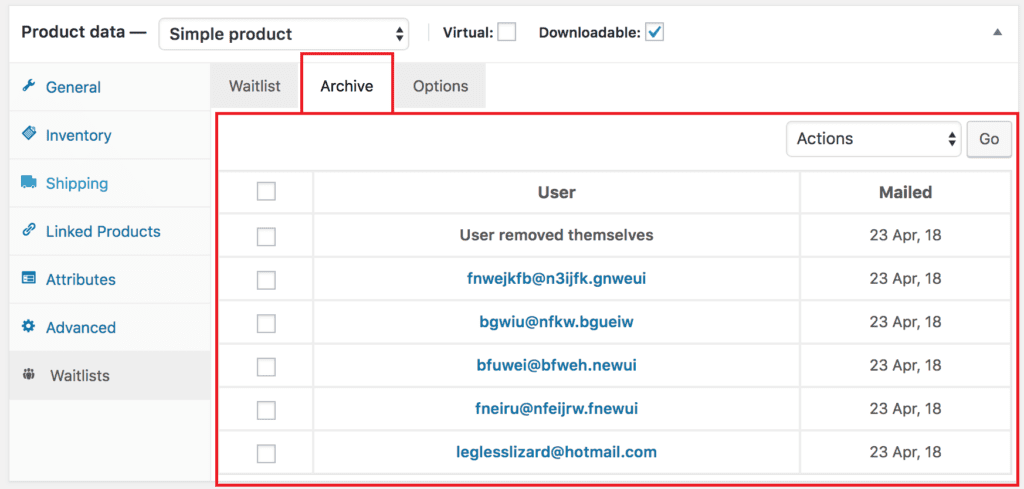
Archive
On the archive tab the shop manager has options to add customers back to the waiting list (these customers will remain in the archive until deleted), permanently delete customers from the archive or send the customers a custom email (if, for example, it is suspected a notification email has not reached them). If a customer removes themselves from the archive (via the “My Waitlists†tab on the “My Account†page), this tab will also reflect this.
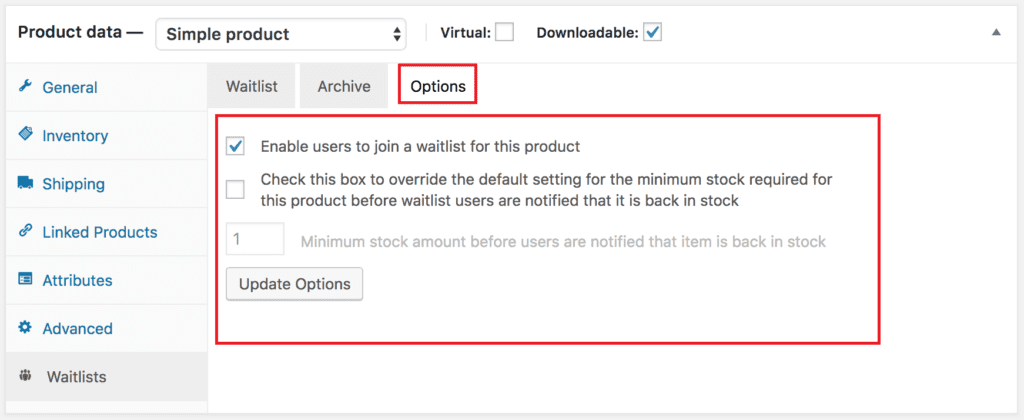
Options
The options tab provides the shop manager with the ability to enforce specific options for certain products. If set here, these options will override the global options (for this product only)
Automated Emails
When a product is switched from ‘Out-of’stock’ status to ‘In-stock’, Waitlist will send all users on the waiting list an email informing them that the product is back in stock, with a link to the product listing for making purchases. The emails follow the same design as all other SmartSeller online store emails, but the subject and the heading can be altered from within Online Store > Settings > Emails > Waitlist Mailout.

Here, it is also possible to add google analytics tracking codes to the product link sent out in the email.
Once this email is sent, Waitlist removes all users from the waiting list for this product. If the product is subsequently switched back to ‘Out-of-stock’, the waiting list will be empty.