1. Email Sender Options
1.1. Settings in this part will directly affect the sender’s emails. Here you can edit the name and email address.
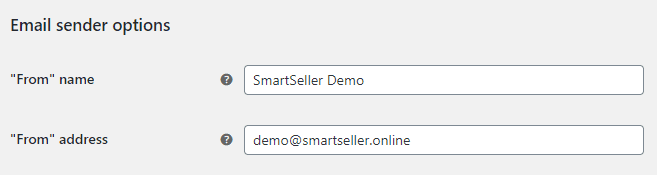
1.2. The figure above shows two different sender settings, which are:
- “From” Name: Enter the name with which you want your customer to be notified by an email.
- “From” Email Address: The mailing ID which will be used to send emails to your customers.
So, whenever any customer buys any product or places an order, an email will be sent from the store which will carry these two fields of name and email address.
2. Email Template
2.1. A custom email design with colors similar to your store is always a better choice. This section for Email Template allows you to create an email template for store emails.
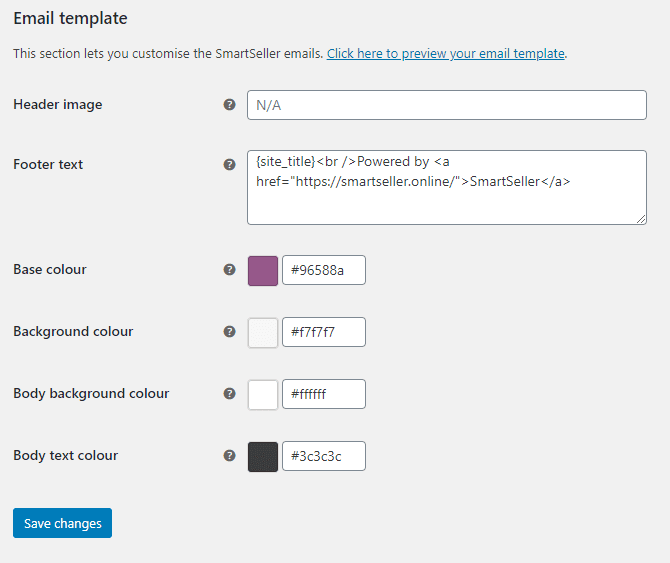
2.2. To view the demo email, browse the link Click here to preview your email template. This is the default email template which SmartSeller sets for you by default.

2.3. Edit Header Image:
The first field is for the addition of a Header Image. Now what is a Header Image? As its name explains, this is the image which can be displayed right at the top of your email. This image can be your store logo or may be about your current promotions or discount sale. The addition of such images will make your emails more attractive, plus you can brand your store more effectively.
If you want to add a header image in your emails then simply upload an image and copy and paste the URL of that image from the media library into this text box.Â
You can upload it in a few clicks (click here to learn how to upload image to your image library). Follow the steps mentioned below :
- In your site’s dashboard go to Content > Media > Library > Add New.
- Upload an image file from your PC.
- Click Edit or open the image file and copy the value or URL text box and paste it into the text box of Header Image.

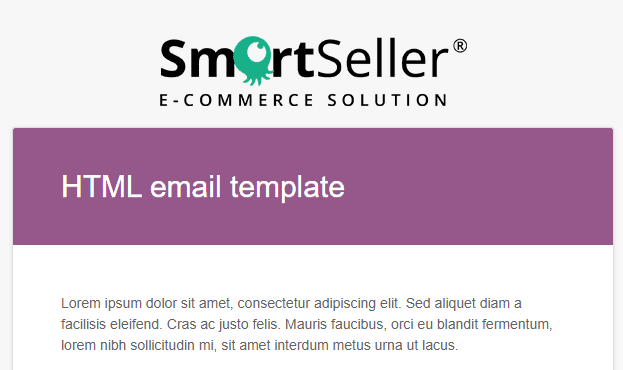
Save the changes, and now if you visit the demo email template,that particular image will appear right at the top of your email (see the below figure).
2.4. Edit Email Footer Text:
Email Footer Text controls what text will be displayed at the end of your email, or more precisely in the footer of your email. SmartSeller sets a default description for you according to your store, but you can change it as per your desire.Â

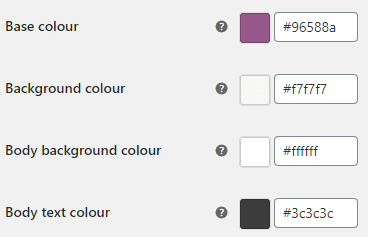
2.5. Edit Email Color Styling:
The last four options are for styling your email template with various colors. These colors can be set by entering their hex values. By default some color values are there, which you can change very easily by simply clicking every hex value and choosing a desired color from the color box.Â
3. Individual Email Template
3.1. In this section, we will discuss how to edit some of the individual email templates, for example New Order Email, Processing Order Email, Completed Order Email, etc.
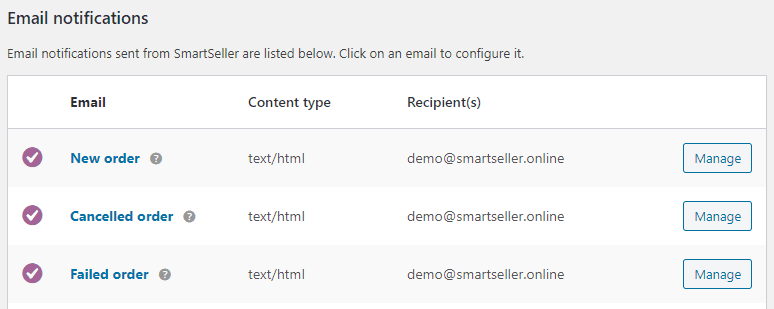
3.2. In this tutorial, we will edit the email template for New Order. To do that, click on the button “Manage” under New Order.
Whenever a customer places an order on your website, you are notified about the activity with a New Order email. In this way, you can keep track of all the orders. The options we see in this section are listed below.
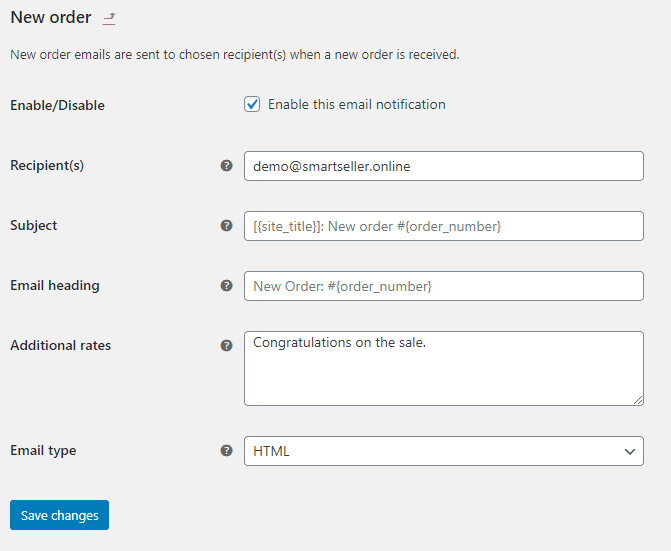
- Enable/Disable: The checkbox for Enable/Disable will control whether or not a store owner will receive New order emails. Usually all store owners enable this option. However you can keep it disabled as per your choice.
- Recipient(s): store owner can enter all the emails which will receive messages about new orders. If you are adding more than one recipient then separate each email ID with a comma. (eg: abc@gmail.com, 123@gmail.com)
- Subject: Every email comes with a relevant and unique subject which can help you in setting a filter at the end of your email clients. You can enter the subject which you want to appear in all the received order emails. By default SmartSeller has already set a Subject for its users which is as follows: [{site_title}] New customer order ({order_number}) – {order_date}
- Email Heading: This field will manage what text will be displayed in the main heading of your email. New customer order is set as a default.
- Email Type: The settings for Email type are offered in the form of a dropdown menu which contains three different options of email format. These options are:
- Plain text
- HTML
- Multipart
I recommend that you select the HTML option, because HTML coupled with CSS can bring about some amazing results.