1. Activating Social Login
This document walks through the creation of apps for each social network that you can connect to SmartSeller Social Login. The Social Login app currently supports several social media platform. However, we will only focus on the following popular platforms on this article:
- Facebook Login
- Instagram Login
- Twitter Login
- Google Login
- Yahoo Login
1) Activate your Social Login at Apps > Social Media > Activate Social Login.
2) Once the Social Login App is activated, you can enter credentials and adjust the settings for each under Online Store > Settings > Social Login by selecting the correct service.
2. Connecting Facebook Login
1. To connect your online store to Facebook, log into your Facebook account. Go to developers.facebook.com while logged in and click “My Apps > Add a New App†to create an app.
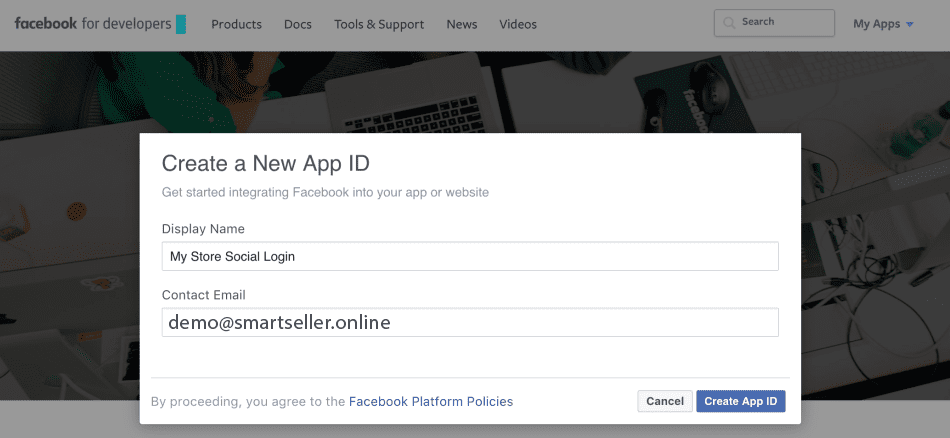
2. Enter your app name + an email address for your store:
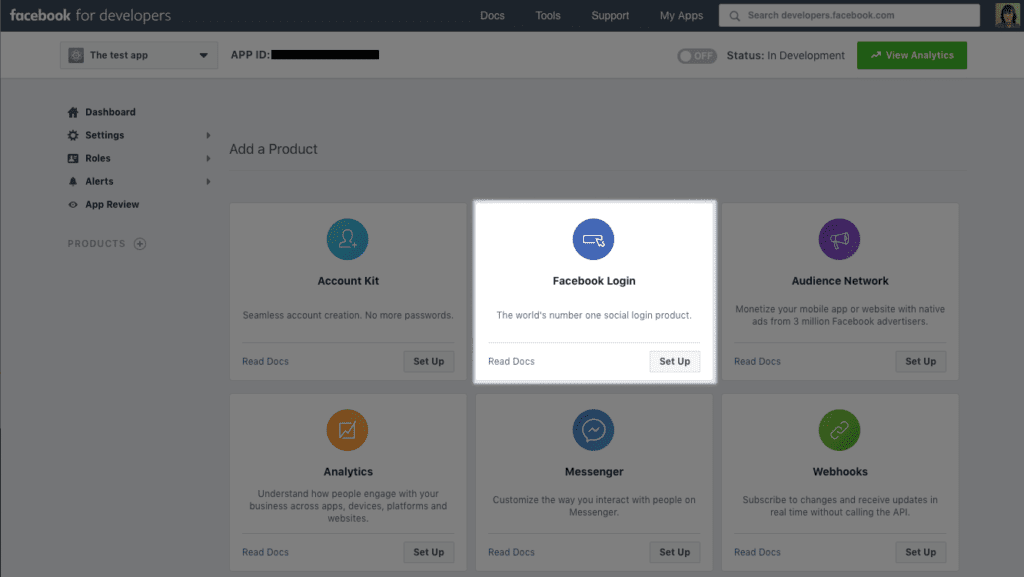
3. Scroll down and choose “Facebook Login†for the app type, and click “Set Upâ€:
4. Do not use the “Quickstart†you’ll be taken into; instead, click “Settings > Basic†for the app:

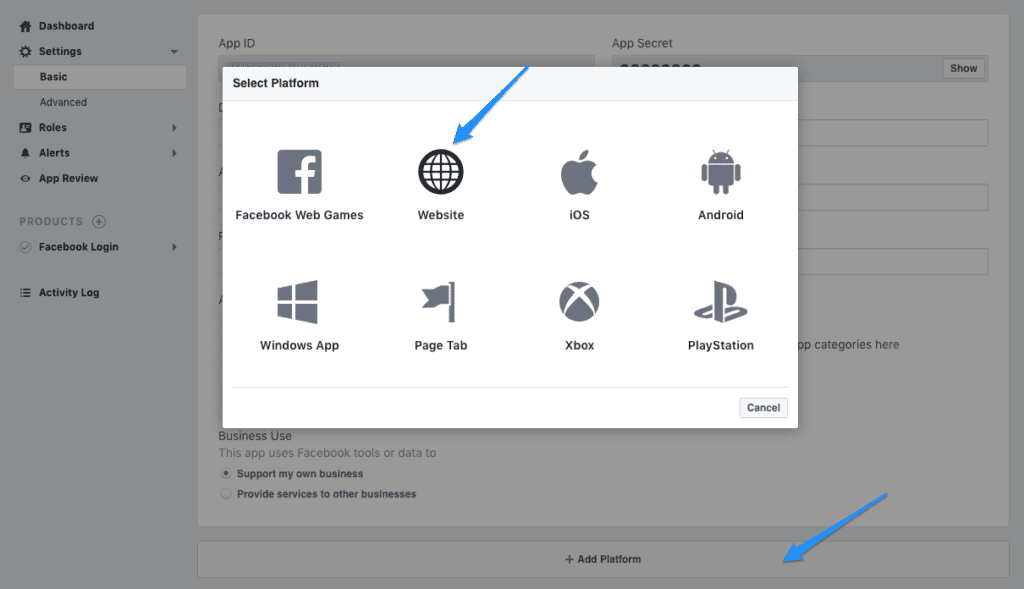
5. Click “Add platformâ€, and then select “Website†as your platform.
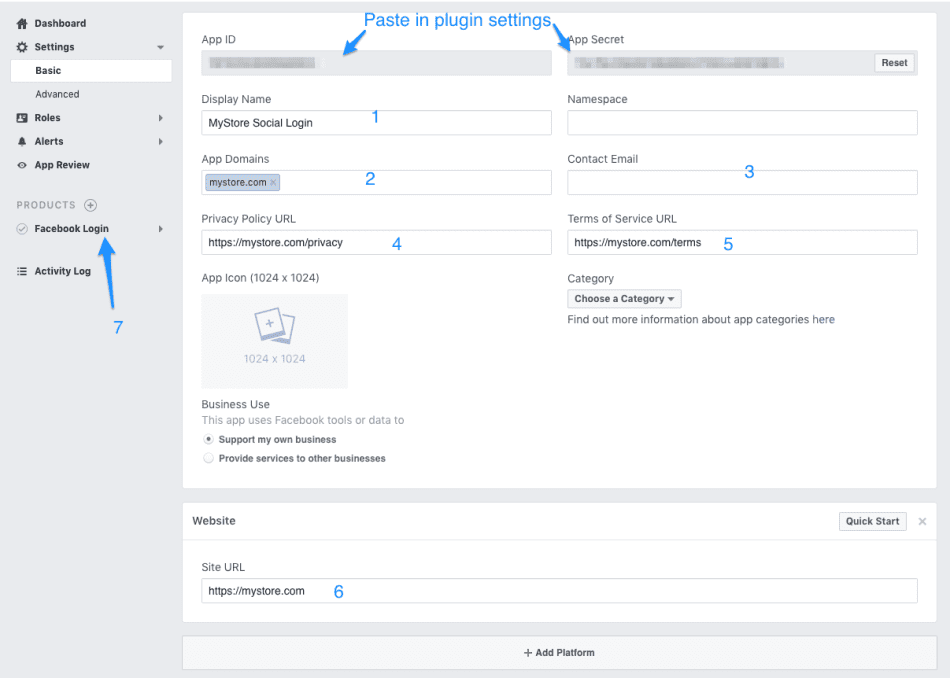
6. Now enter the rest of the basic details for your store. You can
- set the display name (the name of your store; will be shown to customers when they approve app access to log in),
- set “category†to whatever you’d like,
- and optionally add site URLs and a logo.
Then click “Save Changes”.
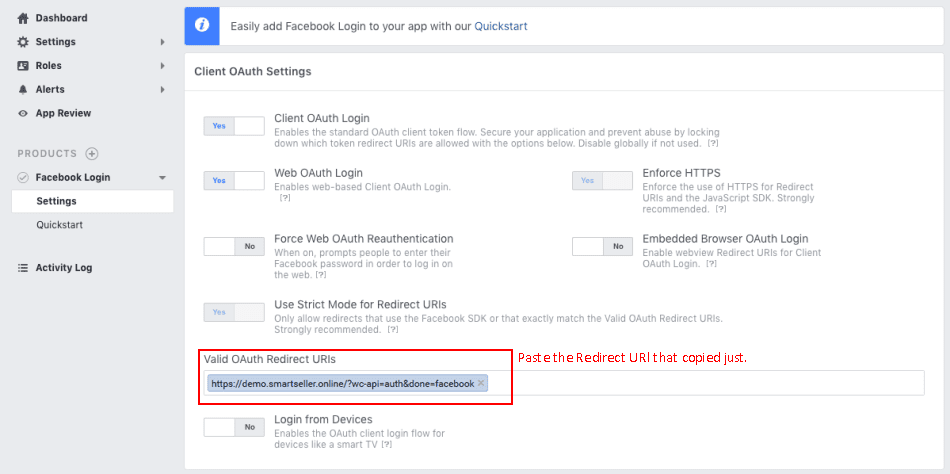
7. Click on “Facebook login > Settings†next.
8. Copy the “Redirect URI” from SmartSeller. The Redirect URI can be obtained at Online Store > Settings > Social Login > Facebook Settings.
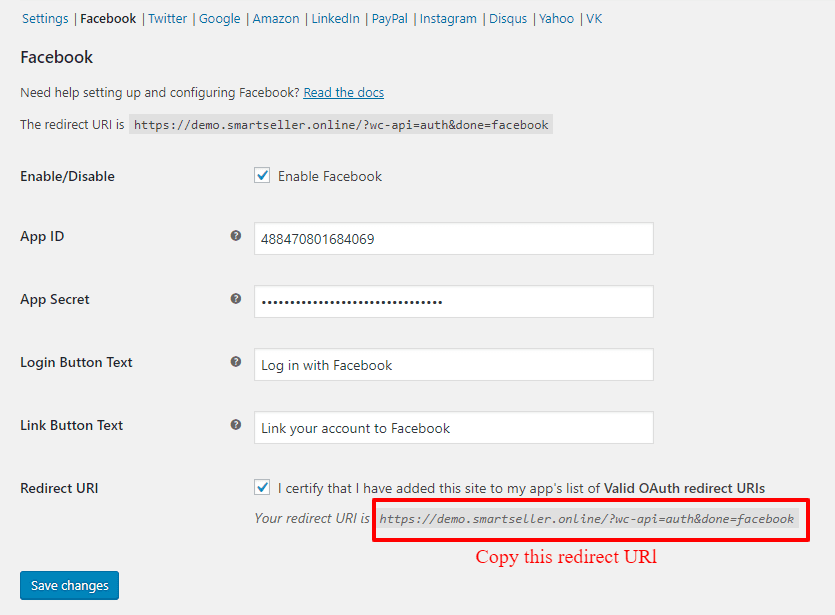
9. Paste the “Redirect URI” into Valid OAuth Redirect URIs. (See below)
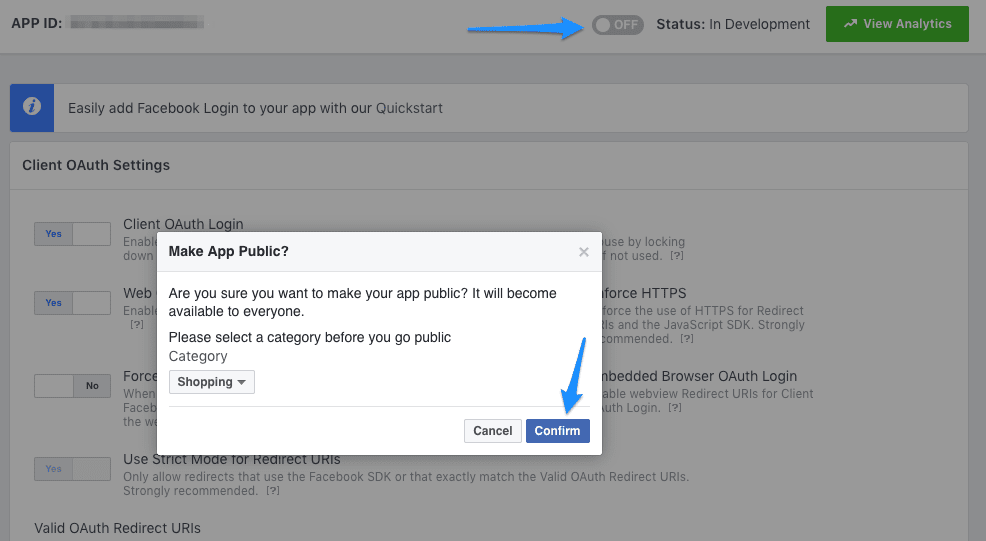
8. Last step! Go to “App Review†and change the app status to live / public (or do so from your top bar):
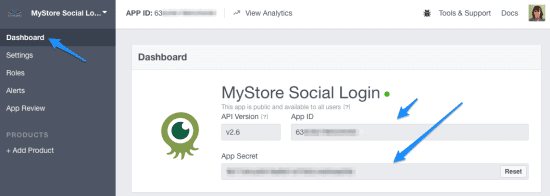
9. The setup is done! Now you can go back to “Settings†or “Dashboard†and grab your App ID and Secret. Enter them under Online Store > Settings > Social Login > Facebook.
3. Connecting Twitter Login
1. To connect your online store to Twitter, you must create a Twitter app. Log into Twitter, then go to apps.twitter.com. Click “Create Appâ€:

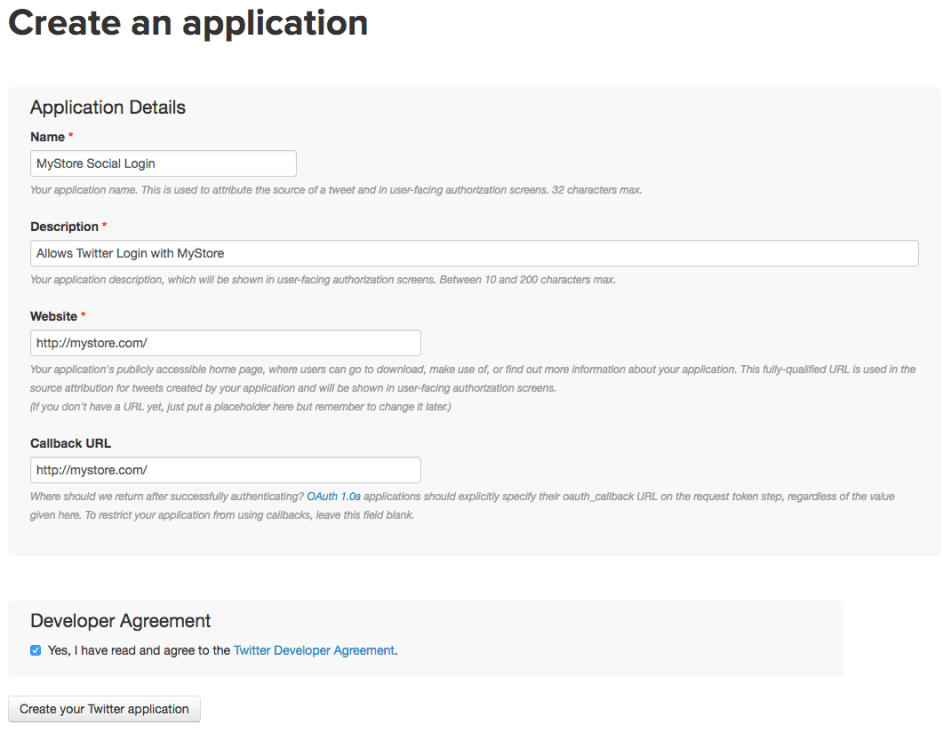
2. Enter the name of your store and a description for your app. Use your site URL for the website URL.
The callback URL for Twitter is a bit of a weird one. There is an example listed under Online Store > Settings > Social Login > Twitter. It will probably look something like this:
https://MYSTORE.smartseller.online/?wc-api=auth&done=twitter
BUT MAY BE DIFFERENT. Please refer to the app settings for this.
https://MYSTORE.smartseller.online/?wc-api=auth also works in our tests.This is most likely a bug in the Twitter platform which we’ve raised with their team, and this document will be updated if they provide feedback.
3. Agree to the developer agreement, and click “Create your Twitter Applicationâ€. Once you’ve confirmed your settings and created your app, you’ll be able to manage the app.
4. From the main app page, navigate to your “Settings†page and ensure the option to “Allow this application to be used with sign in with Twitter†is enabled, then save.
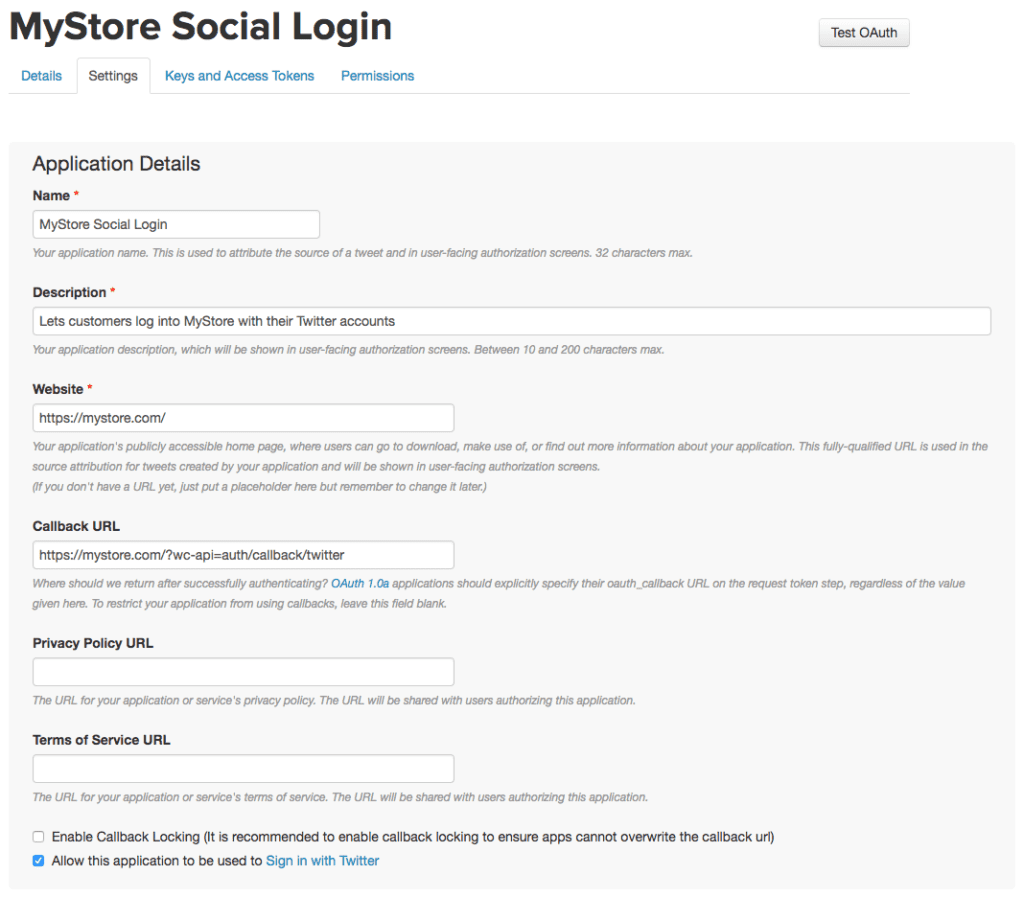
5. Confirm Twitter Sign In
You can also change the app icon to your store logo if desired, or adjust other app settings that customers will see.
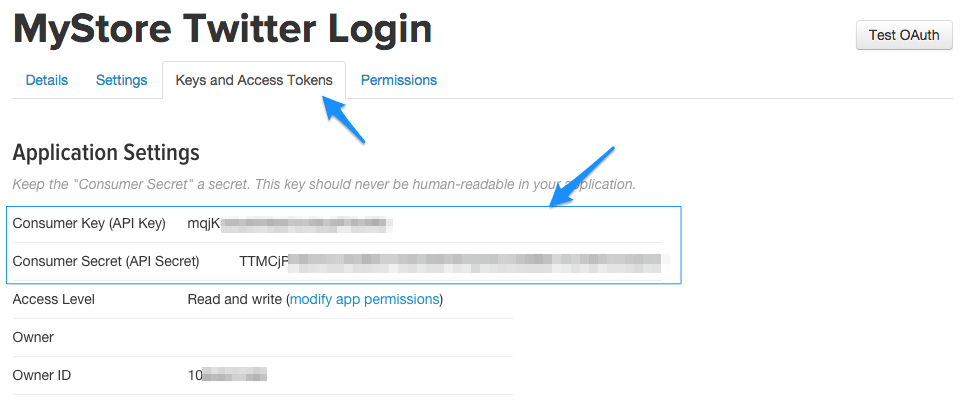
6. Now our setup is done. All we have to do is grab the API Key and API Secret from the “Keys and Access Tokens†page:
7. Now you can copy these credentials and save them under Online Store > Settings > Social Login > Twitter.
4. Connecting Instagram Login
1. To connect your online store to Instagram, visit the Instagram Developer Center and log into your Instagram account. Click “Manage Clients†next your profile info:

2. Create Instagram Apps
If this is the first time you are adding an app or plugin, Instagram will ask you a few questions. You can enter these responses:
- Your website: Enter your website’s home URL
- Phone number: Enter your phone number (they won’t call you)
- What do you want to build with the API? An app for my website.
3. Click “Sign Upâ€, and then click “Manage Clients†again. You’ll now be able to “Register a New Client†by clicking the button:

4. Register a New Client
You’ll be taken to the “register client†form next. You should enter your store name for the Application name and complete the additional fields. The URL you should enter in Valid Redirect URIs is listed under Online Store > Settings > Social Login > Instagram as the “OAuth redirect_uriâ€. It will probably look something like this:
https://MYSTORE.smartseller.online/?wc-api=auth&done=instagram
BUT MAY BE DIFFERENT. Please refer to the app settings for this.
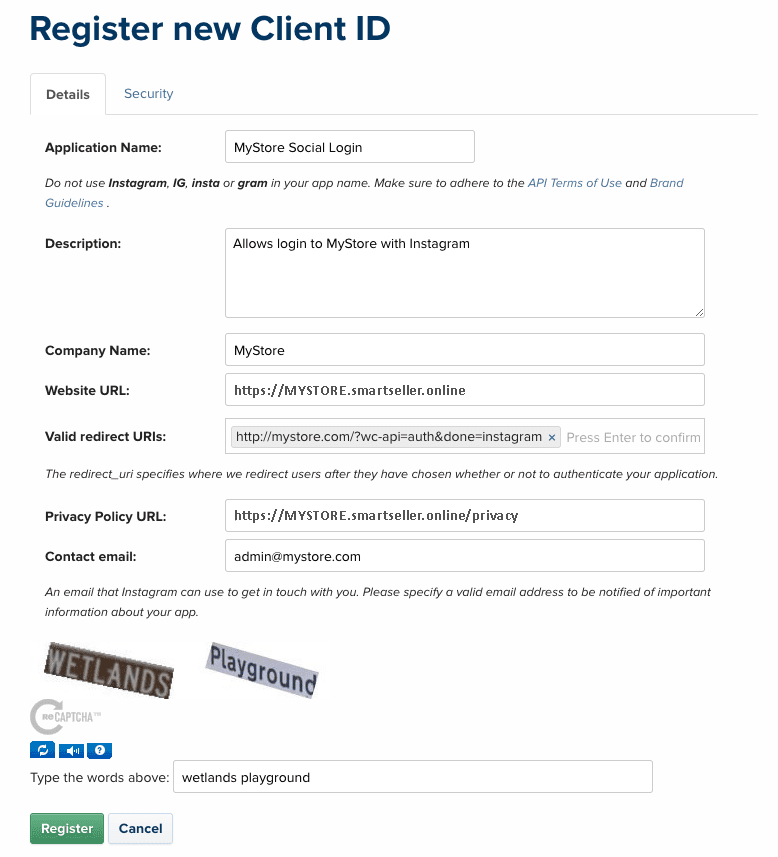
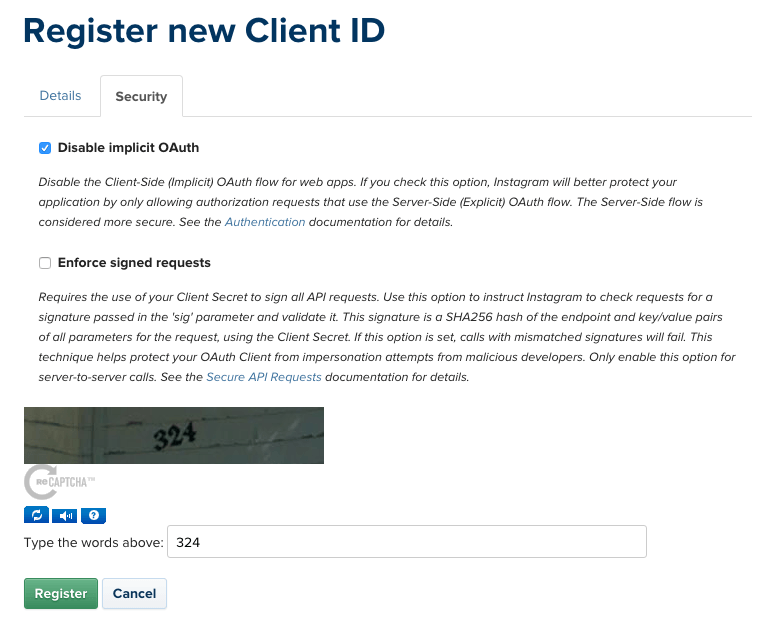
5. Under the “Security†Tab, leave “Disable Implicit OAuth†enabled and “Enforce Signed requests†unchecked.You can now enter the captcha and click “Registerâ€.
6. Then it will redirect you to a page that provides you with your Client ID and Client Secret, which you need to copy.
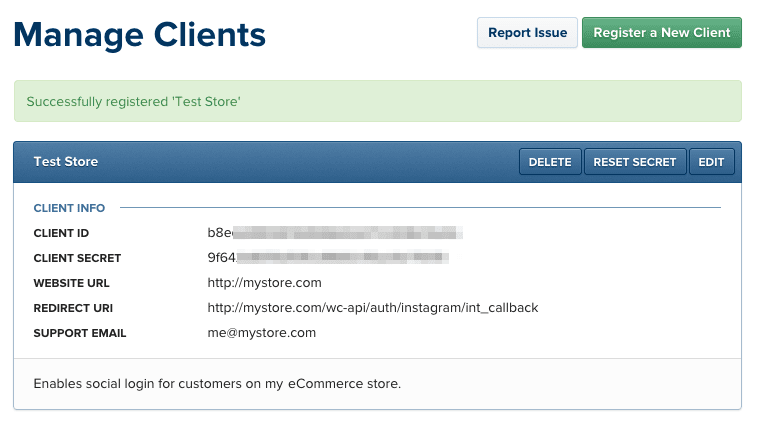
7. You can now enter these credentials under Online Store > Settings > Social Login > Instagram and save your settings. This will enable Sandbox testing for your app. Set up is not completed yet. You can only test with your own Instagram account.
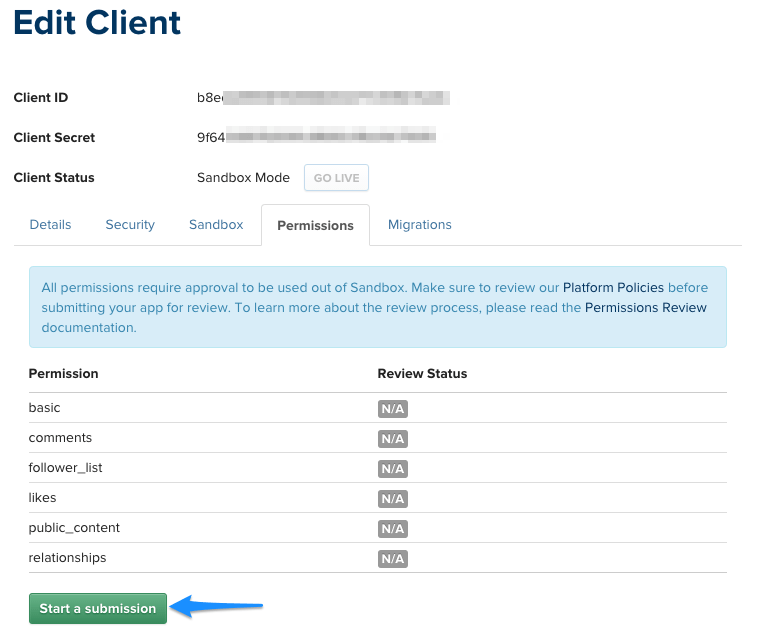
8. To set your app live, you must submit it for approval to Instagram. Click “Edit†for your application, and go to the “Permissions†tab. Here you can submit your app for approval by Instagram.
9. This will take you to the submission form, where you must include a description of what your app does, and a screencast of the app in action on your site. Here is a sample description you can use:
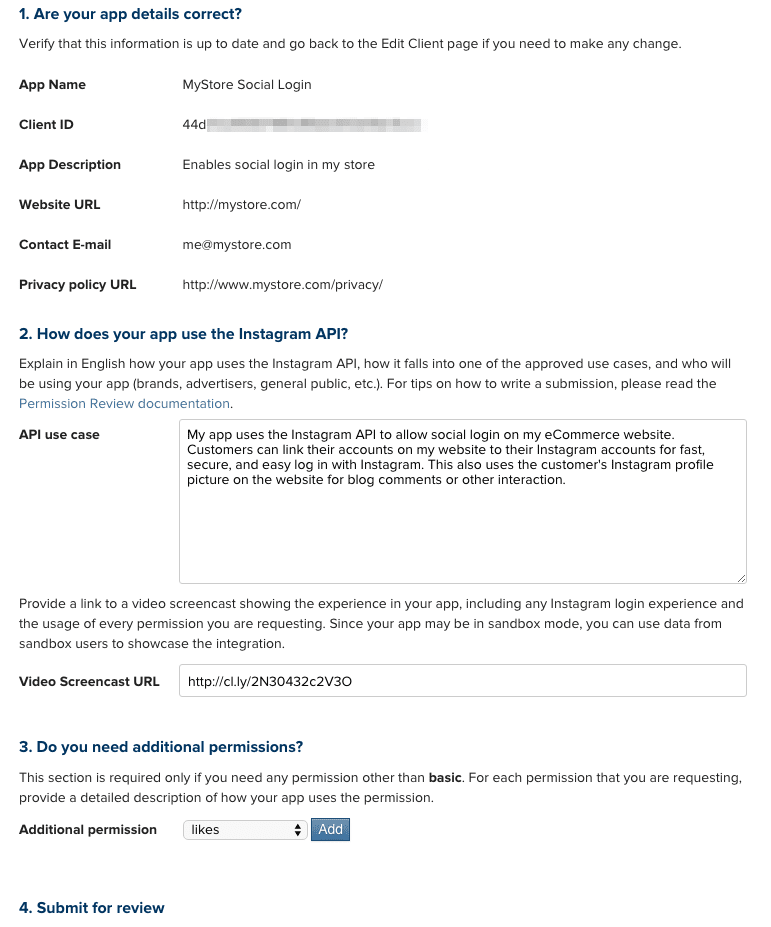
We recommend using your own screencast URL of the plugin in action on your site, as this most likely to be approved by Instagram. If you have no capability to make your own screencast, then our demo plugin screencast could be used as a (not-recommended) backup:
https://cl.ly/2N30432c2V3O
10. Once you’ve completed this form, click “Submit†to submit your app for review. This will submit the app, and it will not be live until reviewed and approved by Instagram.
5. Connecting Google Login
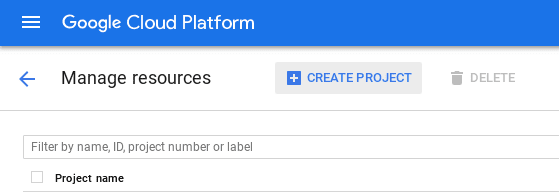
1. To connect your online store to Google, log into your Google account. While logged in, navigate to https://console.cloud.google.com/cloud-resource-manager. Click “Create Projectâ€:
2. Enter your project’s name (this is shown to customers to approve the login) and click “Createâ€:
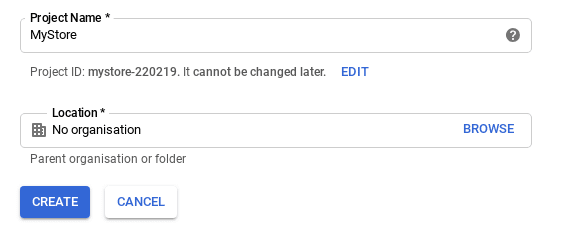
3. Wait a moment for Google to create your project, it may take a bit of time for the page to refresh.
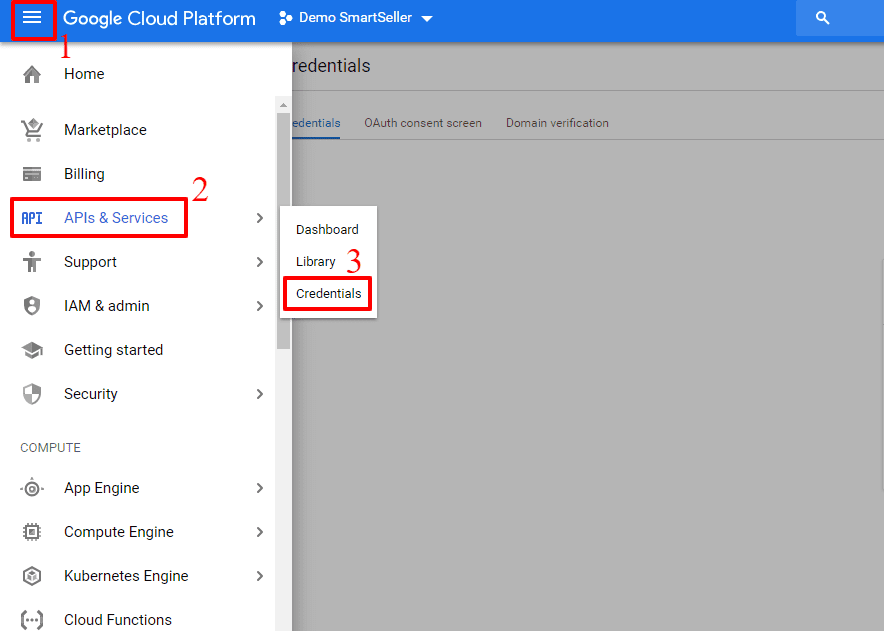
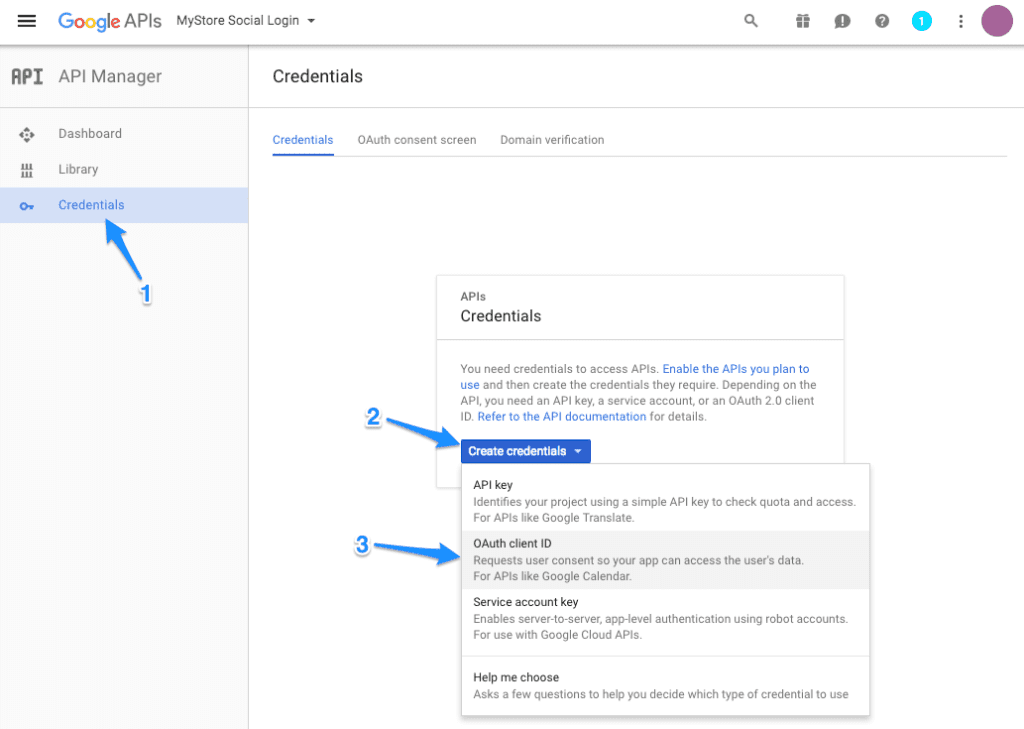
4. Once you’ve created a project, click on Menu on top left > APIs & Services > Credentials.
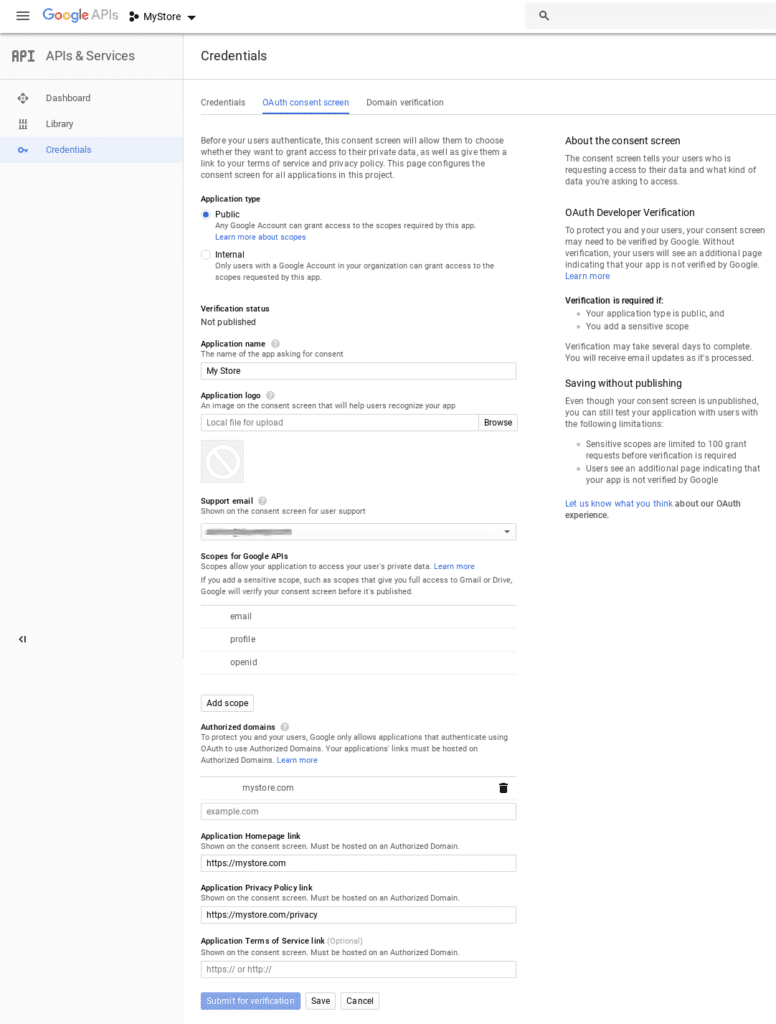
5. Once in the credential page, then select “OAuth Consent Screen†at the top. You’ll need to enter your site / company information here.
6. Now go to the “Credentials†tab and click “Create credentialsâ€. You’ll select “OAuth client ID†for the type.
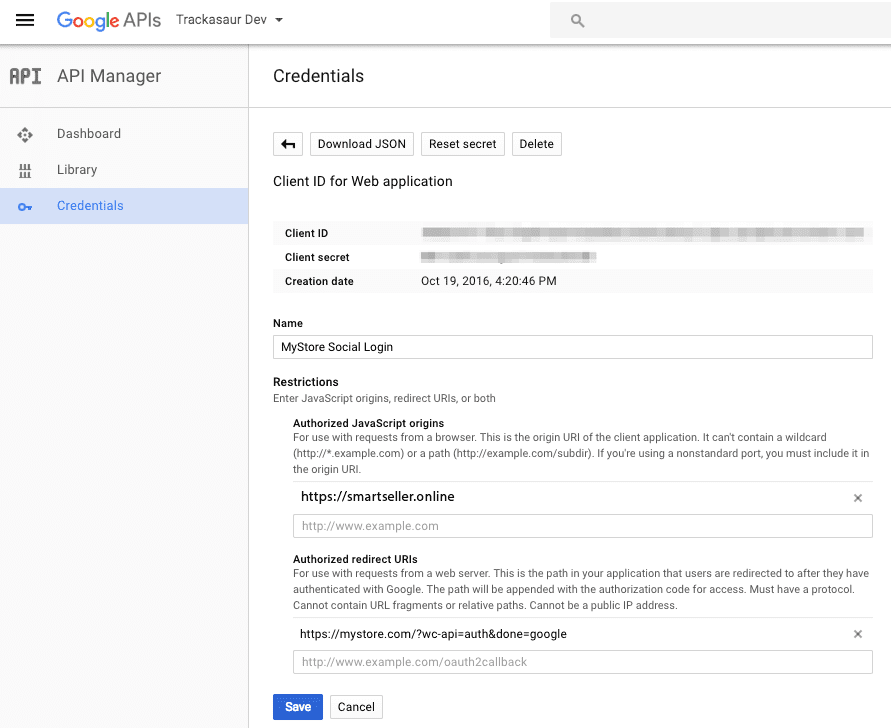
7. Select “Web application†for your application type, and complete the application fields.
8. Under “Authorized Javascript Originsâ€, enter your site URL.
9. The “Authorized Redirect URI†is listed under Online Store > Settings > Social Login > Google. It will probably look something like this:
https://MYSTORE.smartseller.online/?wc-api=auth&done=google
BUT MAY BE DIFFERENT. Please refer to the plugin settings for this.
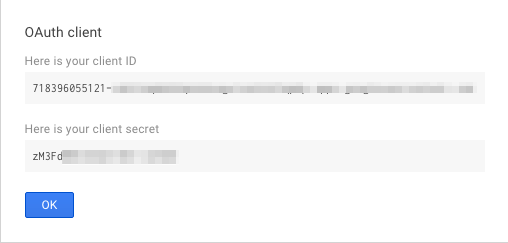
10. Click “Create†to save this setup and generate your credentials. You can copy these credentials and save them under Online Store > Settings > Social Login > Google.
6. Connecting Yahoo Login
1. To connect your online store to Yahoo, you must create a Yahoo application. Go to Yahoo Developer Network and create an account (or sign in if you have an existing Yahoo account — it doesn’t have to be a developer account).
2. Once you’re signed into Yahoo, go to Create an App. This will let you enter fields for your app:
- Application Name – enter any name that users of your website will recognize
- Application Type – Web Application

3. Create app.
- Callback Domain – your website’s home URL, i.e., https://MYSTORE.smartseller.online
- API Permissions – check the “Profiles (Social Directory)” option, then choose the “Read/Write Public and Private” radio button.
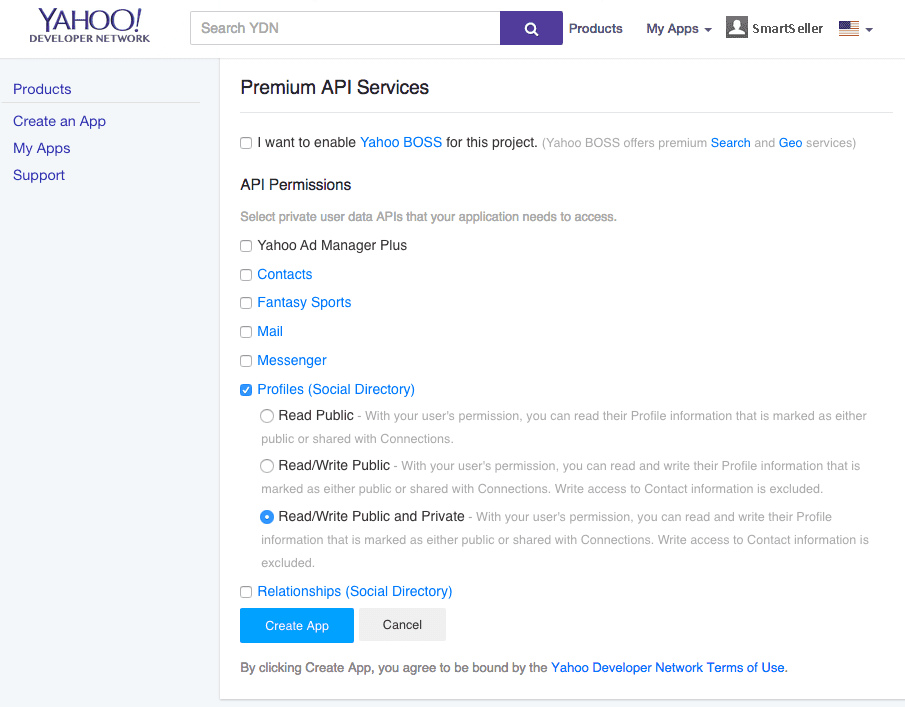
4. Change permissions.
Once you’ve completed these fields, click “Create App”. You’ll see a success message that provides a Client ID and Client Secret.
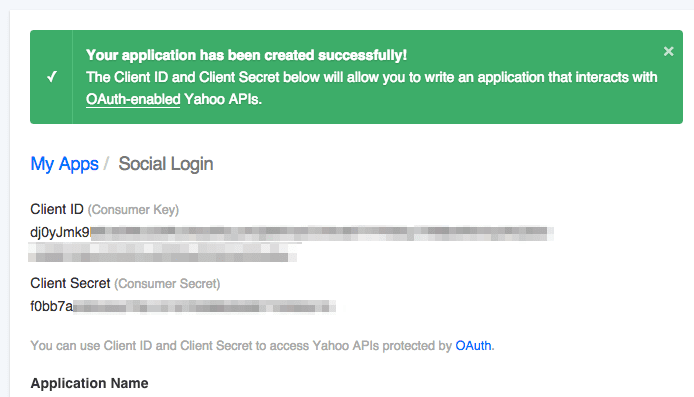
5. Get Client ID and Secret.
Enter these in the app settings to finish enabling Yahoo Login.