Shipping classes can be used to group products of similar type and used by some shipping methods, such as Flat Rate Shipping, to provide different rates to different classes of product.
For example, with shipping classes and Flat Rate Shipping, it’s possible to create different flat rate costs for different product types, like bulky items and small items.
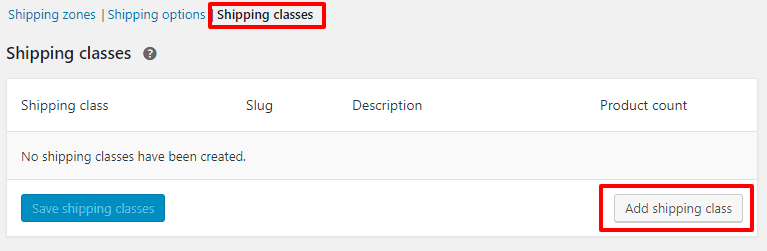
1. Adding Shipping Classes
1. Go to: Online Store > Settings > Shipping > Shipping Classes.
2. Click on “Add Shipping Class”.
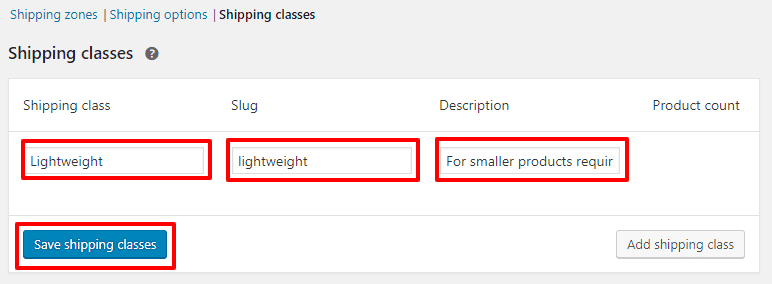
3. Enter a Shipping Class Name and description. Slug (unique identifier) can be left blank and auto-generated, or you can enter one.
4. Save Shipping Classes.
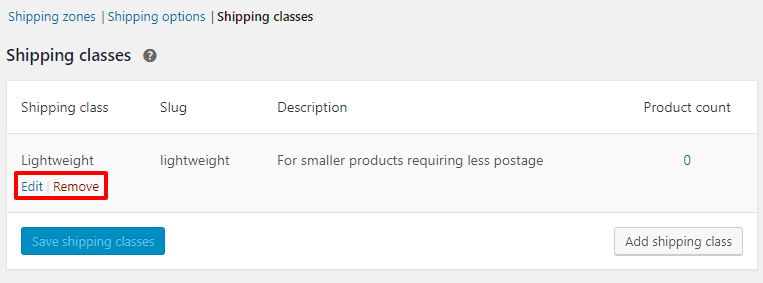
2. Edit and Delete Shipping Classes
1. Hover over Shipping Class Name. Options will appear.
2. Click Edit to revise the name, slug or description. Or click Remove to delete the shipping class.
3. Save Shipping Classes.
3. Assigning Shipping Classes to Products
To apply these rates to a specific class of products (e.g., bulky or heavy items), you need to assign them.
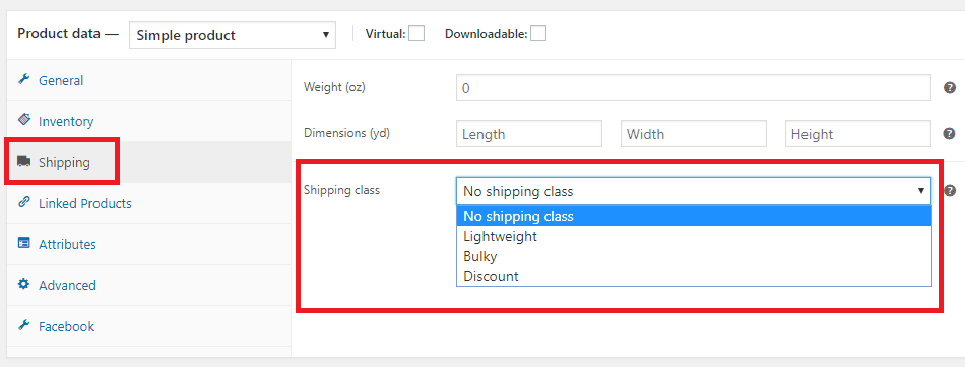
1. From your dashboard, go to Products > Select the product > click Edit.
2. Scroll down to Product Data section. Go to Shipping, and select the Shipping Class from the dropdown.
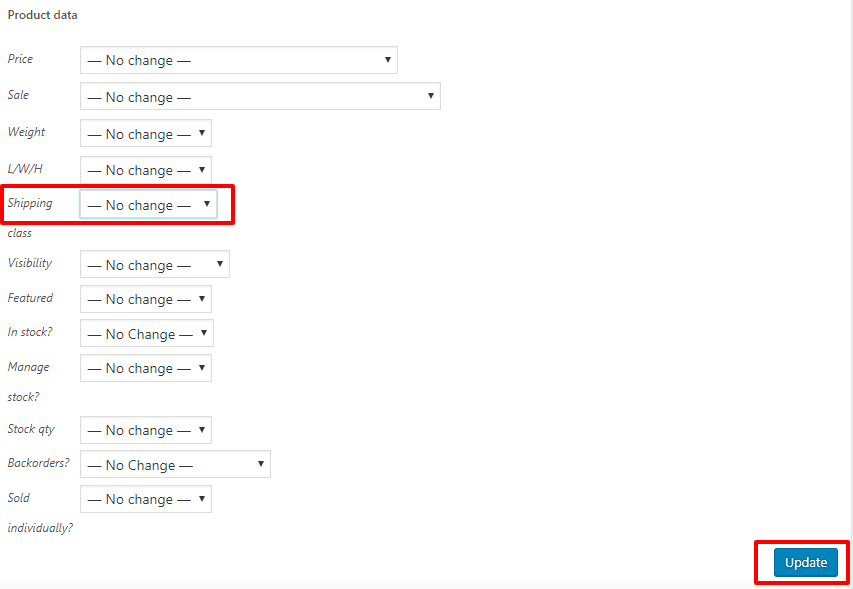
4. Bulk-Assign Shipping Classes to Products
1. Go to Products page on dashboard.
2. Tick the products the you want to assign shipping classes.
3. Select Edit from the Bulk Actions dropdown, then click Apply.

4. Select a shipping class from the dropdown.
5. Update to save changes.