1. Shipping Zones
A Shipping Zone is a geographical area to which you ship items. You can get as specific as you need, right down to regions and zip codes, or you can leave it more general – whichever suits you best.
Customers only see the methods available for their address and corresponding zone. Each customer matches only one zone.
To set up shipping in SmartSeller, you first set up shipping zones, then add shipping methods to those zones, and lastly, shipping rates to your methods. You can create as many zones as you like, and add multiple methods and rates to each zone.
For example, you could create these zones in SmartSeller:

Add as many zones as you need, with each zone containing multiple shipping methods.
2. Adding & managing zones
1. To set up shipping zones, go to: Online > Settings > Shipping.
If you don’t see Shipping as an option, go back to Online Store > General and take a look at settings at Shipping Location(s) – you may need to enable shipping settings there!
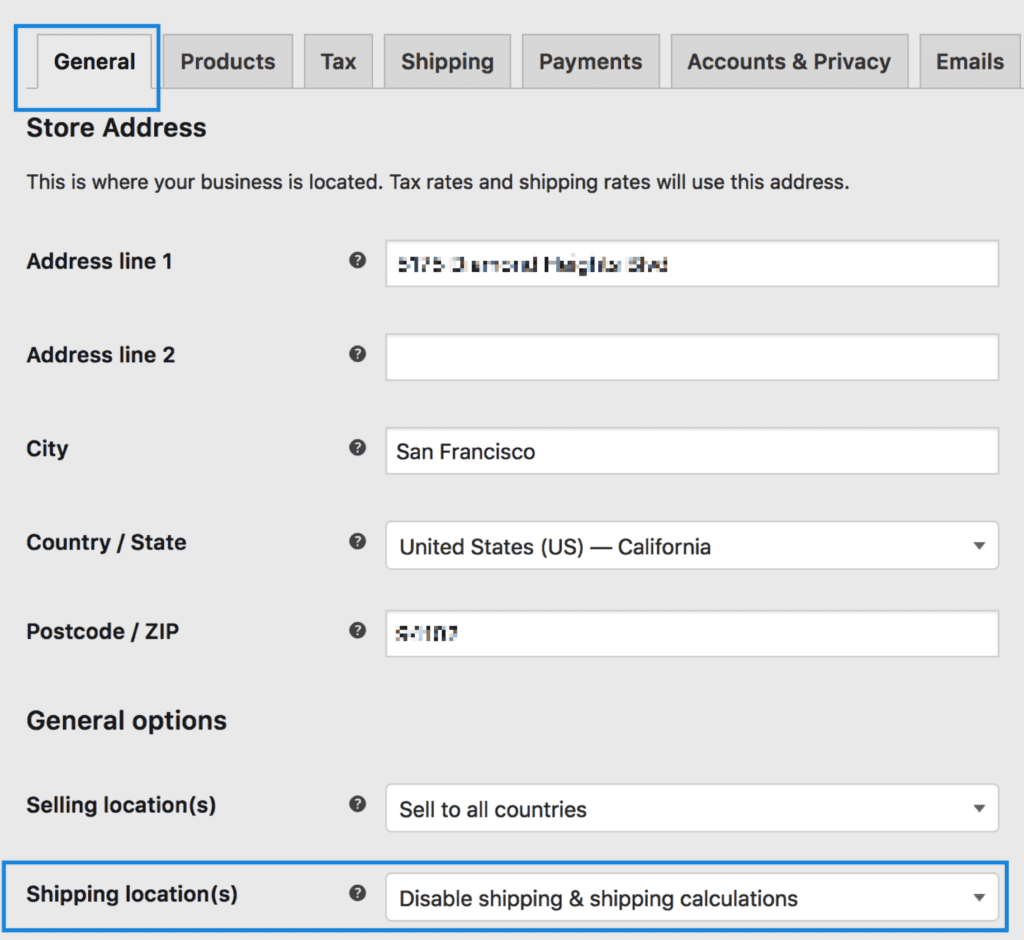
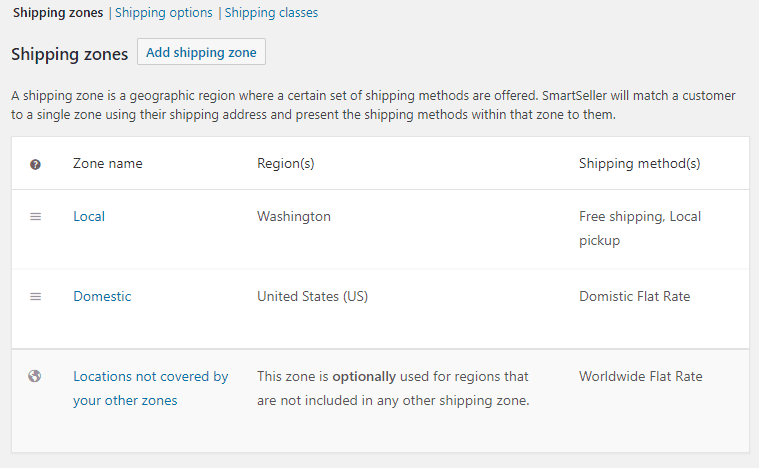
2. The first time you visit Online Store > Settings > Shipping, there is a prompt to add a new zone, and a default zone.
3. Adding a New Zone
1. Go to : Online Store > Shipping > Shipping Zones.
2. Click the Add shipping zone button at the top.
3. Enter a descriptive Zone Name, and select Zone Regions that apply. Regions can consist of: a) Countries, b) States, c) Continents.
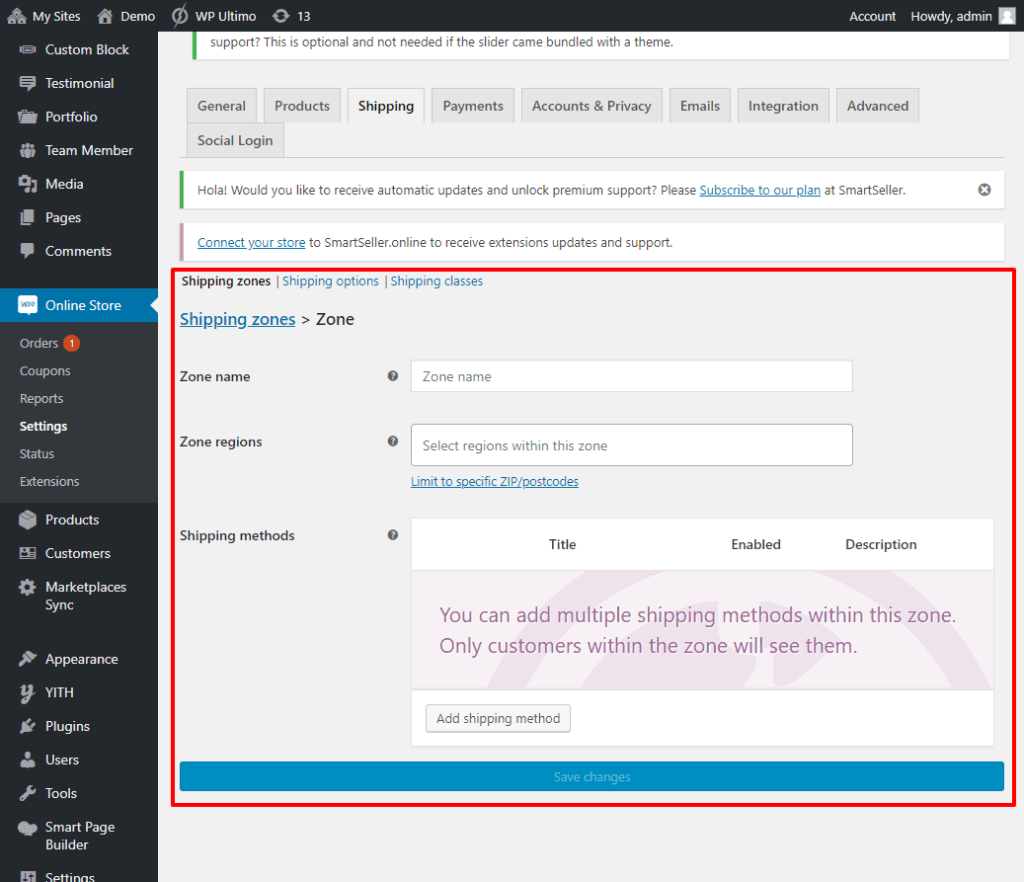
4. Select Limit to specific zip/postcodes (if applicable) to further narrow which customers match this zone. For example, you can set a local zone with a specific set of postcodes (one per line); a range of postcodes (e.g. 90210…99000).
5. Select which Shipping Methods are available to this zone.
6. Save changes.
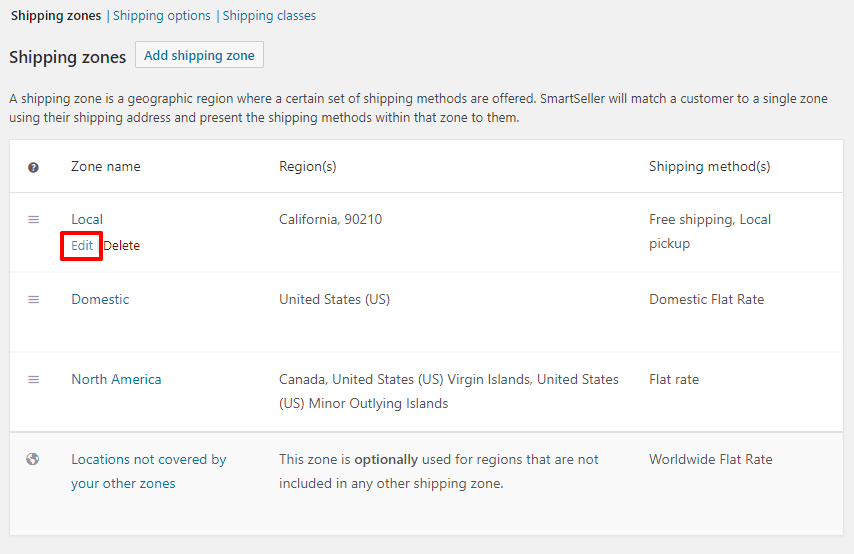
In the below example we created three zones – Local, Domestic, and North America to demonstrate how zones can be set up.
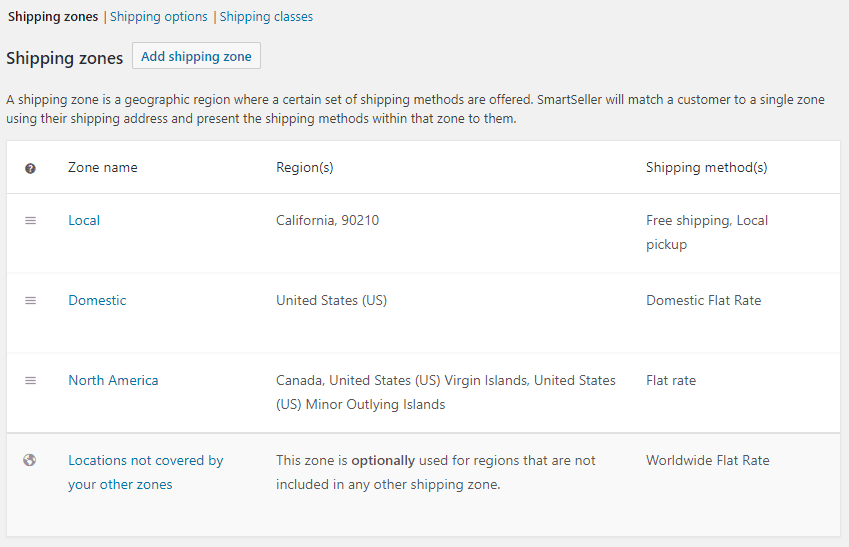
Locations not covered by your other zones is used for customers who do not match any of the custom zones you add. Adding methods to this zone is completely optional, depending on your needs.
4. Sorting Shipping Zones
To sort and reorder zones:
- Go to:Â Online Store > Shipping > Shipping Zones.
- Hover and click on the far left handles. A four-point icon appears on screen.
- Drag and drop.
- Save changes.
5. Editing Shipping Zones
To edit a shipping zone:
1. Go to: Online Store > Shipping > Shipping Zones.
2. Hover over Zone Name, and the option to Edit and Delete appear.
3. Select Edit, and a screen appears so you can change the name, regions or shipping methods.
4. Save changes.
To delete a shipping zone:
1. Go to: Online Store > Shipping > Shipping Zones.
2. Hover over Zone Name, and the option to Edit and Delete appear.
3. Select Delete, and the Shipping Zone is deleted.
6. Adding Shipping Methods to Zones
To add a shipping method to an existing Shipping Zone:
1. Go to: Online Store > Shipping > Shipping Zones.
2. Hover over the Shipping Zone you wish to change, and select Edit.
3. Scroll down to Shipping Methods on the screen that appears.
4. Select Add Shipping Method.

7. How Shipping Zones Work For Customer
Using these shipping zones and methods:
- In the 90210 zip code in California, I offer Local Pickup and Free Shipping.
- In the United States, I offer a Domestic Flat Rate.
- In Canada and U.S. regions, I offer a different Flat Rate.