1. Activate Invoices & Packing Lists
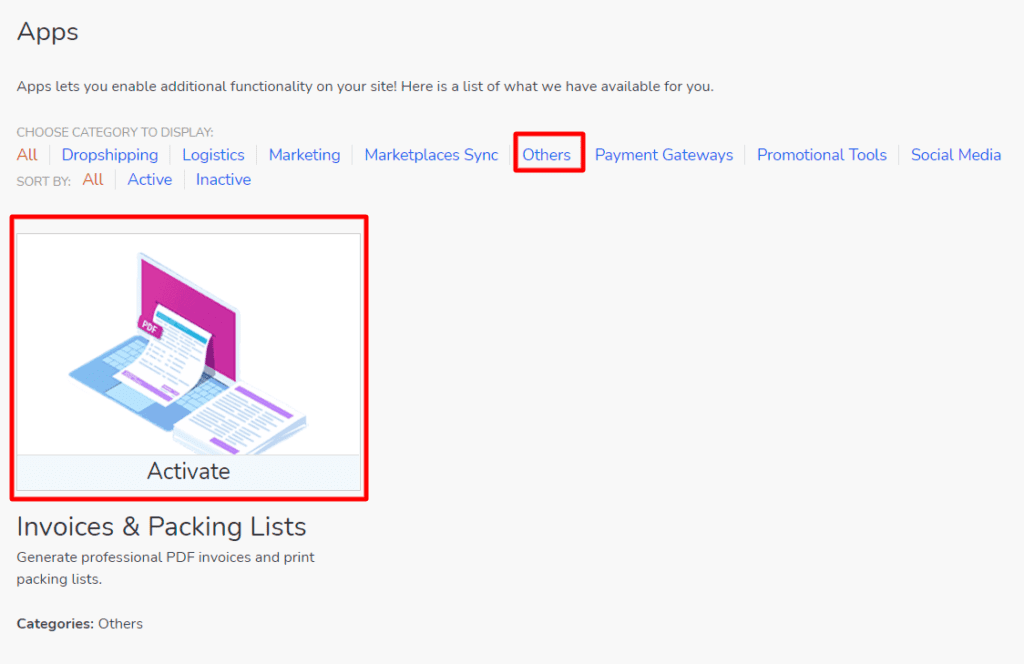
1.1. To activate your Invoices & Packing Slips app, from your dashboard menu, go to Apps > Others > Invoices & Packing Lists.
1.2. After activate the PDF Invoices &Packing Lists app, you can do some customization or settings at Online Store > Settings > nvoices/Packing Lists > General.
2. Customize template
2.1. You can customize the template for your invoices, packing lists, and pick lists by going to Online Store > Settings > Invoices/Packing Lists > General and clicking Customize. This will open the visual editor that you can use to customize the documents template and see your changes displayed live in a template preview.
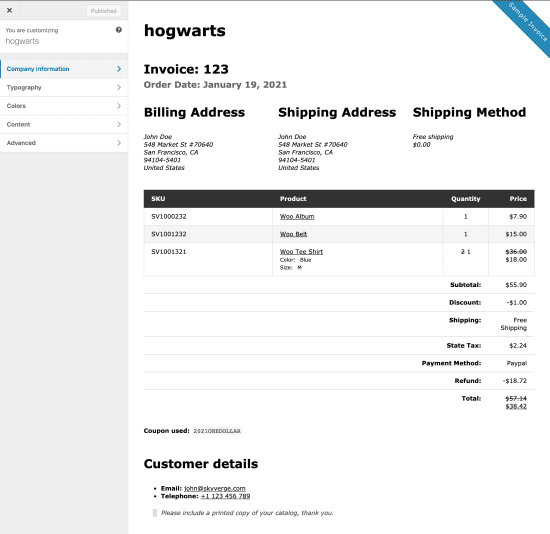
There are several different sections you can update to customize your template appearance:
- Company Information: General document settings like your shop logo, name, address, and VAT number. You can also add extra information that will be displayed at the top of the document, which can be useful for sharing company information, such as a customer service phone number.
- Typography: Select the size of the template’s heading and body fonts.
- Colors: Set the colors of the template’s text and background.
- Content: Enter optional content for the document header / footer and shop policies (e.g., returns policy, terms and conditions, etc.).
3. Document settings
You can determine which order and product information are displayed on your invoices, packing lists, and pick lists.

3.1. Invoice settings
On Online Store > Settings > Invoices/Packing Lists > Invoice, you can modify the following settings to determine which fields appear on the invoice:
- Show shipping method: Select to show the shipping method next to the customer addresses.
- Show customer details: Select to show the customer’s basic account details below the order items table.
- Show customer note: Select to show any customer notes below the order items table.
- Show coupons used in order: Select to show any coupon codes used directly below the order items table.
- Show optional fields: Add optional fields related to the ordered products, including SKU, product thumbnail, line taxes, and/or unit price.
- Show item prices excluding taxes: Select to display item prices exclusive of taxes. This will override the store tax display settings for item prices displayed in the invoice.
On this page, you can also determine how invoice numbers are generated with the following settings:
- Use Order Number as Invoice Number: Select to use the order number as the invoice number on all invoices.
- Invoice Number Start: If Use Order Number as Invoice Number is disabled, select a starting number for your invoice number counter. The first printed invoice will use this as its invoice number, and future invoice numbers will follow sequentially.
- Reset counter: If Use Order Number as Invoice Number is disabled, select this setting to reset the starting invoice number. This may cause duplicate invoice numbers, as existing invoice numbers are never changed.
- Invoice Number Minimum Digits: If Use Order Number as Invoice Number is disabled, enter the minimum number of digits your invoice numbers should have. If your minimum digits are greater than the number of digits in the invoice number, leading zeroes will be used as padding. For example, if the minimum digits is set to
5and the starting invoice number is100, the first invoice number will be printed as00100.
- Invoice Number Prefix: Enter a prefix to add before for the invoice number if desired. You may use merge tags in the prefix. Leave blank to disable prefixes (refer below).
- Invoice Number Suffix: Enter a suffix to add after the invoice number if desired. You may use merge tags in the suffix. Leave blank to disable suffixes (refer below).
Prefix / Suffix Merge Tags
The following merge tags can be optionally used in invoice number prefixes and suffixes:
| MERGE TAG | EXPANDS TO |
|---|---|
{D} | Day of the month, without leading zeros (1-2 digits) |
{DD} | Day of the month, with leading zeros (2 digits) |
{M} | Month, without leading zeros (1-2 digits) |
{MM} | Month, with leading zeros (2 digits) |
{YY} | Year (2 digits) |
{YYYY} | Year (4 digits) |
{H} | 24-hour format of an hour, without leading zeros (1-2 digits) |
{HH} | 24-hour format of an hour, with leading zeros (2 digits) |
{N} | Minutes, with leading zeros (2 digits) |
{S} | Seconds, with leading zeros (2 digits) |
3.2. Packing list settings
On Online Store > Settings > Invoices/Packing Lists > Packing List, you can modify the following settings to determine which fields appear on the packing list:
- Show customer details: Select to show the customer’s basic WooCommerce account details below the order items table in packing lists.
- Show customer note: Select to show any customer notes below the order items table in packing lists.
- Show terms and conditions: Select to show your terms and conditions (as added to the document template) on packing lists.
- Show footer: Select to show the footer text (as added to the document template) on packing lists.
- Show optional fields: Add optional fields related to the ordered products, including SKU, total weight, and/or product thumbnail.
- Exclude virtual items: Select to hide virtual products (i.e. not shippable) from your packing lists.
On Online Store > Settings > Invoices/Packing Lists > Pick List, you can modify the following settings to determine which fields appear on the pick list:
- Pick List Output: Select whether items should be grouped by order or grouped by categories in combined pick lists (i.e. when printing a pick list for more than one order).
- Show optional fields: Add optional fields related to the ordered products, including SKU, product details, total weight, and/or product thumbnail.
- Exclude virtual items: Select to hide virtual products (i.e. not shippable) from your pick lists.
4. Email settings
4.1. Print Invoices / Packing Lists adds three new emails to your online store, which can be accessed under Online Store > Settings > Emails:
- Invoice: When enabled, automatically send an HTML invoice to your customers once the order is paid. The content of the email is the same as a printed invoice.
- Packing List: When enabled, automatically send an HTML packing list to the site administrator (by default) once the order is paid. You can update the Recipient(s) list to send this email to multiple recipients using a comma-separated list.
- Pick List: Pick list emails can only be sent manually using the Online Store > Orders page bulk actions. If one or more orders are selected before selecting this bulk action, a combined HTML pick list will be sent via email to the recipients.
To edit any of these emails (enable / disable or adjust subject lines and recipients), you can click the email name from this table.
5. Printing and emailing order documents
5.1. You can print and email invoices, packing lists, and pick lists with several different order actions.
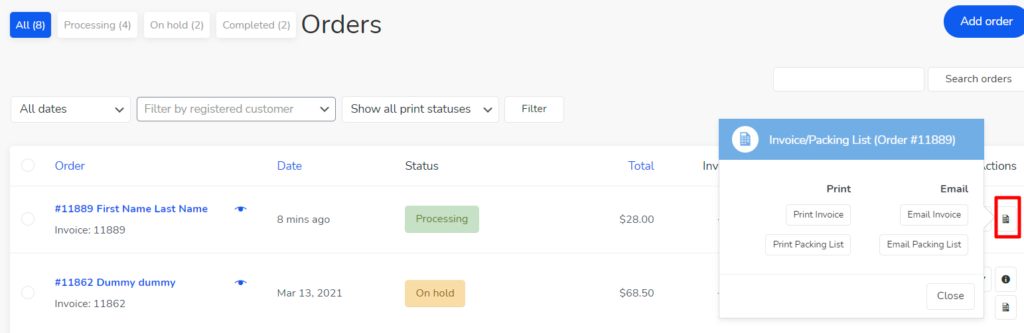
5.2. When viewing the Online Store > Orders, use the “documents” icon in the Actions column to show all possible document actions for that order:
5.3. You can also use the Bulk Actions menu to perform the following actions for one or more orders:
- Print Invoice: Generates an HTML invoice for all selected orders (page breaks between each order’s invoice). The invoice can be opened, previewed, and printed.
- Send Email Invoice: Sends an email with the HTML invoice content for all selected orders to the billing email address.
- Print Packing List: Generates an HTML packing list for all selected orders (page breaks between each order’s packing list). Items in the packing list will be sorted by product category. The packing list can be opened, previewed, and printed.
- Send Email Packing List: Sends individual emails with the HTML packing list content for each selected order to the admin recipients configured in your email settings. If 20 orders are selected, you will receive 20 packing list emails.
- Print Pick List: Generates a combined HTML pick list for all selected orders. Items in the pick list will be sorted by product category. The pick list can be opened, previewed, and printed.
- Send Email Pick List: Sends an email with the HTML pick list content for all selected orders to the admin recipients configured in your email settings. If 20 orders are selected, only one email is sent with a combined pick list for all 20 orders.
Once you’ve chosen and applied your bulk action, a modal will appear showing the number of documents and the option to Print Documents. If you choose Print Documents, you’ll see a link to open your document(s) in a new window for printing. Click the link to preview and print your document(s).
6. Sample documents
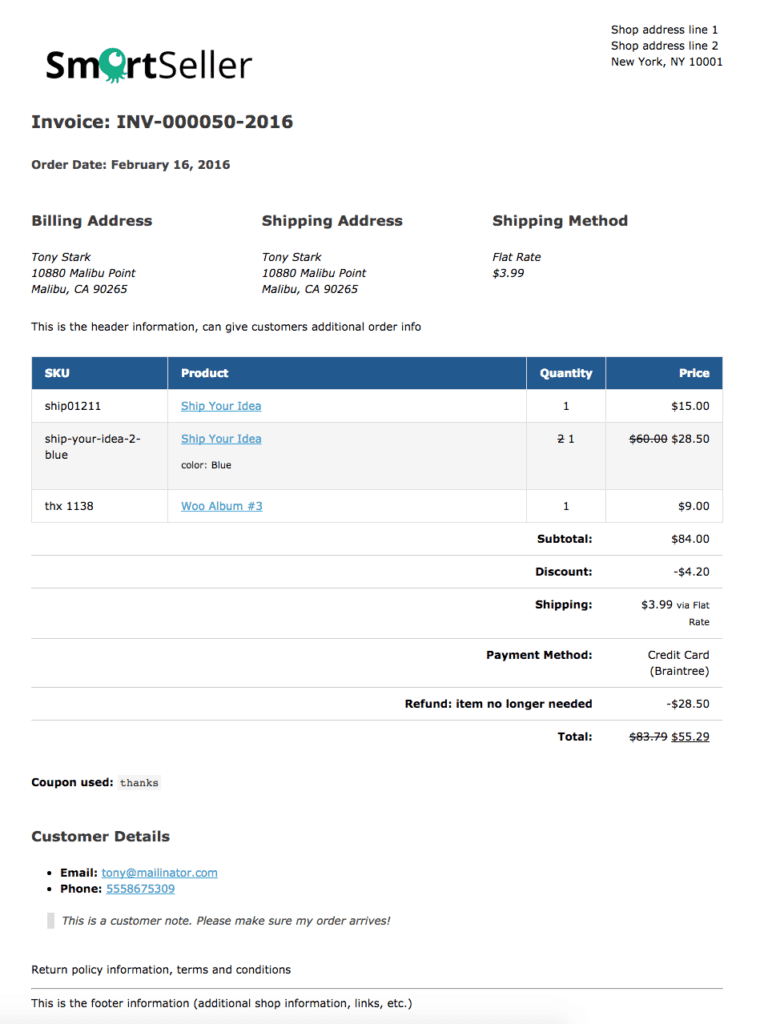
6.1. Sample invoice – Invoices will always display invoice numbers, customer details, and all order line items. If you have taxes, they will be displayed based on your Online Store tax settings. If you opt to show taxes as one total at checkout, then taxes will be added as a single cost line after the subtotal. If you show itemized taxes, multiple taxes will appear as individual line costs.
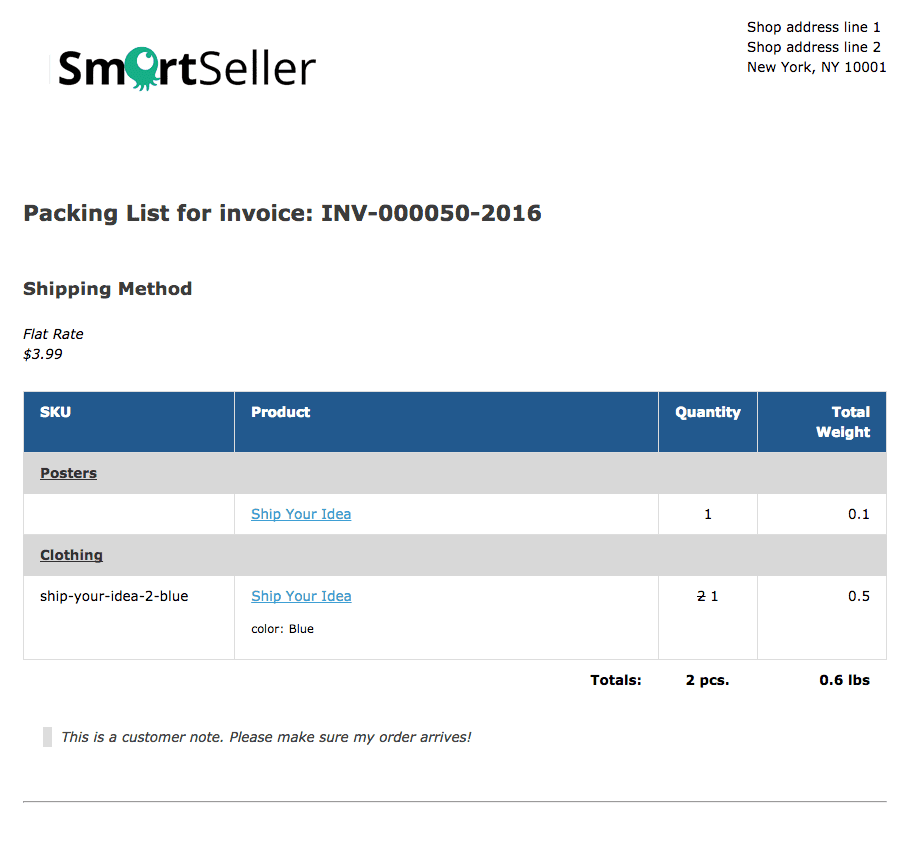
6.2. Sample packing list – Packing lists will always group ordered items by the product category to make picking and packaging orders easier. The item details, attributes (e.g., size), and line weight will be shown, along with any additional information based on your template and packing list settings.
If you exclude virtual items from packing lists, they will not appear at all on the list. If the order only contains virtual items, the packing list will state that there are no shipped items in the order.
6.3. Sample pick list – A pick list is a combined document for one or more orders. This can serve as a “warehouse pick list” to get items for packing. Additional information is shown based on your template and invoice settings.
If you opted to group items by order in the pick list settings, products will be organized by order and product category in the combined list.
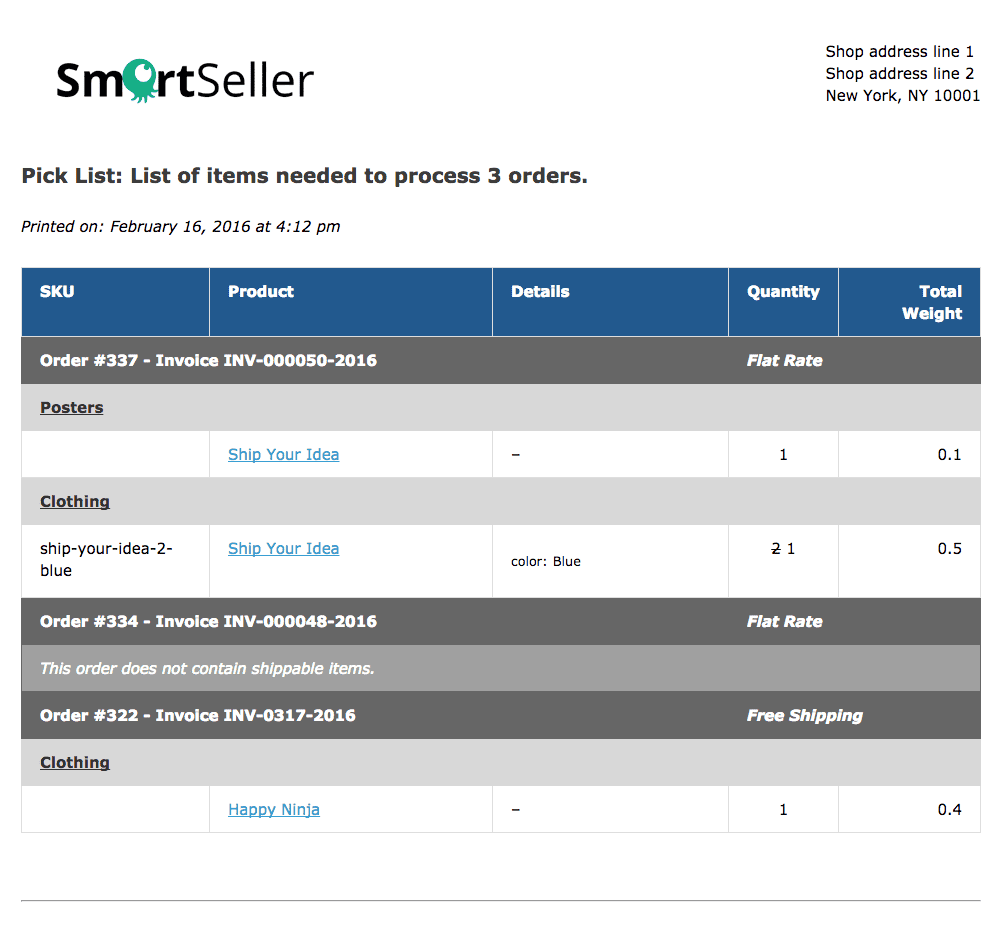
If you opted to group items by category in the pick list settings, products will be organized in an overall list by category with total counts for each item (regardless of which order they belong to).