1. Activate PayPal
1.1 By default, PayPal is already activated in SmartSeller Online Store. All you need to do is enter your PayPal information and enable the feature.
1.2. On dashboard, go to Online Store > Settings > Payments > Enable PayPal.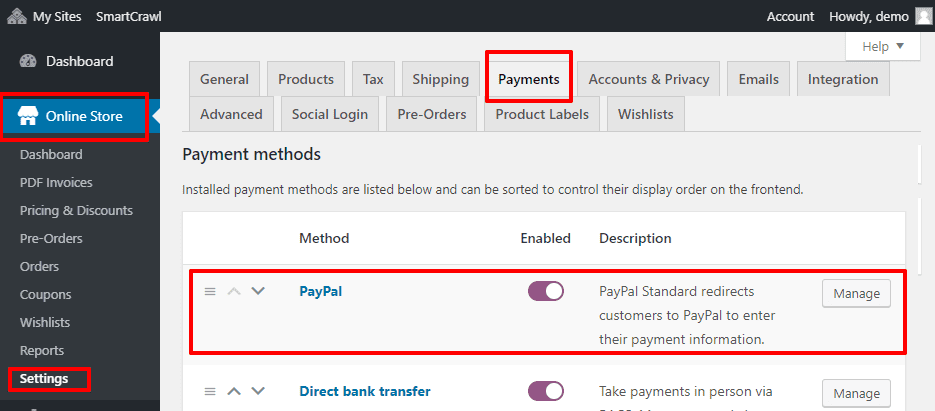
1.3. To receive payment from customer on your online store, you’re required to have a PayPal Business account.
1.4. Go to paypal.com and sign up for a PayPal Business account or convert an existing Personal account to Business. It’s free.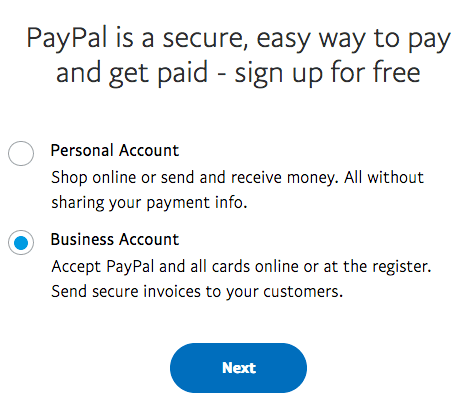
2. PayPay Settings
2.1. On Payment Gateways setting page, click “Manage” on PayPal.
2.2. Tick on Enable Paypal Standard.
2.3. Enter Title and Description. This will show on customer checkout page.
2.4. Enter your PayPal email address in the PayPal Email field, which is the most important thing to configure before taking payments. Must match the same email address on your PayPal Business account.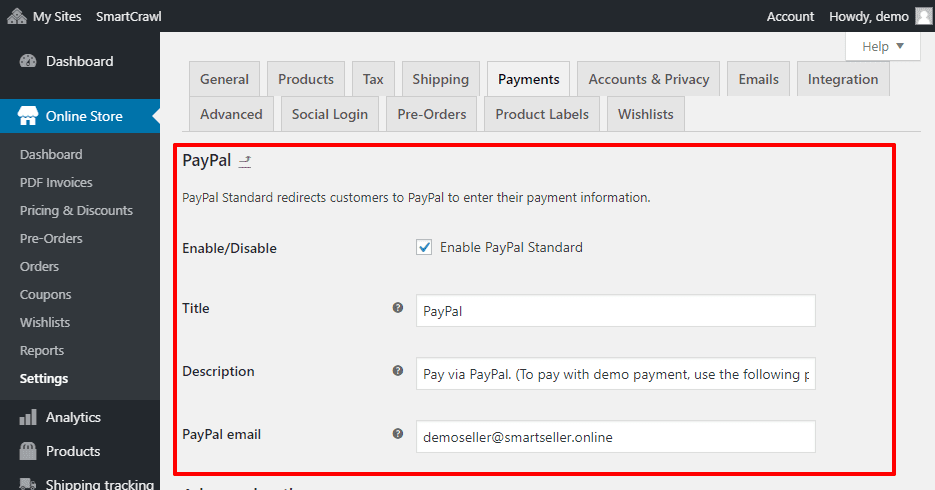
3. PayPal Advanced Options
3.1. Under Advanced Options, complete fields as needed.
3.2. Tick the box for Enable PayPal Sandbox if you wish to test the checkout process during your online store’s development. With sandbox enabled, no payment/money is taken. To use Sandbox mode, you need a separate sandbox account via PayPal Sandbox.
3.3. Debug log may also be turned on, which can be useful if you have someone to setup the store or testing your online store issue.
3.4. IPN Email Notifications (optional). Instant Payment Notifications (IPN) are sent from PayPal when you receive a payment, issue a refund or a chargeback or cancellation.
3.5. Enter an email address for Receiver Mail if this address is different than the PayPal email address you entered above in step 2.4.
3.6. PayPal Identity Token (optional). Only required if you signed up for the Data Transfer option on your PayPal account; can be used to verify payments if you have IPN issues.
3.7. Enter an Invoice Prefix (useful if you have multiple stores).
3.8. There are two shipping options:
- Send shipping details to PayPal. You can opt to have Online Store send shipping details to PayPal to create shipping labels instead of billing.
- Address override option. PayPal verifies addresses therefore this setting can cause errors. We recommend keeping it disabled, but it can be useful in preventing address information from being changed.
3.9. Payment Action lets you choose to Capture funds immediately or only Authorize*.
3.10. Page Style (optional) allows you to select the name of a custom page from your PayPal account.
4. PayPal API Credentials
4.1. There are three fields to paste API information into (Only use this if you are offering refund payment through PayPal):
- API Username
- API Password
- API Signature
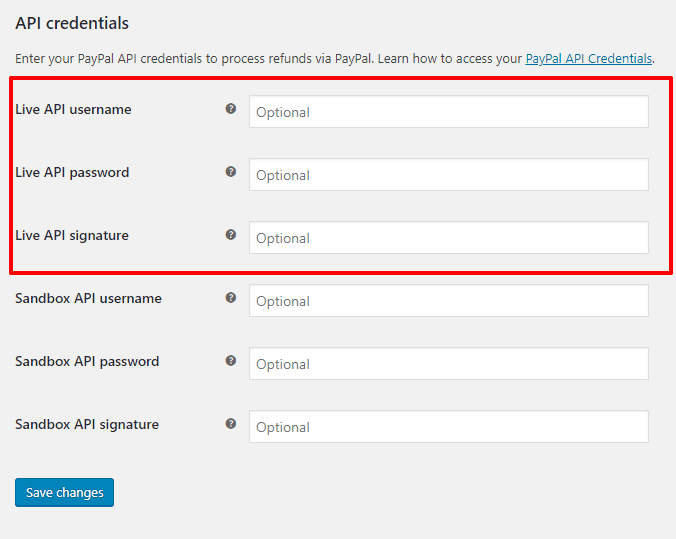
4.2. If you enabled Sandbox mode in step 3.2, paste the sandbox API information into the three sandbox fields.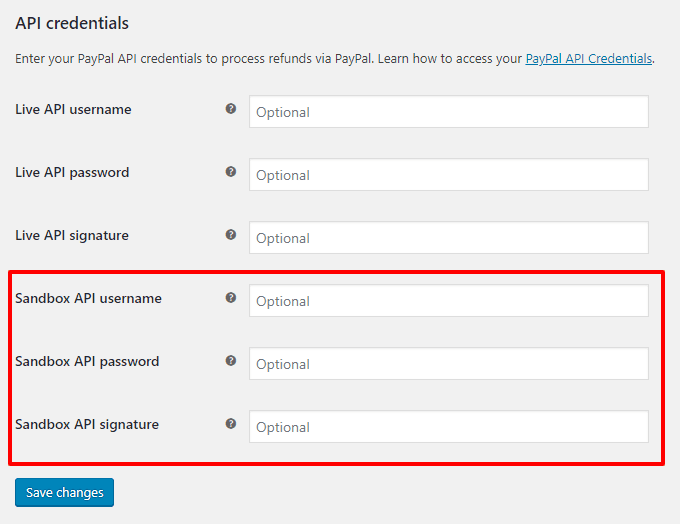
How to get Live API Information
- Log in to your PayPal account at PayPal.com.
- Go to Tools > All Tools > API Credentials.
- Select the NVP/SOAP API integration (Classic) > View API Signature.
- View and copy API Username, API Password and API Signature as needed.