Key Benefits:
- Learn what channels (including search, social, email and ads) drive the most traffic, so you know which channels to spend more time on.
- Figure out where your site is leaking money by tracking the flow of users from product page to cart to checkout.
- Understand which products customers are interested in by comparing traffic, transactions, and revenue across products.
- Determine what your customers are looking for by seeing which pages they land on from search engines.
1. Activate Google Analytics
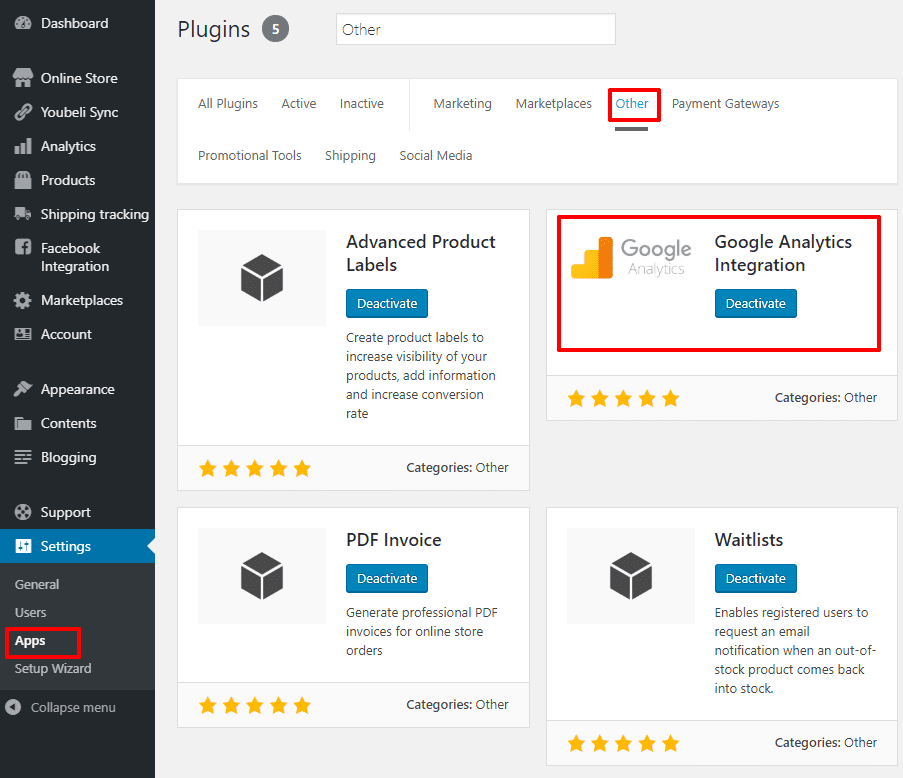
1.1. To activate your Google Analytics app, go to Settings > Apps > Other > Activate Google Analytics.
1.2. Sign in to your Google Analytics or create a free account.
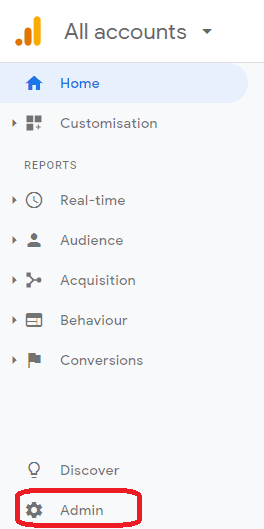
1.3. Once you’re in your Google Analytics Dashboard, click “Admin“.
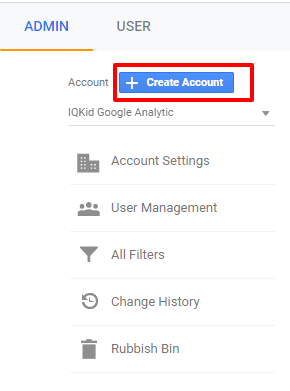
1.4. Then click on the button “Create Account” and follow the step-by-step procedure for setting up the new account.
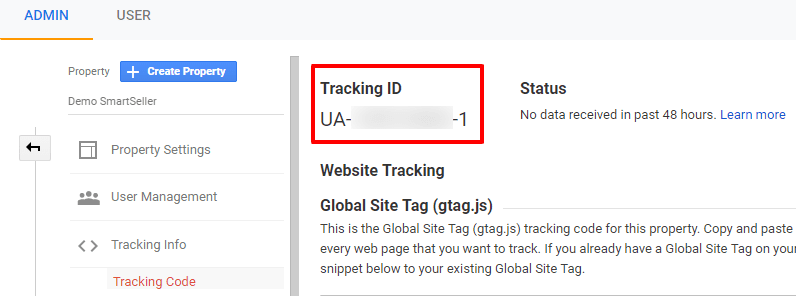
1.5. Once the account is successfully created, a Tracking ID will be shown. Copy the Tracking ID.
1.6. Paste the Tracking ID to your SmartSeller’s Dashboard at Online Store > Settings > Ingetration > Google Analytics.
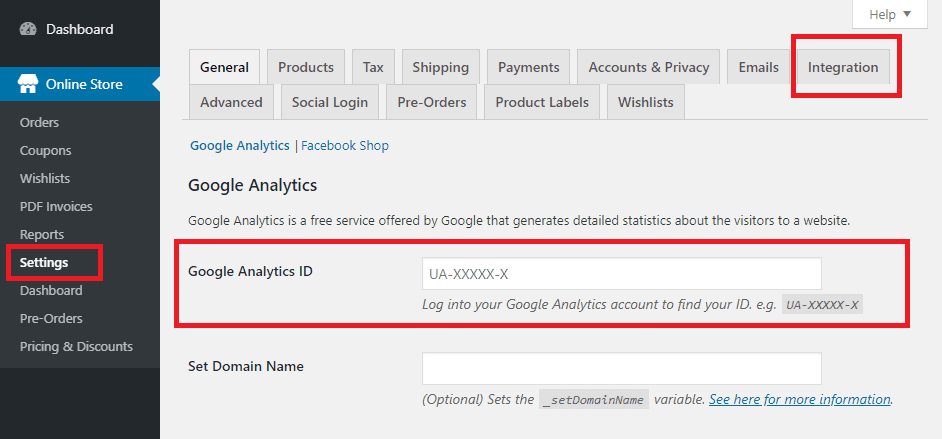
1.7. For the field Set Domain Name, Add the domain for your site, such as yourstorename.smartseller.online OR yourstorename.com.
2. Google Analytics Settings
2.1. On your Google Analytics Dashboard, click “Admin“, in the view column, click “Ecommerce Settings“.
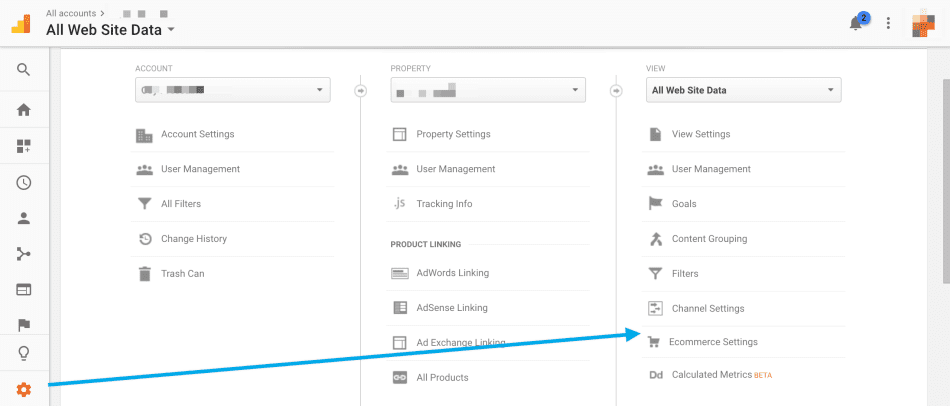
2.2. On the Ecommerce set-up page, do the following:
- Set Enable Ecommerce to “ON”.
- Optional: Set Enable Related Products to “ON“.
- Click Next Step.
- Click Submit.
2.3. On SmartSeller Dashboard, go to Online Store > Settings > Ingetration > Google Analytics. You will see several options for you to tick.
Tracking Options:
- Enable Standard Tracking:Â Check this box to add basic website tracking. This option must be ticked.
- “Display Advertising†Support: Check this box if you intend to run ads on the Google Display Network and would like these tracked in your analytics account.
- Use Enhanced Link Attribution: This setting improves the accuracy of your In-Page Analytics report by differentiating between several links to one URL on a single page. Check this box if you have multiple links to the same URL and want to understand which are clicked more often.
- Enable Universal Analytics: Universal Analytics is the new standard for Google Analytics. Check this box if you have not used Google Analytics on this site before. If you have used it before, upgrade to Universal Analytics.Â
- Anonymize IP addresses: This keeps user data more private and is mandatory in some countries. Read more about IP Anonymization.  Consult an expert if you’re unsure about whether this is required for your store.
- Track 404 (Not found) Errors: This allows you to find broken or dead links. To see how many times this occurs, go to your Google Analytics account > Behavior > Events > Overview > Error.
- Purchase Transactions: Track purchases on your site, including data like revenue, tax, refunds, shipping and more. This requires a payment gateway that redirects to the thank you/order received page after payment. Some popular options that do this are Stripe, PayPal powered by Braintree, PayPal Express Checkout and Square.
- Add to Cart Events: Track when customers add a product to their cart. This allows you to see more specific details about your customers’ experience and better understand where they might be dropping off.
- Enhanced eCommerce: Enhanced eCommerce allows you to measure more user interactions with your store, including: product impressions, product detail views, starting the checkout process, adding cart items, and removing cart items. Universal Analytics must be enabled for Enhanced eCommerce to work. Before enabling this setting, turn on Enhanced eCommerce in your Google Analytics dashboard. See here for more information.
3. Testing Analytics
If you would like to test the tracking and make sure it’s sending over the correct data to Google, you can use the Google Tag Assistant tool for Chrome. This will analyze the tracking code which has been added to your page and notify you of any warnings or errors.
Keep the following points in mind:
- Pageviews are not tracked for logged in admin users (so make sure you are logged out from SmartSeller Dashboard when you’re sending a test traffic to your website)
- Multiple tracking code instances on the same page can cause issues
- Tracking can take a while to show up in your Google Dashboard (it’s recommended to wait 24 hours or try the real time tracking reports)
- Any JavaScript errors on the page could prevent tracking from occurring (you can use the browser tools to check if there are any errors showing up in the console)
- Confirm there are no browser extension / ad blockers which would block the tracking