1. Adding a Grouped Product
The option which you will see just below the Simple product is for the Grouped product. A grouped product has one parent product and many children products. For example, Windows 10 could be a parent product and its versions, i.e. 32-bit and 64-bit, could be its children.
To start with creating a grouped product, first add the name/title plus a brief description of the product. Then scroll down the page to choose Grouped product from the product data field.
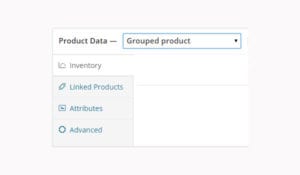
The moment you select the option for Grouped product, the tabs for settings change immediately. Actually the tabs for General and Shipping disappear. There are certain other changes in other tabs. Let’s have a look at these changes separately.
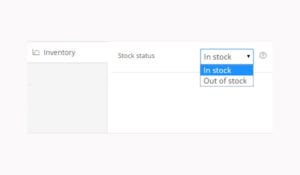
Inventory
Here we see a single option, which is for the Stock status, which will determine whether this parent product is In stock or Out of stock.Â
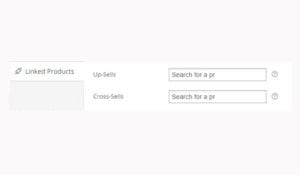
Linked Products
In the tab for Linked Products, add all the recommended products in the field of Up-Sells. Similarly, in the field of Cross-Sells, for the purpose of linking similar products, add all the products which are related to the currently viewed product.
Attributes
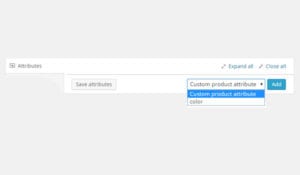
For grouped products, the attributes will perform the same function of providing extra information and data about the product. You can add these according to Custom product attribute or color. You will select a particular attribute or define a custom one. Then you’ll add the data relevant to it, e.g. the name and values. At the end you’ll have to enable the checkbox to display this particular attribute at the front end. Let’s review the process.
Custom product attribute
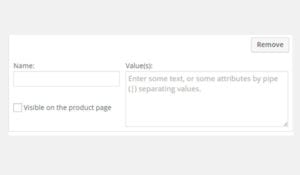
Add a Custom product attribute by clicking the Add button, which displays options similar to those shown in the above figure. You can fill out the fields for:
- Name:Â Name of the custom attribute, e.g. Design type
- Value(s):Â Value of the custom attribute, e.g. Flat
- Enable checkbox of Visible on the product page
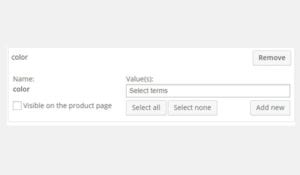
Color
If you want to add the colors attribute, then select Color from the dropdown menu and fill out the field for Value(s) with the help of the Select all, Select none and Add new buttons.
If you want to delete any attribute then click the Remove button.
Advanced
The tab for advanced settings is similar to the simple product advanced tab. Store owners can add Purchase note and Menu order, and can allow reviews by checking Enable reviews.

2. Creating a Child Product in a Group
So far we have discussed how users can create and configure settings for a parent product which is categorized as a grouped product. What if you want to add a child product in this group?
The products which are a part of any group are individually categorized as simple products. So to create any child product, follow the steps mentioned below:
2.1. Add Title and Description of the child.
2.2. Select the option of Simple product from the menu of Product Data.
2.3. Edit all the settings which I explained in other articles to create a Simple product.
2.4. Publish the simple products.
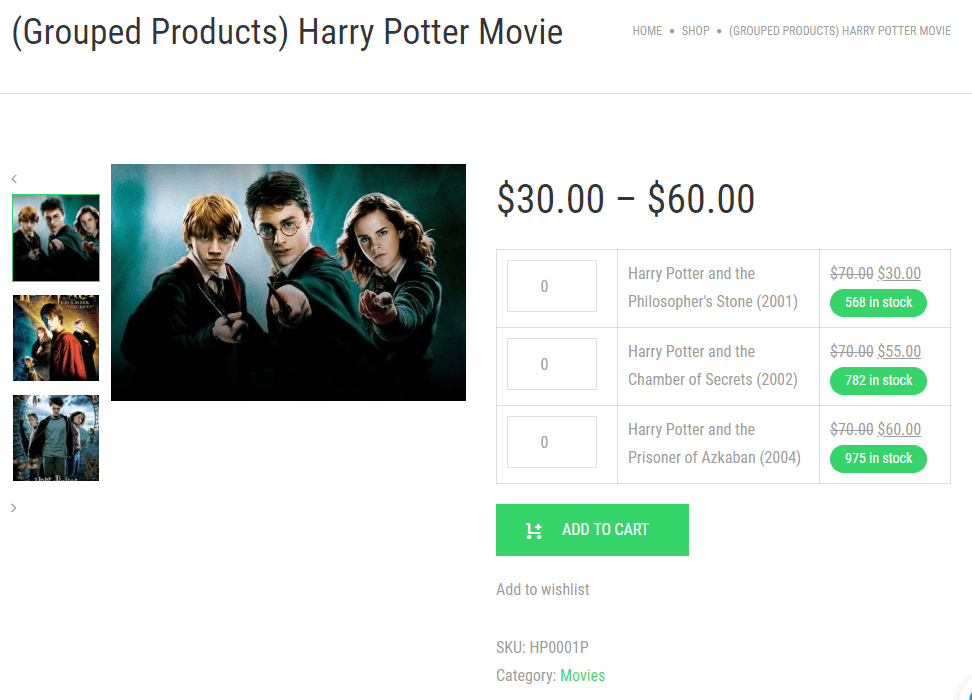
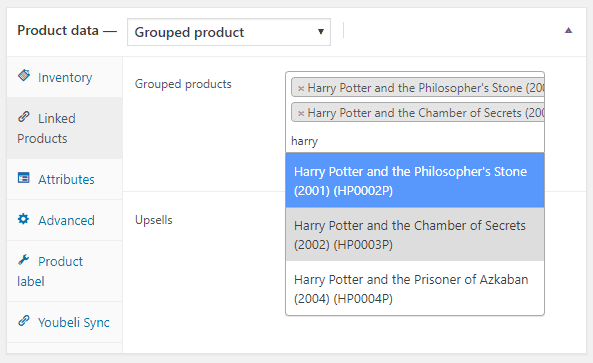
In this example, our parent product is (Grouped Products) Harry Potter Movie.
As for Child Product, there are few episodes of Harry Potter movies.
2.5. Then to make product the child of its parent product, go to Parent Product, under the Linked Products tab select the child products that you want to insert under this parent product. See figure below.
The figure below shows how the grouped product will be displayed on the front-end. Here you can see that Grouped Product – Harry Potter Movie is the parent product, and there are 3 child products, which is being displayed below its parent.